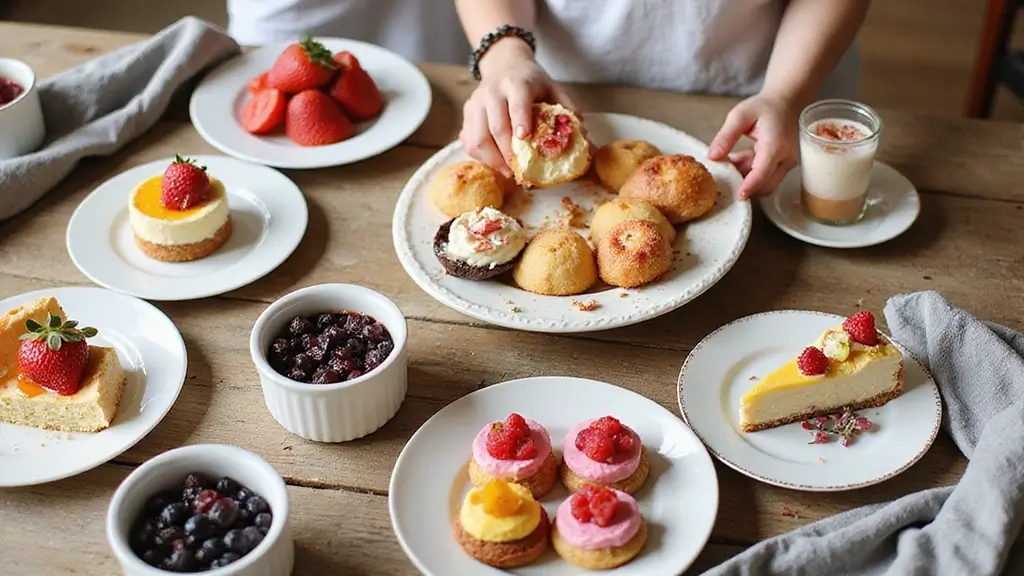
Have you ever found yourself searching for delicious meals that fit a vegan, dairy-free, and gluten-free lifestyle? You’re not alone. Many of us are craving meals that are not just healthy but also satisfying and full of flavor. Whether you’re navigating dietary restrictions or simply want to explore new cooking styles, finding the right recipes can feel overwhelming. That’s why I put together this collection of 25 vegan, dairy-free, and gluten-free recipes for every occasion.
This post is for anyone who loves to cook or eat delicious food but also cares about what goes into their meals. If you’re vegan, gluten-sensitive, or just curious about healthier choices, you’ll find something here that speaks to you. Cooking should be enjoyable, and these recipes are designed to bring joy back to your kitchen, no matter what your dietary needs might be.
You’ll discover a variety of recipes that are not only easy to follow but also mouthwatering. From quick snacks to hearty main dishes, each recipe offers a unique taste experience. Imagine cozying up with a warm bowl of creamy vegan soup or sharing a colorful salad at your next gathering. These recipes are crafted to make your cooking simple, fun, and flavorful.
So, ready to dive in? Your next favorite meal awaits! With this guide, you’ll have a treasure trove of tasty and wholesome dishes that you can whip up any time. Let’s make every meal a celebration of flavors and healthy eating!
1. Decadent Chocolate Avocado Mousse
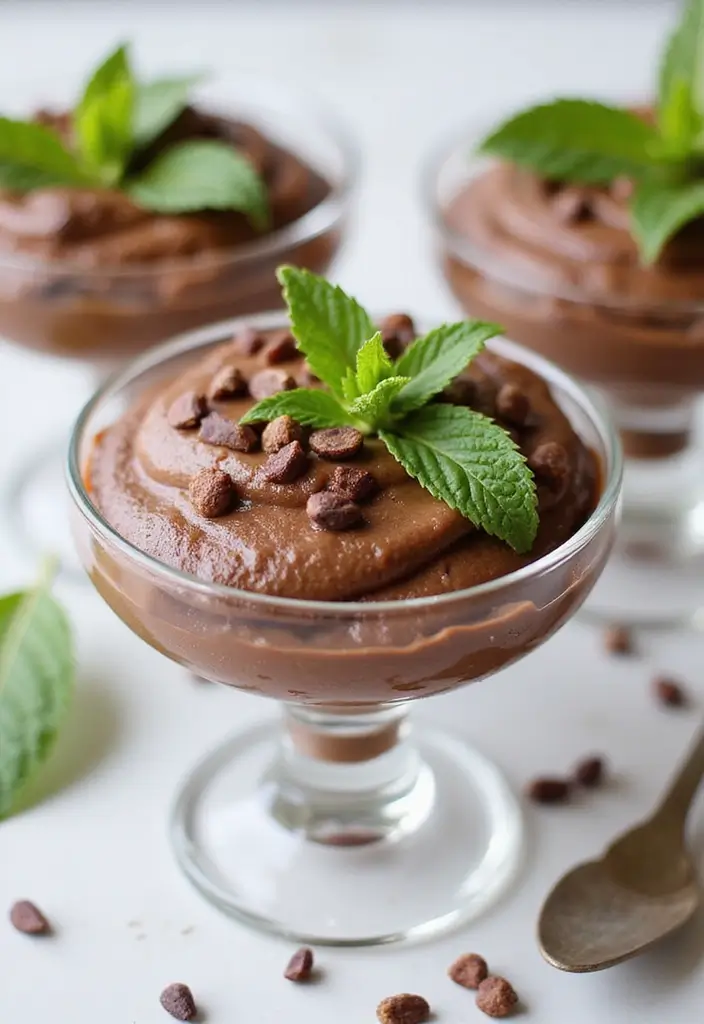
Indulge your chocolate cravings with this Decadent Chocolate Avocado Mousse. This dessert is a game changer for anyone looking for a rich, creamy treat without dairy or gluten. The magic ingredient? Ripe avocados! They create a smooth texture while adding healthy fats that nourish your body. Plus, this mousse is quick to whip up, making it perfect for any occasion.
Recipe Overview:
– Servings: 4
– Prep Time: 10 minutes
– Cook Time: 0 minutes
– Total Time: 10 minutes
– Calories: 220 per serving
Nutrition Information:
– Calories: 220
– Fat: 16g
– Carbohydrates: 18g
– Protein: 3g
Ingredients List:
– 2 ripe avocados
– 1/2 cup unsweetened cocoa powder
– 1/2 cup maple syrup
– 1 teaspoon vanilla extract
– Pinch of salt
Step-by-Step Instructions:
1. Cut the avocados in half and remove the pit. Scoop the flesh into a blender.
2. Add cocoa powder, maple syrup, vanilla extract, and a pinch of salt.
3. Blend until silky smooth. Scrape down the sides if needed to ensure everything mixes well.
4. Taste the mousse and add more sweetness if desired.
5. Serve right away for a light mousse, or chill it to enjoy a denser texture later on.
For the Best Mousse:
– Choose avocados that are ripe for ultimate creaminess.
– Refrigerate the mousse to enhance its flavor and texture before serving.
Frequently Asked Questions:
– Can I use a different sweetener? Yes! Agave syrup or coconut sugar are great alternatives that will work well in this recipe.
This mousse not only satisfies your sweet tooth but also provides a guilt-free dessert option that you can feel good about enjoying. It’s perfect for dinner parties, date nights, or just a cozy night in. Treat yourself and your loved ones to this delightful dessert today!
Fun fact: 1 ripe avocado can add natural creaminess to vegan, dairy-free desserts. This decadent chocolate mousse shows you can skip dairy and gluten-free while still enjoying a rich, silky texture—no heavy cream required, and it comes together in minutes for busy days.
Decadent Chocolate Avocado Mousse
Editor’s Choice

Amazon Fresh, Unsweetened Cocoa Powder, 8 Oz (Pack of 3)
 AmazonCheck Price
Butternut Mountain Farm Pure Vermont Maple Syrup, Grade A, Dark Color, R…
 Amazon$17.97
nutribullet Personal Blender, Shakes, Smoothies, Food Prep, and Frozen B…
 Amazon$47.49
2. Coconut Chia Seed Pudding
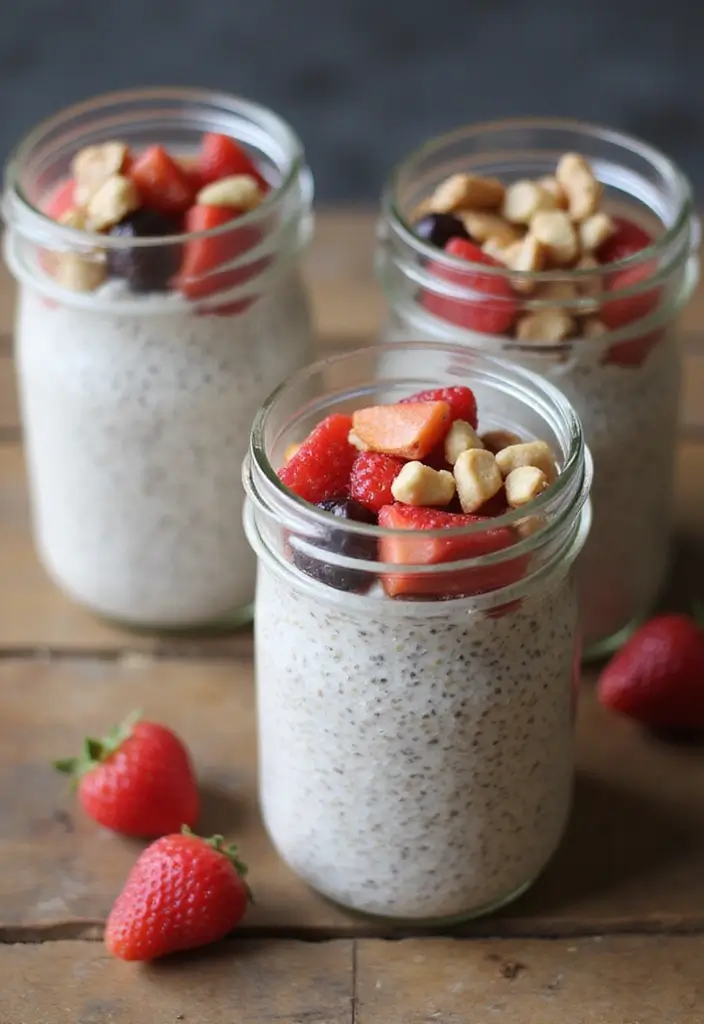
Indulge in a creamy, dreamy dessert that’s as simple as it is delicious. You’ll love this coconut chia seed pudding, perfect for satisfying your sweet tooth without any cooking required. Chia seeds are tiny but mighty! They pack a nutritional punch with omega-3 fatty acids, fiber, and protein. When you blend them with rich coconut milk, you create a satisfying treat that is both sweet and refreshing.
Imagine enjoying a bowl of this pudding topped with fresh berries or mango. It’s not just tasty; it’s easy to make and even easier to customize.
Ready to whip up this delightful dish? Here’s what you’ll need:
Ingredients:
– 1 cup coconut milk
– 1/4 cup chia seeds
– 2 tablespoons maple syrup
– 1 teaspoon vanilla extract
– Fresh fruit for topping (like berries or mango)
Instructions:
1. In a mixing bowl, combine the coconut milk, chia seeds, maple syrup, and vanilla extract. Whisk until everything is well mixed.
2. Cover the bowl and place it in the refrigerator. Let it chill for at least 4 hours, but overnight works best!
3. Before serving, give the pudding a good stir to mix in any seeds that have settled.
4. Top with your favorite fresh fruit and enjoy!
Pro Tips:
– Use full-fat coconut milk for an ultra-creamy texture.
– Get creative! Try different toppings like nuts or granola for extra crunch.
Want to make this pudding last? It keeps well in the fridge for up to 5 days, making it a perfect make-ahead treat for busy weeks. Enjoy this guilt-free dessert for breakfast, a snack, or a sweet finish to any meal!
Coconut Chia Seed Pudding
Editor’s Choice

BetterBody Foods Organic Chia Seeds 2 lbs, 32 Oz, with Omega-3, Non-GMO,…
 Amazon$11.97
Thai Kitchen Gluten Free Unsweetened Coconut Milk, 13.66 fl oz (Pack of 12)
 Amazon$18.96
3. Vegan Banana Bread
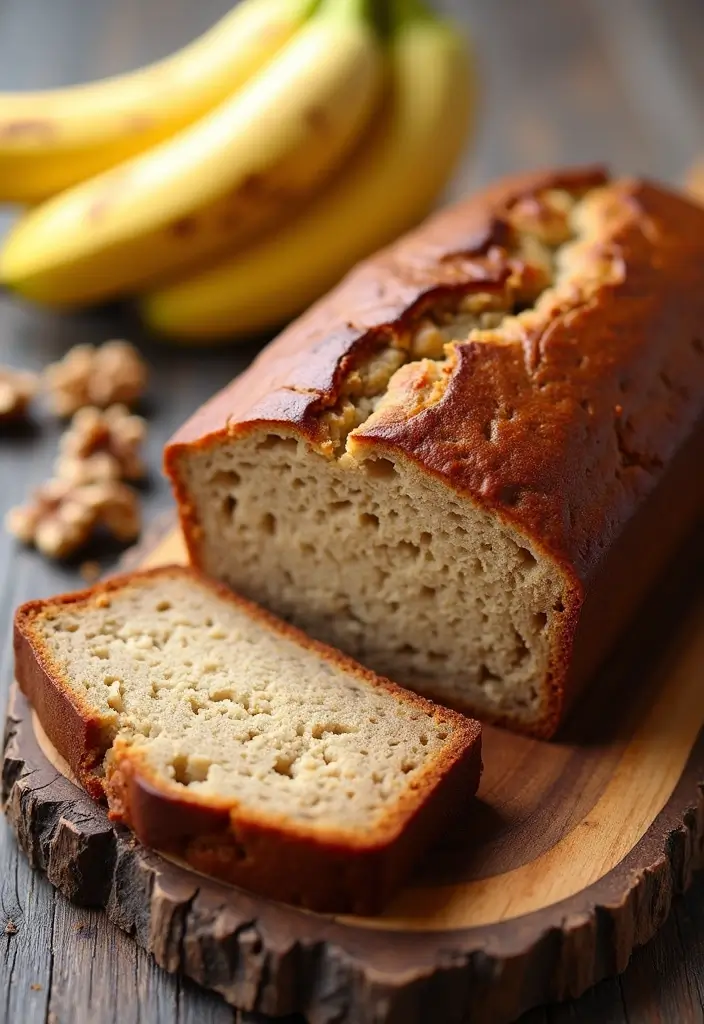
Do you love the smell of fresh banana bread wafting through your kitchen? This vegan banana bread is not just delicious; it’s moist, fluffy, and oh-so-easy to make. With ripe bananas for natural sweetness and crunchy walnuts for that perfect texture, this bread is a delightful treat for breakfast or an afternoon snack. Plus, it’s both dairy-free and gluten-free, making it a win for everyone!
Here’s what you need to whip up this scrumptious banana bread:
Recipe Overview:
– Servings: 8
– Prep Time: 10 minutes
– Cook Time: 50 minutes
– Total Time: 1 hour
– Calories: 190 per slice
Nutrition Information:
– Calories: 190
– Fat: 7g
– Carbohydrates: 32g
– Protein: 3g
Ingredients List:
– 3 ripe bananas, mashed
– 1/4 cup almond milk
– 1/2 cup maple syrup
– 1/4 cup coconut oil, melted
– 1 teaspoon baking soda
– 1 1/2 cups almond flour
– 1/2 cup gluten-free all-purpose flour
– 1/2 cup walnuts, chopped (optional)
Step-by-Step Instructions:
1. Preheat your oven to 350°F (175°C) and grease a loaf pan.
2. In a mixing bowl, combine the mashed bananas, almond milk, maple syrup, and melted coconut oil.
3. Stir in the baking soda, then add the almond and gluten-free flours. Mix until just combined.
4. Fold in the chopped walnuts if you like, then pour the batter into the prepared loaf pan.
5. Bake for 45-50 minutes, or until a toothpick inserted in the center comes out clean.
6. Let it cool before slicing and enjoy!
Tips for the Best Banana Bread:
– Add a sprinkle of cinnamon or nutmeg for extra flavor.
– Let the bread sit for a day; it makes the flavors richer.
Frequently Asked Questions:
– Can I freeze banana bread? Yes! Just wrap it tightly in plastic wrap, and it will last in the freezer for up to 3 months.
This vegan banana bread is the perfect way to satisfy your sweet tooth while keeping things healthy. Whether you’re sharing with friends or enjoying a slice solo, it’s a recipe you’ll want to make again and again!
Vegan Banana Bread
Editor’s Choice

Blue Diamond Almonds Almond Flour, Gluten Free, Blanched, Finely Sifted,…
 Amazon$9.91
Viva Naturals Organic Coconut Oil – Unrefined, Cold-Pressed Extra Virgin…
 Amazon$9.99
Crown Maple Dark Color Robust Taste Certified Organic Maple Syrup, 1 Gal…
 AmazonCheck Price
4. Fruity Vegan Crumble
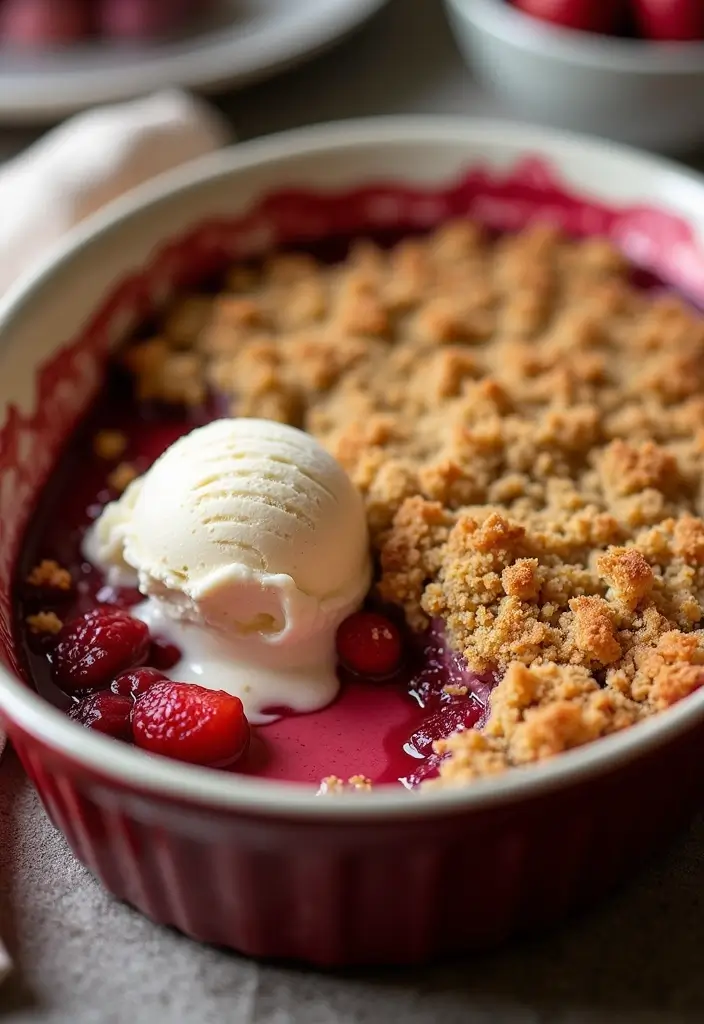
Indulge in the delightful flavors of a fruity vegan crumble, a dish that brings together the best of seasonal fruits under a crispy, golden oat topping. Perfect for family gatherings or a cozy night in, this crumble is not just a dessert; it’s a warm hug in a bowl! You can get creative with your fruit choices—think juicy berries, crisp apples, or sweet peaches. The result is a comforting treat that bursts with flavor.
Recipe Overview:
– Servings: 6
– Prep Time: 15 minutes
– Cook Time: 30 minutes
– Total Time: 45 minutes
– Calories: 180 per serving
Nutrition Information:
– Calories: 180
– Fat: 6g
– Carbohydrates: 28g
– Protein: 3g
Ingredients List:
– 4 cups mixed fruits (like apples, berries, or peaches)
– 1 tablespoon maple syrup (optional)
– 1 cup rolled oats
– 1/2 cup almond flour
– 1/4 cup melted coconut oil
– 1 teaspoon cinnamon
Step-by-Step Instructions:
1. Preheat your oven to 350°F (175°C).
2. In a baking dish, layer your chosen mixed fruits. Drizzle with maple syrup if you want a touch of sweetness.
3. In a separate bowl, mix the oats, almond flour, melted coconut oil, and cinnamon until crumbly.
4. Evenly spread the oat mixture over the fruits.
5. Bake for about 30 minutes, or until the top is golden brown and the fruits are bubbly.
6. Serve warm, and consider adding a scoop of vegan ice cream for an extra treat!
Tips for the Best Crumble:
– Mix sweet and tart fruits for a delightful flavor combo.
– Don’t skip the cinnamon; it adds warmth and depth that elevate the dish.
Frequently Asked Questions:
– Can I use frozen fruit? Yes! Just adjust the baking time as needed for best results.
This fruity vegan crumble is sure to become a favorite in your home, offering a sweet escape that’s both delicious and comforting. Enjoy every last bite!
Fruity Vegan Crumble
Editor’s Choice

Bob’s Red Mill Gluten Free Old Fashioned Rolled Oats, 32oz (Pack of 4) -…
 Amazon$23.92
Blue Diamond Almonds Almond Flour, Gluten Free, Blanched, Finely Sifted,…
 AmazonCheck Price
365 by Whole Foods Market, Organic Refined Coconut Oil, 14 Fl Oz
 AmazonCheck Price
5. Strawberry Coconut Sorbet
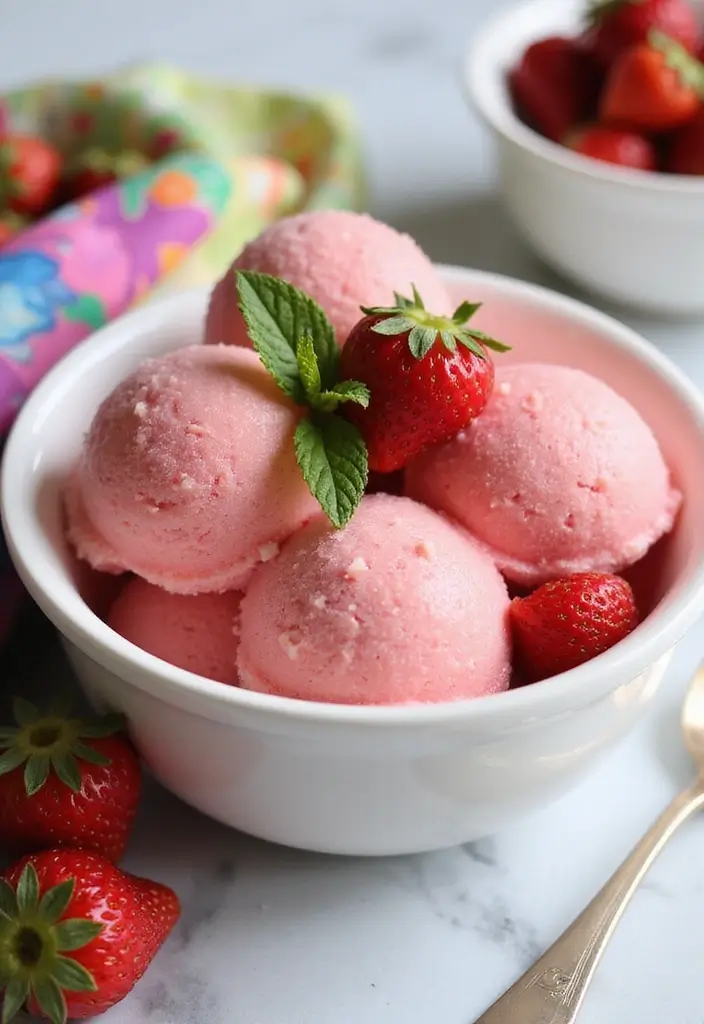
Beat the heat with a luscious Strawberry Coconut Sorbet! This dairy-free and gluten-free treat is not just refreshing; it’s also simple to whip up. Imagine the sweet taste of ripe strawberries blended with creamy coconut milk. Perfect for summer gatherings or a cozy night in, this sorbet will satisfy your sweet cravings without any guilt.
With just four ingredients, you can create a delightful dessert in no time. Here’s how to make it:
Recipe Overview:
– Servings: 4
– Prep Time: 10 minutes
– Freeze Time: At least 4 hours
– Calories: 120 per serving
Nutrition Information:
– Calories: 120
– Fat: 5g
– Carbohydrates: 18g
– Protein: 1g
Ingredients:
– 2 cups fresh or frozen strawberries
– 1 cup coconut milk
– 1/4 cup maple syrup or agave
– 1 tablespoon lemon juice
Instructions:
1. Toss the strawberries, coconut milk, maple syrup, and lemon juice into a blender.
2. Blend until you achieve a smooth and creamy consistency.
3. Pour the mixture into an airtight container. Freeze for at least 4 hours or until it’s solid.
4. When you’re ready to serve, let it sit at room temperature for a few minutes to soften.
5. Scoop into bowls and garnish with fresh strawberries if you like!
Tips for the Best Sorbet:
– Select ripe strawberries for the sweetest flavor.
– Feel free to mix in other fruits like mango or pineapple for a fun twist!
Frequently Asked Questions:
– Can I make this without an ice cream maker? Yes! Just follow the freezing instructions above.
Now you’re ready to impress your friends and family with this easy, delicious sorbet! Enjoy every scoop guilt-free!
Strawberry Coconut Sorbet
Editor’s Choice

nutribullet Personal Blender, Shakes, Smoothies, Food Prep, and Frozen B…
 Amazon$47.49
![25 Vegan Dairy Free Gluten Free Recipes for Every Occasion 30 Freshware Food Storage Containers [24 Set] 32 oz Plastic Deli Containers...](https://m.media-amazon.com/images/I/71PGchb5nSL._AC_UL320_.jpg)
Freshware Food Storage Containers [24 Set] 32 oz Plastic Deli Containers…
 Amazon$12.99
Spring Chef Heavy Duty Ice Cream Scoop with Comfortable Handle – Profess…
 Amazon$9.99
6. Vegan Chocolate Chip Cookies
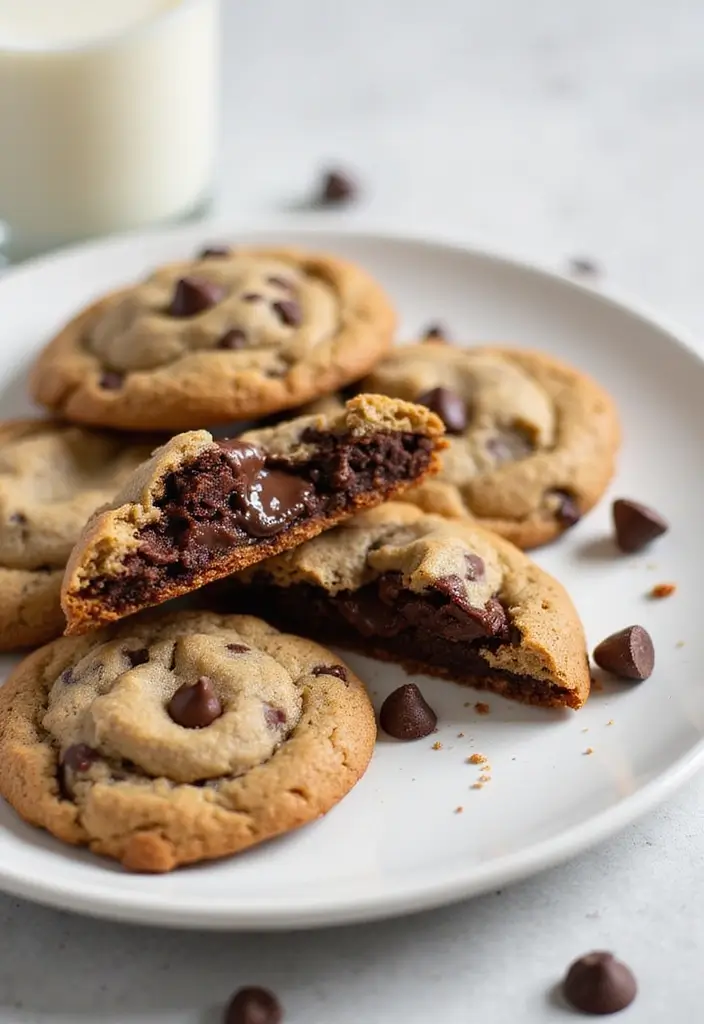
Who can resist the warm, gooey goodness of a chocolate chip cookie? These vegan chocolate chip cookies are not only soft and chewy, but they’re also dairy-free and gluten-free! With rich chocolate chips melting in your mouth, you won’t even remember that they’re healthier than traditional cookies. Perfect for an afternoon snack or a late-night treat, you’ll want to make these again and again.
Here’s a quick overview of what you’ll need:
Recipe Overview:
– Servings: 12 cookies
– Prep Time: 15 minutes
– Cook Time: 12 minutes
– Total Time: 27 minutes
– Calories: 160 per cookie
Nutrition Information:
– Calories: 160
– Fat: 7g
– Carbohydrates: 22g
– Protein: 2g
Ingredients:
– 1 cup almond flour
– 1/4 cup gluten-free all-purpose flour
– 1/2 teaspoon baking soda
– 1/4 cup coconut oil, melted
– 1/4 cup maple syrup
– 1/2 cup dairy-free chocolate chips
Step-by-Step Instructions:
1. Start by preheating your oven to 350°F (175°C) and lining a baking sheet with parchment paper.
2. In a mixing bowl, blend almond flour, gluten-free flour, and baking soda together.
3. In another bowl, whisk together melted coconut oil and maple syrup until smooth.
4. Combine the wet and dry mixtures, then gently fold in the chocolate chips.
5. Scoop tablespoon-sized balls onto the baking sheet, leaving space between each for spreading.
6. Bake for 10-12 minutes, until the edges turn a light golden brown.
7. Let them cool on the sheet for a few minutes before transferring to a wire rack.
For the best results:
– Avoid overbaking; they will firm up as they cool.
– Experiment by adding nuts or dried fruit for a fun twist!
Frequently Asked Questions:
– Can I use a different sweetener? Absolutely! Coconut sugar is a great alternative.
Enjoy these delightful cookies that not only satisfy your sweet tooth but also fit into a vegan and gluten-free lifestyle. They’re a hit for any occasion!
Craving cookies that fit vegan, dairy-free, and gluten-free life? These chocolate chip cookies prove you can have chewy, bakery-style bites without dairy or gluten. Bake a batch, share with friends, and enjoy guilt-free chocolate bliss.
Vegan Chocolate Chip Cookies
Editor’s Choice

Blue Diamond Almonds Almond Flour, Gluten Free, Blanched, Finely Sifted,…
 AmazonCheck Price
Enjoy Life Baking Dark Chocolate Morsels, Dairy Free , Soy Free, Nut Fre…
 Amazon$5.84
Viva Naturals Organic Coconut Oil – Unrefined, Cold-Pressed Extra Virgin…
 Amazon$9.99
7. Nutty Vegan Brownies
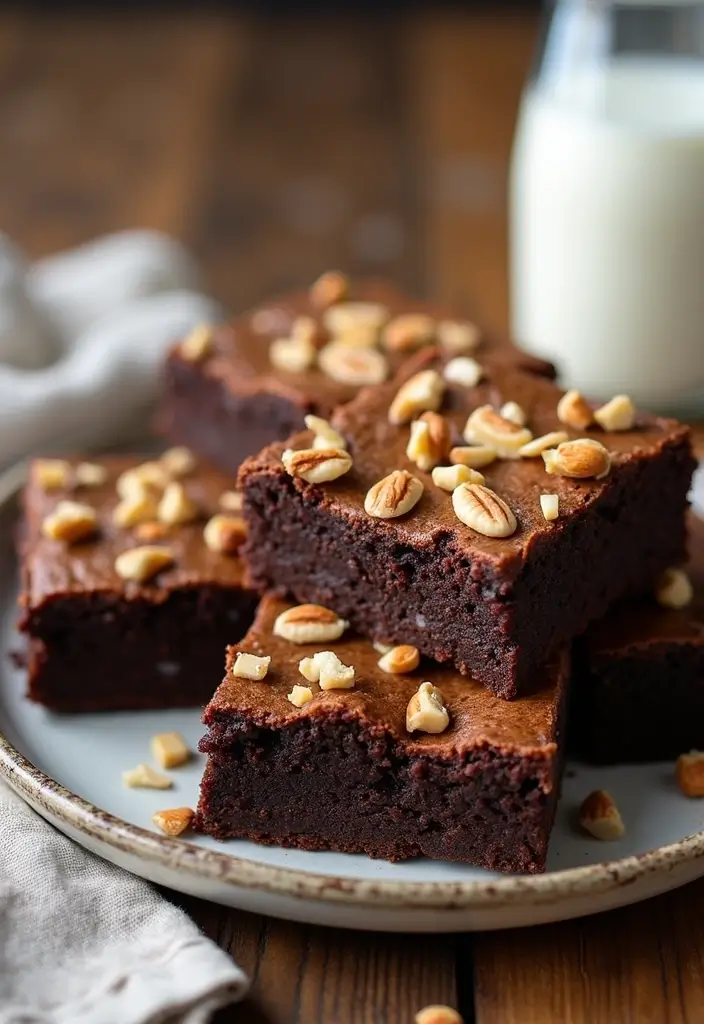
Indulge in the ultimate dessert with these Nutty Vegan Brownies! They’re rich, chocolatey, and packed with flavor. Perfect for anyone craving a sweet treat without dairy or gluten, these brownies will satisfy your sweet tooth. Made with almond flour and cocoa powder, they offer a delightful fudgy texture that pairs beautifully with a scoop of dairy-free ice cream. The added nuts provide a satisfying crunch, elevating your dessert experience.
Let’s get to the recipe! Here’s what you’ll need and how to make these delicious brownies:
Ingredients:
– 1 cup almond flour
– 1/2 cup cocoa powder
– 1/2 cup maple syrup
– 1/4 cup coconut oil, melted
– 1/4 cup mixed nuts, chopped
– 1 teaspoon vanilla extract
Step-by-Step Instructions:
1. Preheat your oven to 350°F (175°C) and grease a square baking dish.
2. In a large bowl, mix together the almond flour, cocoa powder, and chopped nuts.
3. In a separate bowl, whisk the maple syrup, melted coconut oil, and vanilla until well combined.
4. Pour the wet mixture into the dry ingredients and stir until you get a thick batter.
5. Spread the batter evenly in the prepared baking dish, smoothing the top.
6. Bake for 25 minutes, checking with a toothpick to ensure it comes out clean.
7. Let the brownies cool before slicing them into squares.
Tips for the Best Brownies:
– Start checking for doneness a few minutes early to avoid overbaking.
– Serve warm with your favorite vegan ice cream for a heavenly dessert!
Enjoy the rich flavors and textures of these Nutty Vegan Brownies. They’re perfect for parties, family gatherings, or just a cozy night in. Plus, they’re a fantastic way to treat yourself without compromising your dietary choices. Happy baking!
Nutty Vegan Brownies
Editor’s Choice

Blue Diamond Almonds Almond Flour, Gluten Free, Blanched, Finely Sifted,…
 Amazon$9.91

Ben & Jerry’s Non-Dairy Chocolate Chip Cookie Dough Frozen Dessert Certi…
 AmazonCheck Price
8. Pumpkin Spice Energy Balls
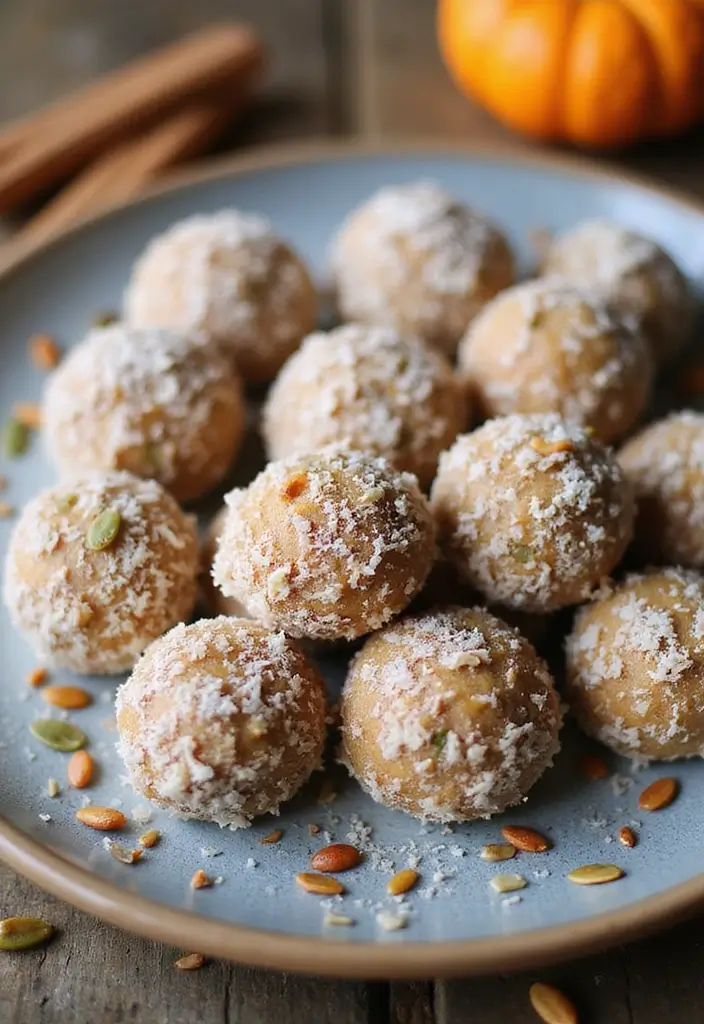
Pumpkin Spice Energy Balls are a scrumptious snack that lets you indulge without the guilt. They’re perfect for when you need a quick pick-me-up during a busy day. Imagine biting into these soft, sweet bites that are packed with the cozy flavors of pumpkin and warm spices. Plus, they’re super easy to make and can be stored in your fridge, ready to satisfy those cravings anytime!
Recipe Overview:
– Servings: 12 energy balls
– Prep Time: 10 minutes
– Cook Time: 0 minutes
– Total Time: 10 minutes + chilling time
– Calories: 110 per ball
Nutrition Information:
– Calories: 110
– Fat: 5g
– Carbohydrates: 15g
– Protein: 3g
Ingredients List:
– 1 cup rolled oats
– 1/2 cup pumpkin puree
– 1/4 cup almond butter
– 1/4 cup maple syrup
– 1 teaspoon pumpkin pie spice
– Pinch of salt
Step-by-Step Instructions:
1. In a mixing bowl, combine all the ingredients and stir until well mixed.
2. Form the mixture into 12 small balls and place them on a parchment-lined tray.
3. Refrigerate for at least 30 minutes to allow them to firm up.
4. Store in an airtight container in the fridge for up to a week.
For the best energy balls, try these tips:
– Add: Chopped nuts or dark chocolate chips for extra crunch and flavor.
– Customize: Adjust the spices to match your taste. A hint of cinnamon or a dash of vanilla can enhance the flavor!
Frequently Asked Questions:
– Can I make these ahead of time? Yes! They stay fresh in the fridge for up to a week, making them perfect for meal prep.
Pumpkin Spice Energy Balls
Editor’s Choice

Bob’s Red Mill Gluten Free Organic Old Fashioned Rolled Oats, 32oz (Pack…
 Amazon$5.98
MaraNatha Creamy Almond Butter No Sugar Added, Unsalted, 12 oz Jar (Pack…
 AmazonCheck Price
The Spice Hunter Pumpkin Pie Spice Blend, 1.8-Ounce Jar
 AmazonCheck Price
9. Raspberry Almond Tart
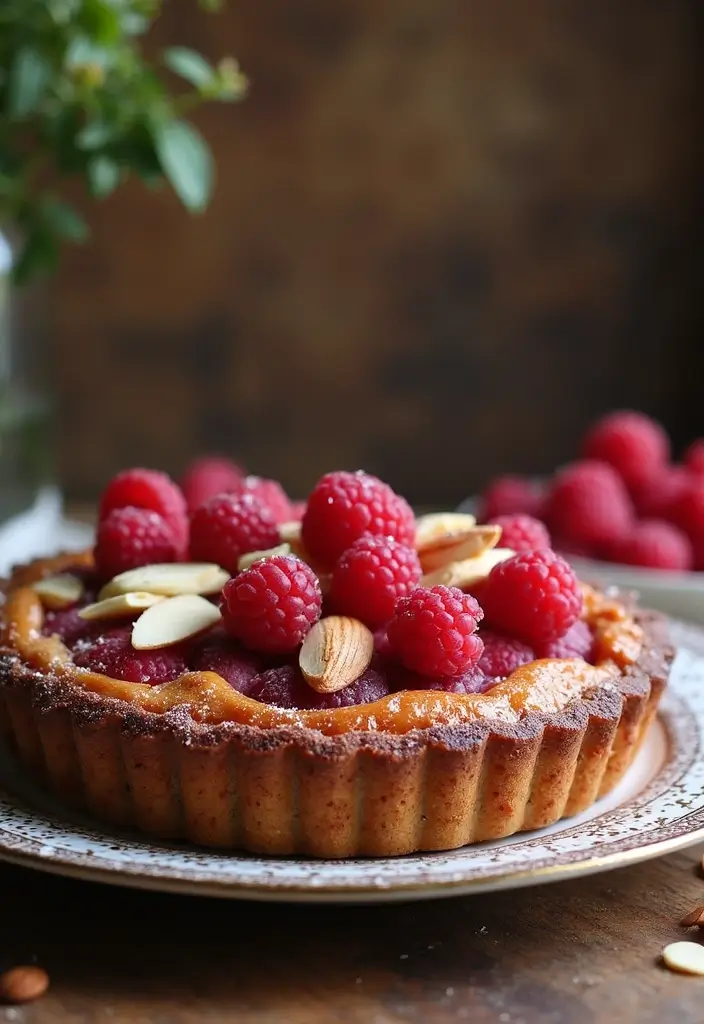
Imagine serving a beautiful raspberry almond tart that not only looks stunning but also tastes incredible. This dessert is perfect for your next gathering, whether it’s a birthday party or a cozy dinner with friends. The rich almond crust pairs perfectly with the sweet-tart raspberries, creating a delightful balance of flavors. Your guests will be impressed, and you’ll love how easy it is to make!
Let’s dive into the details so you can whip up this delicious treat.
Recipe Overview:
– Servings: 8
– Prep Time: 20 minutes
– Cook Time: 30 minutes
– Total Time: 50 minutes
– Calories: 210 per slice
Nutrition Information:
– Calories: 210
– Fat: 12g
– Carbohydrates: 24g
– Protein: 4g
Ingredients:
– 1 cup almond flour
– 1/4 cup coconut oil, melted
– 2 tablespoons maple syrup
– 2 cups fresh raspberries
– 1 tablespoon cornstarch
– 1 tablespoon lemon juice
Instructions:
1. Preheat your oven to 350°F (175°C) and lightly grease a tart pan. This ensures the tart comes out easily.
2. In a mixing bowl, combine the almond flour, melted coconut oil, and maple syrup. Stir until the mixture resembles a crumbly texture.
3. Press this mixture firmly into the bottom of the tart pan to form a crust. Make sure it is even for the best results.
4. In another bowl, toss the raspberries with cornstarch and lemon juice. This will help thicken the filling. Pour this mixture over your crust, spreading it evenly.
5. Bake in the oven for about 30 minutes, or until the filling is bubbly and the crust is a lovely golden color.
6. Allow the tart to cool before slicing. Serve it as is or garnish with sliced almonds for an extra touch.
Tips for the Best Tart:
– Use fresh raspberries for vibrant flavor.
– Garnish with sliced almonds for a beautiful finish.
Frequently Asked Questions:
– Can I use frozen raspberries? Yes! Just thaw them and drain any extra liquid before using.
Now, you’re ready to impress everyone with this gorgeous raspberry almond tart. Enjoy the compliments!
Raspberry Almond Tart
Editor’s Choice

Blue Diamond Almonds Almond Flour, Gluten Free, Blanched, Finely Sifted,…
 AmazonCheck Price
Viva Naturals Organic Coconut Oil – Unrefined, Cold-Pressed Extra Virgin…
 Amazon$9.99
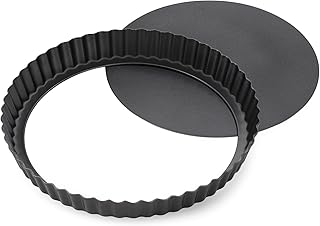
Tart Pan Removable Bottom – 9 Inch Non-Stick Carbon Steel Pie Pan for Ba…
 Amazon$7.99
10. Chocolate Banana Nice Cream
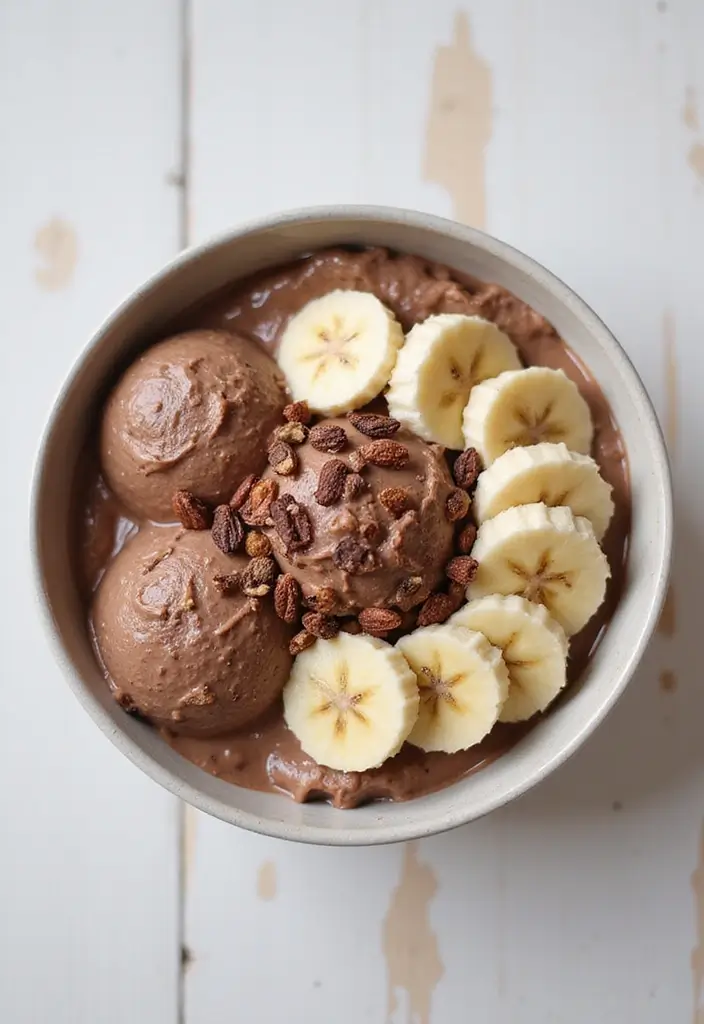
If you’re dreaming of a creamy, sweet treat on a hot day, look no further than chocolate banana nice cream. This delightful dessert is not only vegan and gluten-free, but also incredibly easy to whip up. With just a few simple ingredients—frozen bananas and cocoa powder—you can satisfy your ice cream cravings without the guilt. Imagine scooping into a bowl of rich, chocolatey goodness that feels indulgent yet is healthy!
Ready to make your own? Here’s how to create this refreshing treat in just five minutes. It’s perfect for those warm afternoons or any time you need a sweet pick-me-up. Plus, you can customize it with extras like peanut butter or a splash of vanilla for an added flavor twist.
Recipe Overview:
– Servings: 2
– Prep Time: 5 minutes
– Cook Time: 0 minutes
– Total Time: 5 minutes
– Calories: 120 per serving
Nutrition Information:
– Calories: 120
– Fat: 3g
– Carbohydrates: 22g
– Protein: 2g
Ingredients List:
– 2 ripe bananas, frozen
– 2 tablespoons cocoa powder
– 1 tablespoon maple syrup (optional)
Step-by-Step Instructions:
1. Start by placing the frozen bananas and cocoa powder in a blender.
2. Blend until the mixture is smooth and creamy, stopping to scrape down the sides if needed.
3. Taste your nice cream and add maple syrup if you want it a little sweeter.
4. Serve immediately for a soft-serve texture or freeze for about an hour for a firmer consistency.
Tips for the Best Nice Cream:
– Use very ripe bananas for maximum sweetness and flavor.
– Experiment by adding flavors like peanut butter or a dash of cinnamon for variety!
Frequently Asked Questions:
– Can I store leftovers? While it’s best enjoyed fresh, you can store it in the freezer for later. Just let it sit out for a few minutes before scooping.
Enjoy your delicious chocolate banana nice cream, a treat that’s as fun to make as it is to eat!
Fun fact: With just 2 frozen bananas and a spoonful of cocoa, you can whip up a creamy Chocolate Banana Nice Cream in under 5 minutes. No dairy, no gluten, just pure chocolatey goodness—perfect for vegan, dairy free gluten free cravings.
Chocolate Banana Nice Cream
Editor’s Choice

Professional Blender For Smoothies, 58 Oz Glass Jar, Glass Blender Inclu…
 Amazon$49.62
365 by Whole Foods Market, Organic Cocoa Powder, 8 Ounce (Pack of 2)
 AmazonCheck Price
11. Lemon Coconut Energy Bites
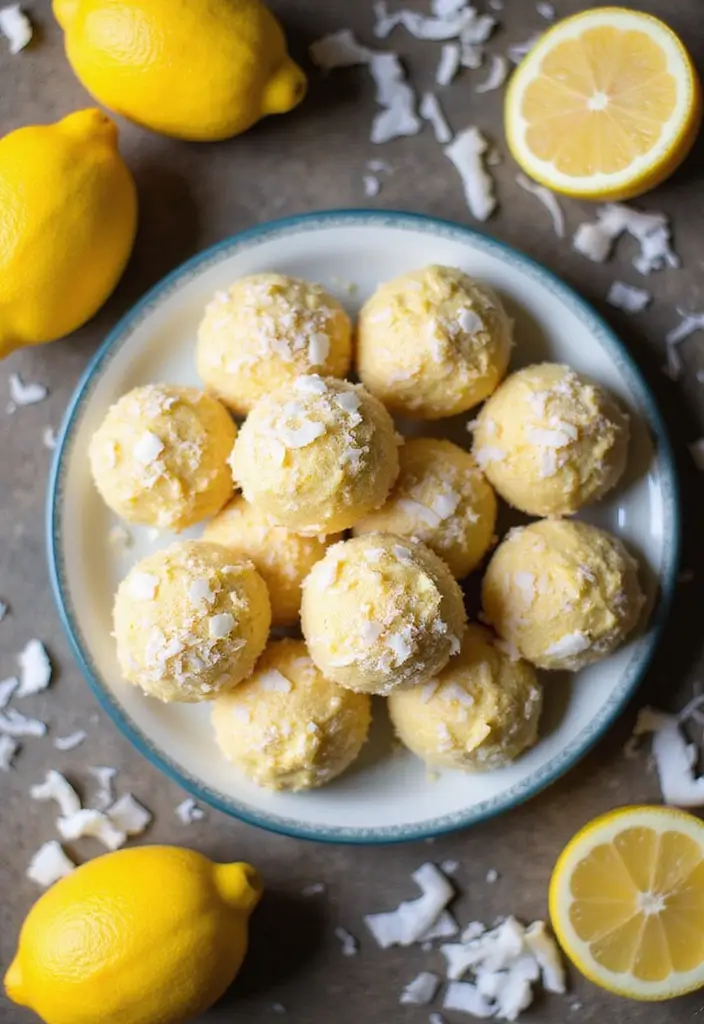
These Lemon Coconut Energy Bites are a burst of sunshine in every bite! They’re bright, sweet, and perfect for a quick snack when you need a boost. Made with simple, wholesome ingredients, these bites are a breeze to whip up. Just mix, roll, chill, and you’re ready to enjoy a tasty treat that fuels your day.
Let’s dive into the recipe details:
Recipe Overview:
– Servings: 12 bites
– Prep Time: 10 minutes
– Cook Time: 0 minutes
– Total Time: 10 minutes + chilling time
– Calories: 90 per bite
Nutritional Information:
– Calories: 90
– Fat: 5g
– Carbohydrates: 10g
– Protein: 1g
Ingredients Needed:
– 1 cup rolled oats
– 1/2 cup shredded coconut (unsweetened works best)
– 1/4 cup almond butter (or your favorite nut butter)
– 1/4 cup maple syrup
– Zest of 1 lemon (fresh is key!)
– Juice of 1 lemon (for that zesty kick)
How to Make Them:
1. In a large mixing bowl, combine rolled oats, shredded coconut, almond butter, maple syrup, lemon zest, and lemon juice. Mix until everything is well blended.
2. Once mixed, roll the mixture into small balls, about the size of a tablespoon, and place them on a baking sheet.
3. Chill the bites in the refrigerator for at least 30 minutes. This helps them firm up and makes them easier to enjoy.
4. After chilling, transfer your energy bites to an airtight container. They’ll stay fresh in the fridge for up to a week.
For the Best Bites:
– Use fresh lemon juice; it brightens the flavor!
– Sprinkle a pinch of sea salt in the mixture to enhance sweetness.
Frequently Asked Questions:
– Can I use a different nut butter? Yes! Feel free to substitute almond butter with any nut or seed butter you like.
Now you’re all set to create these delightful Lemon Coconut Energy Bites! They’re not just a snack; they’re a little piece of joy you can enjoy anytime. Perfect for busy days, workouts, or a sweet treat after meals! Enjoy!
Lemon Coconut Energy Bites
Editor’s Choice

Bob’s Red Mill Gluten Free Organic Old Fashioned Rolled Oats, 32oz (Pack…
 Amazon$5.98
365 by Whole Foods Market, Organic Creamy Almond Butter, 16 Ounce
 Amazon$13.99
Anthony’s Organic Shredded Coconut, 2 lb, Unsweetened, Gluten Free, Non …
 Amazon$18.29
12. Orange Almond Muffins
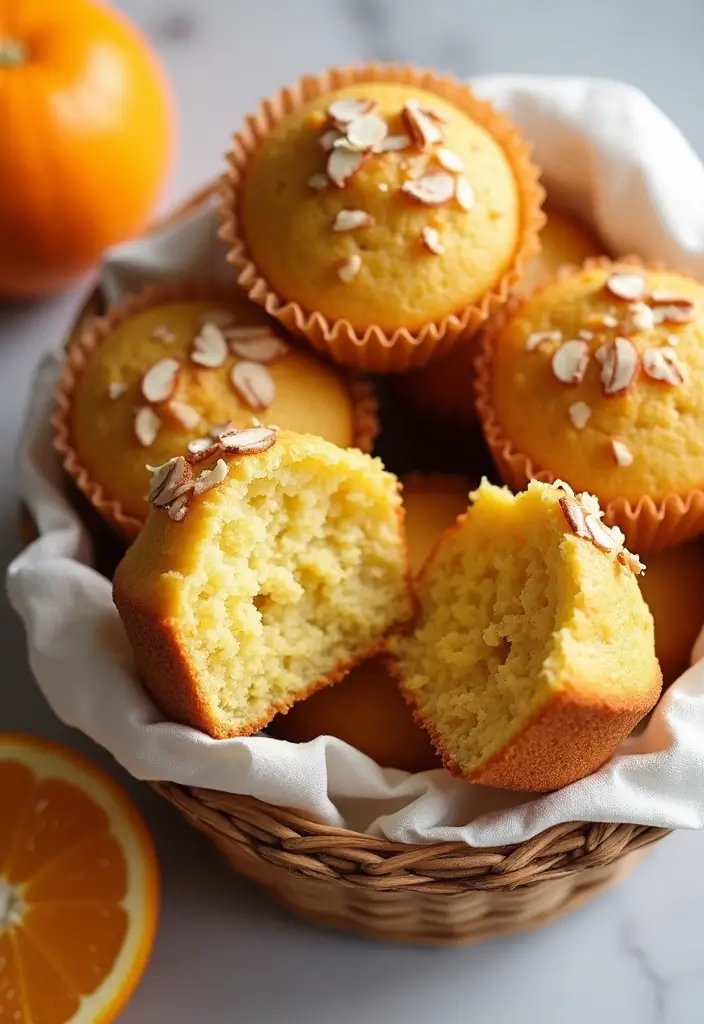
Brighten your mornings with delightful orange almond muffins! These treats burst with citrus flavor and are perfect for a quick breakfast or a satisfying snack. Fluffy and fragrant, they fit perfectly into your dairy-free and gluten-free lifestyle. You’ll love how easy they are to make, and they’ll surely become a favorite in your recipe rotation!
Here’s what you need to know about this quick and tasty recipe:
Recipe Overview:
– Servings: 12 muffins
– Prep Time: 15 minutes
– Cook Time: 20 minutes
– Total Time: 35 minutes
– Calories: 160 per muffin
Nutrition Information:
– Calories: 160
– Fat: 7g
– Carbohydrates: 23g
– Protein: 3g
Ingredients List:
– 1 1/2 cups almond flour
– 1/2 cup gluten-free all-purpose flour
– 1/2 cup fresh orange juice
– Zest of 1 orange
– 1/4 cup melted coconut oil
– 1/4 cup maple syrup
– 1 teaspoon baking powder
Step-by-Step Instructions:
1. Preheat your oven to 350°F (175°C) and line a muffin tin with liners.
2. In a large bowl, mix the almond flour, gluten-free flour, baking powder, and orange zest.
3. In another bowl, whisk together the orange juice, melted coconut oil, and maple syrup until well combined.
4. Gently fold the wet ingredients into the dry ingredients. Mix until just combined—this keeps your muffins light and fluffy!
5. Spoon the batter into the muffin tin, filling each cup about two-thirds full.
6. Bake for 20 minutes, or until a toothpick inserted comes out clean.
7. Let them cool for a few minutes, then enjoy!
Pro Tips for Perfect Muffins:
– Avoid overmixing to keep your muffins airy.
– Serve them warm with almond butter for a delicious twist!
Frequently Asked Questions:
– Can I use a different citrus? Absolutely! Lemon or lime is a great choice.
These orange almond muffins are a delightful way to kickstart your day or enjoy a light snack. With simple ingredients and easy steps, you’ll find them fun to make and even better to eat. Enjoy the sunshine in every bite!
Orange Almond Muffins
Editor’s Choice

Blue Diamond Almonds Almond Flour, Gluten Free, Blanched, Finely Sifted,…
 Amazon$9.91
King Arthur Measure for Measure Gluten-Free Flour: All-Purpose 1:1 Subst…
 Amazon$8.62
2Pack Silicone Muffin Pan for Baking with Metal Reinforced Frame, 12 Cup…
 Amazon$19.99
13. Vegan Matcha Energy Bars
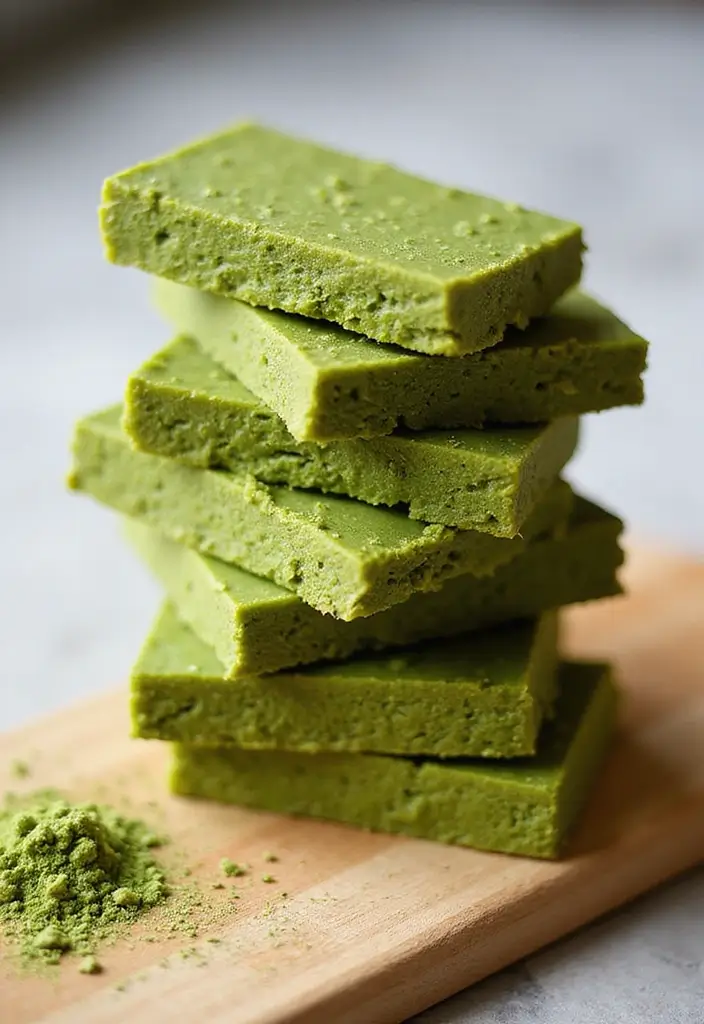
Fuel your day with delicious Vegan Matcha Energy Bars! These bars are not just a snack; they’re a burst of energy wrapped in a delightful green tea flavor. Perfect for a pre- or post-workout boost, they’re also easy to make. Plus, you can customize them to your liking by adding nuts, seeds, or dried fruit.
Imagine biting into a chewy bar that not only satisfies your hunger but also provides a healthy dose of nutrients. With just a few simple ingredients, you can whip up these tasty treats in no time. Let’s dive into the recipe!
Recipe Overview:
– Servings: 10 bars
– Prep Time: 15 minutes
– Cook Time: 0 minutes
– Total Time: 15 minutes + chilling time
– Calories: 110 per bar
Nutrition Information:
– Calories: 110
– Fat: 5g
– Carbohydrates: 15g
– Protein: 3g
Ingredients List:
– 1 cup dates, pitted
– 1/2 cup almond flour
– 1/4 cup rolled oats
– 1 tablespoon matcha powder
– 1/4 cup almond butter
– Pinch of salt
Step-by-Step Instructions:
1. In a food processor, combine the dates, almond flour, rolled oats, matcha powder, almond butter, and salt.
2. Blend the mixture until it becomes sticky and holds together well.
3. Press the mixture into a lined baking dish, smoothing it out evenly.
4. Chill in the refrigerator for at least 30 minutes, then cut into bars.
5. Store your energy bars in an airtight container in the fridge for freshness.
For the Best Bars:
– Adjust the sweetness by using more or fewer dates.
– Freeze leftover bars for a cool snack later!
Frequently Asked Questions:
– Can I use another nut butter? Yes! Peanut butter or sunflower seed butter works well too.
These Vegan Matcha Energy Bars are a fantastic way to keep your energy up throughout the day. They’re simple, nutritious, and totally customizable to fit your taste. Enjoy your healthy snacking!
Vegan Matcha Energy Bars
Editor’s Choice

Hamilton Beach Food Processor & Vegetable Chopper for Slicing, Shredding…
 Amazon$46.98
6Pack 2-Compartment Reusable Snack Containers with Lids, Wheat Straw Reu…
 Amazon$12.99
14. Vegan Chocolate Peanut Butter Cups
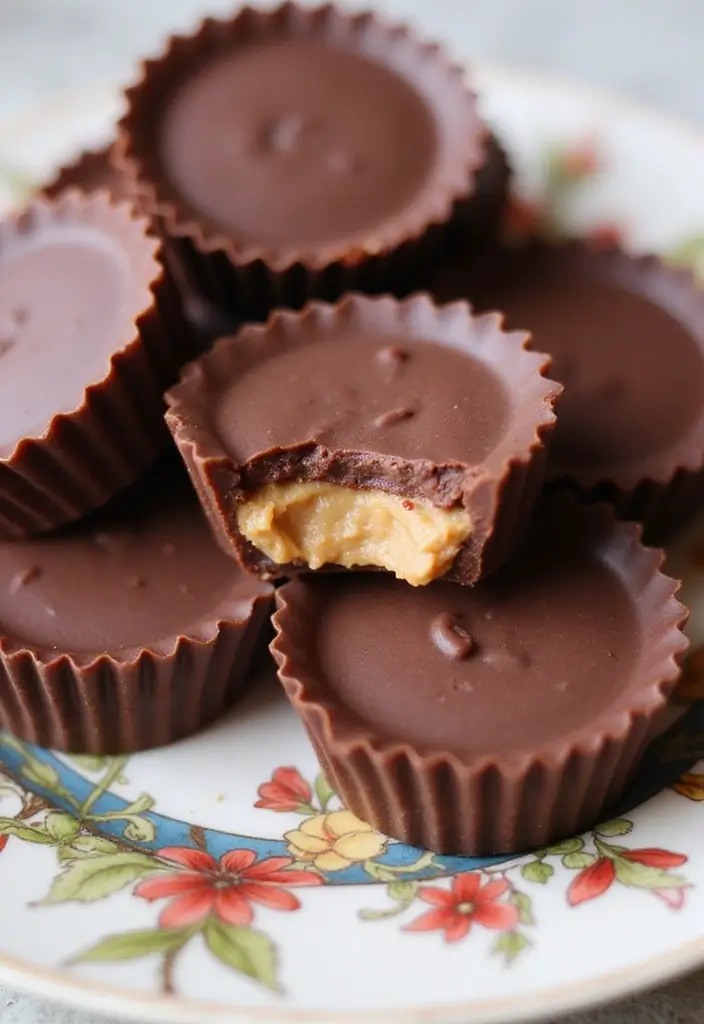
Indulge your sweet tooth with these delightful vegan chocolate peanut butter cups! If you love the rich taste of chocolate paired with creamy peanut butter, you’re in for a treat. These cups are not just tasty; they’re also dairy-free and gluten-free, making them perfect for everyone. In just 25 minutes, you can whip up a batch that’s sure to impress at any gathering or serve as a satisfying snack for yourself.
Recipe Overview:
– Servings: 12 cups
– Prep Time: 15 minutes
– Cook Time: 10 minutes
– Total Time: 25 minutes + setting time
– Calories: 130 per cup
Nutrition Information:
– Calories: 130
– Fat: 8g
– Carbohydrates: 12g
– Protein: 3g
Ingredients List:
– 1 cup dairy-free chocolate chips
– 1/2 cup peanut butter (or your favorite nut butter)
– 1 tablespoon maple syrup
– Pinch of salt
Easy Steps to Make Your Cups:
1. Melt the Chocolate: Use a double boiler or microwave to melt the chocolate chips until they are smooth.
2. Prepare the Muffin Tin: Line a muffin tin with cupcake liners to keep things tidy.
3. Create the Base: Spoon a layer of melted chocolate into the bottom of each liner. Place them in the fridge until they set.
4. Mix the Peanut Butter: In a bowl, combine peanut butter, maple syrup, and a pinch of salt. Stir until everything is blended.
5. Add the Filling: Once the chocolate base is set, add a dollop of the peanut butter mixture on top.
6. Top with Chocolate: Cover the peanut butter layer with more melted chocolate. Refrigerate again until solid.
7. Enjoy: Remove the cups from the liners and savor each bite!
For the best flavor, choose high-quality chocolate. Feel free to experiment with different nut butters like almond or cashew for a twist!
Frequently Asked Questions:
– Can I use almond butter instead of peanut butter? Yes! Almond butter adds a delicious flavor twist.
These peanut butter cups are not only a fun project but also a fantastic way to indulge without the guilt. Enjoy making them for yourself or share them with friends and family. They’ll appreciate the thought and the taste!
Vegan Chocolate Peanut Butter Cups
Editor’s Choice

Enjoy Life Baking Dark Chocolate Morsels, Dairy Free, Soy Free, Nut Free…
 AmazonCheck Price
Amazon Basics Reusable Silicone Baking Cups, BPA Free Muffin Liners, Dis…
 Amazon$6.99
Woodstock Organic Smooth Peanut Butter, Salt Added, 35 oz
 AmazonCheck Price
15. Vegan Blueberry Pancakes
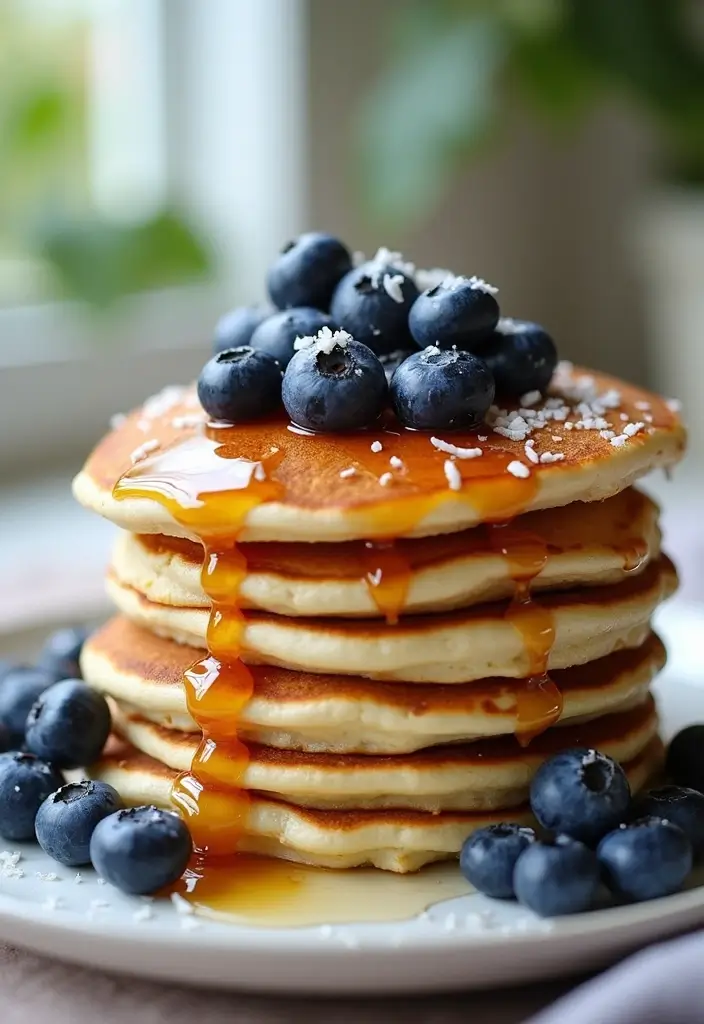
Start your morning off right with these delightful vegan blueberry pancakes! They’re soft, fluffy, and bursting with sweet blueberries. This breakfast classic is not only easy to make but also fits perfectly into a gluten-free and dairy-free lifestyle. Whether you’re cooking for yourself or a crowd, these pancakes will satisfy everyone at the table.
Here’s what you need to know to whip up this tasty dish in no time:
Recipe Overview:
– Servings: 4
– Prep Time: 10 minutes
– Cook Time: 15 minutes
– Total Time: 25 minutes
– Calories: 150 per serving
Nutrition Information:
– Calories: 150
– Fat: 4g
– Carbohydrates: 27g
– Protein: 3g
Ingredients:
– 1 cup gluten-free flour
– 1 tablespoon baking powder
– 1 cup almond milk
– 1/4 cup maple syrup
– 1 cup fresh blueberries
– 1 tablespoon coconut oil (for cooking)
Step-by-Step Instructions:
1. In a bowl, mix the gluten-free flour and baking powder together.
2. In a separate bowl, whisk together the almond milk and maple syrup until well combined.
3. Pour the wet ingredients into the dry ones. Stir gently until just mixed. Fold in the blueberries carefully.
4. Heat a non-stick skillet over medium heat and lightly grease it with coconut oil.
5. Pour 1/4 cup of the batter for each pancake. Cook until bubbles start to form on the surface, then flip them over.
6. Cook until both sides are golden brown.
7. Serve them warm, topped with extra blueberries and a drizzle of maple syrup!
Pro Tips for the Best Pancakes:
– Use a gentle hand when mixing; a few lumps are okay!
– For a zingy twist, add some lemon zest to the batter.
Frequently Asked Questions:
– Can I make these pancakes in advance? Yes! You can reheat them quickly in a toaster for a speedy breakfast.
These pancakes are not just a treat; they’re a wholesome start to your day. With simple ingredients and quick prep, you’ll have a delicious breakfast that everyone can enjoy. Try making them this weekend—you won’t regret it!
Vegan Blueberry Pancakes
Editor’s Choice

King Arthur Measure for Measure Gluten-Free Flour: All-Purpose 1:1 Subst…
 Amazon$8.62
Silk Shelf-Stable Almond Milk, Unsweetened Vanilla, Dairy-Free, Vegan, N…
 Amazon$11.27
Viva Naturals Organic Coconut Oil – Unrefined, Cold-Pressed Extra Virgin…
 Amazon$9.99
16. Vegan Snickerdoodle Cookies
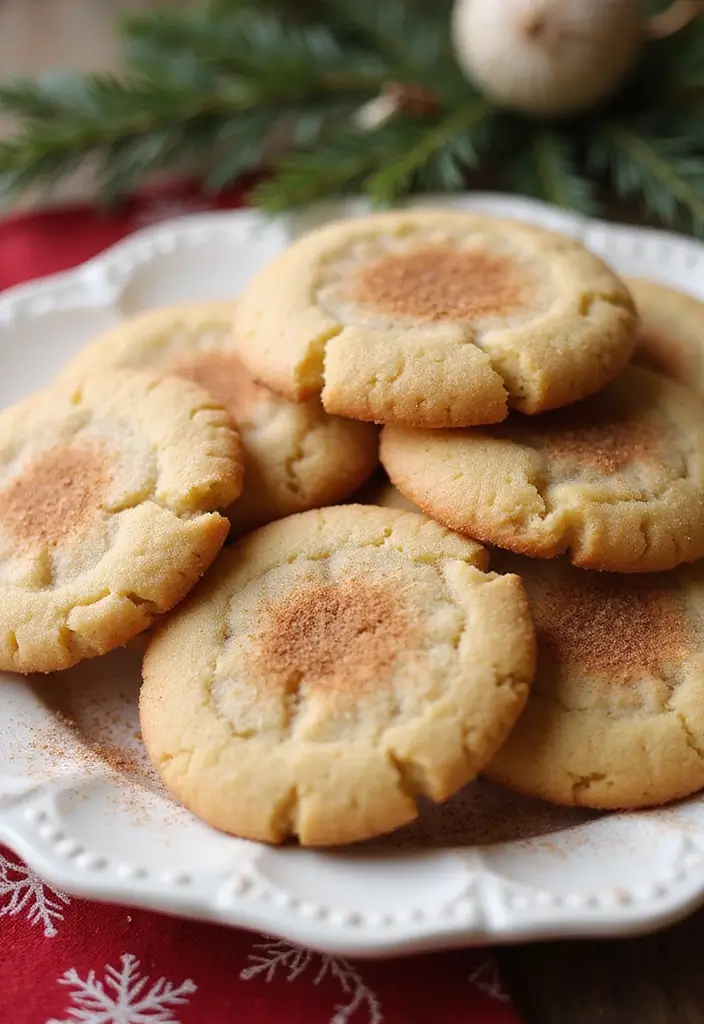
Indulge your sweet tooth with these delightful vegan snickerdoodle cookies! Soft, chewy, and coated in cinnamon-sugar, they are the perfect treat for any occasion. Whether it’s a cozy evening at home or a festive gathering, these cookies bring joy and warmth. Plus, they’re gluten-free and simple to whip up, making them a favorite for cookie fans everywhere.
Here’s what you need to know to make these tasty treats:
Recipe Overview:
– Servings: 12 cookies
– Prep Time: 15 minutes
– Cook Time: 10 minutes
– Total Time: 25 minutes
– Calories: 130 per cookie
Nutrition Information:
– Calories: 130
– Fat: 6g
– Carbohydrates: 19g
– Protein: 2g
Ingredients:
– 1 cup almond flour
– 1/2 cup gluten-free flour
– 1/3 cup coconut oil, melted
– 1/2 cup maple syrup
– 1 teaspoon cinnamon
– 1/2 teaspoon baking soda
Step-by-Step Instructions:
1. Preheat your oven to 350°F (175°C) and line a baking sheet with parchment paper.
2. In a mixing bowl, whisk together the almond flour, gluten-free flour, baking soda, and cinnamon until well combined.
3. In a separate bowl, mix the melted coconut oil and maple syrup until smooth and creamy.
4. Combine the wet and dry ingredients, stirring until a dough forms.
5. Roll the dough into small balls and place them on the prepared baking sheet. Gently flatten each ball with your hand.
6. Bake for 10-12 minutes, or until the edges are lightly golden.
7. Allow the cookies to cool before enjoying them.
Tip: Roll the warm cookies in a mix of cinnamon and sugar for extra flavor! Enjoy them with your favorite plant-based milk for a delightful pairing.
Frequently Asked Questions:
– Can I use a different sweetener? Yes! Coconut sugar works beautifully as a substitute.
Get ready to enjoy these scrumptious vegan snickerdoodle cookies. They’re a tasty treat that everyone will love!
Vegan Snickerdoodle Cookies
Editor’s Choice

Blue Diamond Almonds Almond Flour, Gluten Free, Blanched, Finely Sifted,…
 AmazonCheck Price
Amazon Grocery, Organic Refined Coconut Oil, 30 Fl Oz (Previously Amazon…
 Amazon$11.93
Butternut Mountain Farm Pure Vermont Maple Syrup, Grade A, Dark Color, R…
 Amazon$17.97
17. Vegan Pumpkin Pie
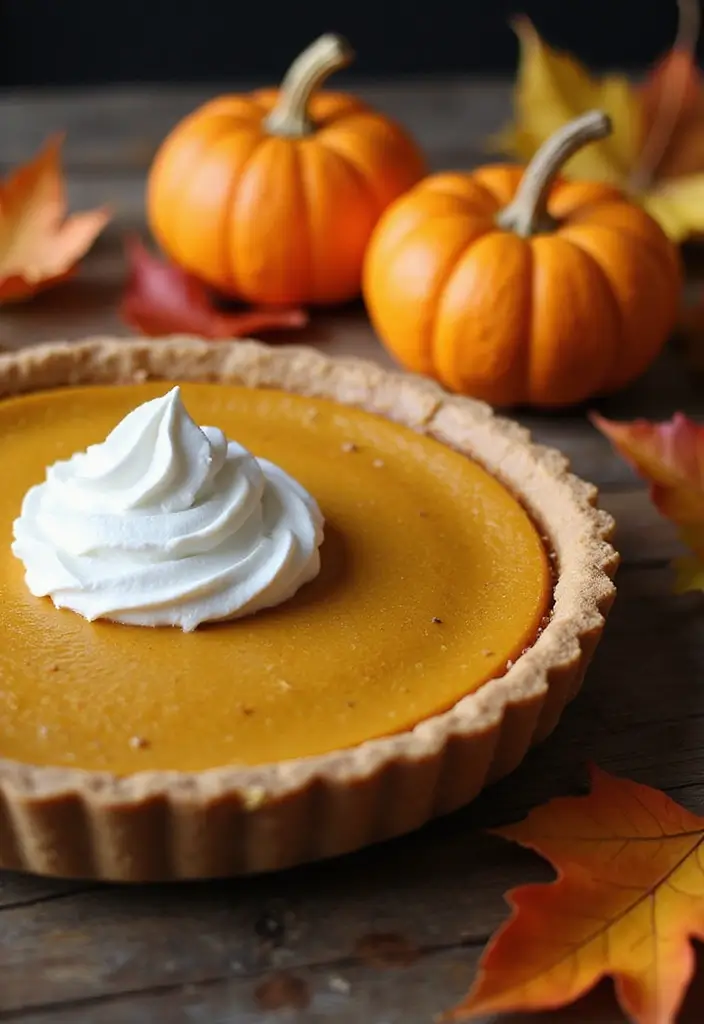
Imagine the warm, spicy aroma of pumpkin pie wafting through your kitchen. This vegan pumpkin pie is a delightful twist on a holiday favorite. Creamy and rich, it features a flaky gluten-free crust that’s sure to impress. Perfect for holiday gatherings or cozy nights at home, it’s a dessert everyone will love!
Let’s get to the recipe. It’s simple and quick, taking just about 20 minutes of prep time. You’ll have a delicious pie ready to bake in no time. Plus, it’s dairy-free and gluten-free, making it a great option for various dietary needs.
Recipe Overview:
– Servings: 8
– Prep Time: 20 minutes
– Cook Time: 60 minutes
– Total Time: 1 hour 20 minutes
– Calories: 250 per slice
Nutrition Information:
– Calories: 250
– Fat: 12g
– Carbohydrates: 34g
– Protein: 3g
Ingredients:
– 1 premade gluten-free pie crust
– 1 can (15 oz) pumpkin puree
– 1/2 cup coconut milk
– 1/2 cup maple syrup
– 2 teaspoons pumpkin pie spice
– 1 teaspoon vanilla extract
Instructions:
1. Preheat your oven to 350°F (175°C).
2. In a mixing bowl, whisk together the pumpkin puree, coconut milk, maple syrup, pumpkin pie spice, and vanilla extract until creamy.
3. Pour the pumpkin mixture into the pie crust, smoothing the top.
4. Bake in the oven for 60 minutes, or until the filling is set.
5. Let the pie cool completely before slicing.
For the Best Experience:
– Serve with a dollop of coconut whipped cream for a luxurious touch!
– Store leftovers in the fridge for up to three days.
This vegan pumpkin pie is not just a dessert; it’s a cozy hug on a plate. Enjoy every bite as you gather around with friends and family this season!
Vegan Pumpkin Pie
Editor’s Choice

King Arthur Flour Gluten Free Pie Crust Mix, Packaging May Vary, 14 Oz
 Amazon$7.95
Thai Kitchen Gluten Free Unsweetened Coconut Milk, 13.66 fl oz (Pack of 12)
 Amazon$18.96
Simply Organic Pumpkin Spice Organic, 1.94 Ounce
 AmazonCheck Price
18. Vegan Chocolate Cake
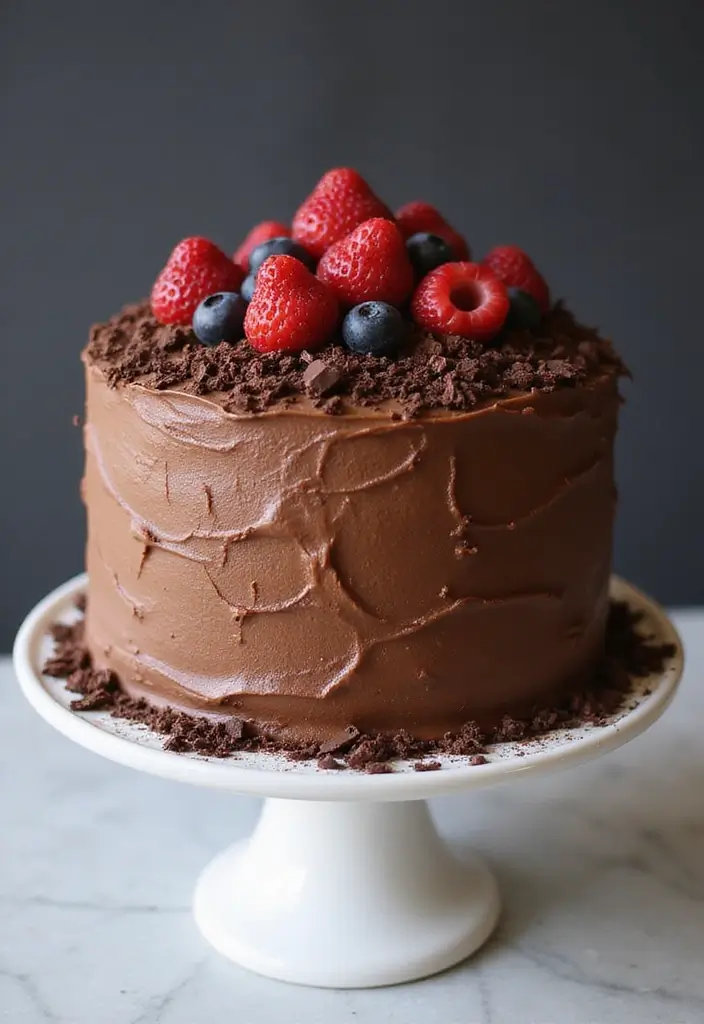
Treat yourself to a slice of pure happiness with this vegan chocolate cake! It’s rich, moist, and completely dairy-free and gluten-free. Whether you’re celebrating a birthday or just enjoying a cozy evening at home, this cake will satisfy your sweet tooth without compromising your dietary choices. It’s easy to make and sure to impress your friends and family.
Recipe Overview:
– Servings: 10
– Prep Time: 20 minutes
– Cook Time: 30 minutes
– Total Time: 50 minutes
– Calories: 300 per slice
Nutrition Information:
– Calories: 300
– Fat: 15g
– Carbohydrates: 38g
– Protein: 5g
Ingredients List:
– 1 1/2 cups almond flour
– 1/2 cup cocoa powder
– 1 teaspoon baking soda
– 1/2 cup maple syrup
– 1/2 cup almond milk
– 1/4 cup coconut oil, melted
– 1 teaspoon vanilla extract
Step-by-Step Instructions:
1. Preheat your oven to 350°F (175°C). Grease an 8-inch round cake pan.
2. In a large bowl, mix together the almond flour, cocoa powder, and baking soda.
3. In a separate bowl, whisk the maple syrup, almond milk, melted coconut oil, and vanilla extract.
4. Combine the wet and dry ingredients. Mix until just blended.
5. Pour the batter into the prepared cake pan and spread it evenly.
6. Bake for 30 minutes or until a toothpick inserted into the center comes out clean.
7. Let it cool before frosting or serving.
For the Best Cake Experience:
– Frost with dairy-free chocolate frosting for an extra indulgent touch.
– Top with fresh berries or a dusting of powdered sugar for a beautiful presentation.
Frequently Asked Questions:
– Can I make this cake in advance? Yes! It keeps well in the fridge for a few days, so you can enjoy it later.
This cake is not just a dessert; it’s a celebration of flavor and health. Enjoy every bite without worry!
Vegan Chocolate Cake
Editor’s Choice

Blue Diamond Almonds Almond Flour, Gluten Free, Blanched, Finely Sifted,…
 Amazon$9.91
Amazon Fresh, Unsweetened Cocoa Powder, 8 Oz (Pack of 3)
 AmazonCheck Price
Duncan Hines Whipped Chocolate Flavored Frosting, Halloween Cookie Decor…
 AmazonCheck Price
19. Vegan Oatmeal Raisin Cookies
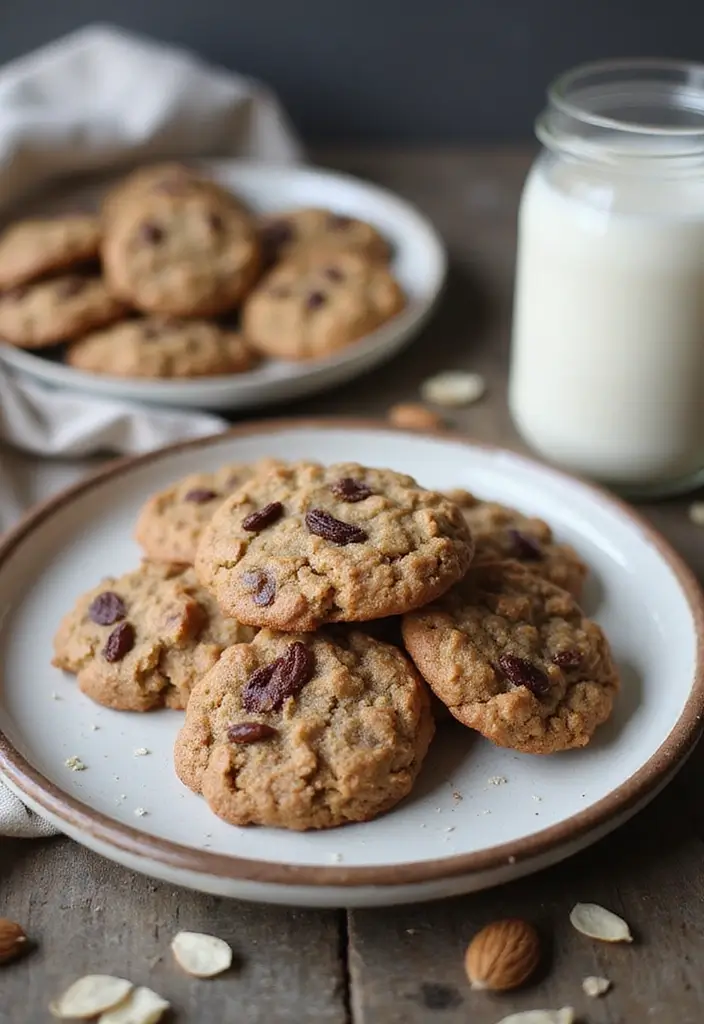
Craving something sweet but want to keep it vegan and gluten-free? Try these delicious vegan oatmeal raisin cookies! They’re chewy, hearty, and bursting with flavor. You can whip them up in no time, making them the ideal treat for any occasion. Packed with wholesome oats, sweet raisins, and a hint of cinnamon, these cookies are sure to please kids and adults alike!
Here’s what you need to make 12 scrumptious cookies:
Ingredients:
– 1 cup rolled oats
– 1/2 cup gluten-free flour
– 1/4 cup melted coconut oil
– 1/4 cup maple syrup
– 1/2 cup raisins
– 1 teaspoon cinnamon
– 1/2 teaspoon baking soda
Step-by-Step Instructions:
1. Preheat your oven to 350°F (175°C) and line a baking sheet with parchment paper.
2. In a large mixing bowl, combine the rolled oats, gluten-free flour, baking soda, and cinnamon.
3. In another bowl, whisk together the melted coconut oil and maple syrup until smooth.
4. Pour the wet mixture into the dry ingredients and stir until well combined. Fold in the raisins.
5. Scoop tablespoon-sized portions of the dough onto the prepared baking sheet, spacing them about 2 inches apart.
6. Bake for 12-15 minutes or until the cookies are golden brown.
7. Let them cool on the baking sheet for a few minutes before transferring to a wire rack to cool completely.
Tips for the Best Cookies:
– Add a splash of vanilla extract for extra flavor.
– Store your cookies in an airtight container to keep them fresh longer.
Frequently Asked Questions:
– Can I substitute the raisins? Absolutely! Try using chocolate chips or nuts for a different twist.
These cookies not only satisfy your sweet tooth but also make excellent snacks for lunchboxes or afternoon treats. Enjoy the wholesome goodness in every bite!
Vegan Oatmeal Raisin Cookies
Editor’s Choice

King Arthur, Measure for Measure Flour, Certified Gluten-Free, Non-GMO P…
 AmazonCheck Price
PURA D’OR 16 Oz ORGANIC Fractionated Coconut Oil – MCT Oil – 100% Pure &…
 Amazon$15.99
Butternut Mountain Farm Pure Vermont Maple Syrup, Grade A, Dark Color, R…
 Amazon$17.97
20. Chia Seed Fruit Parfaits
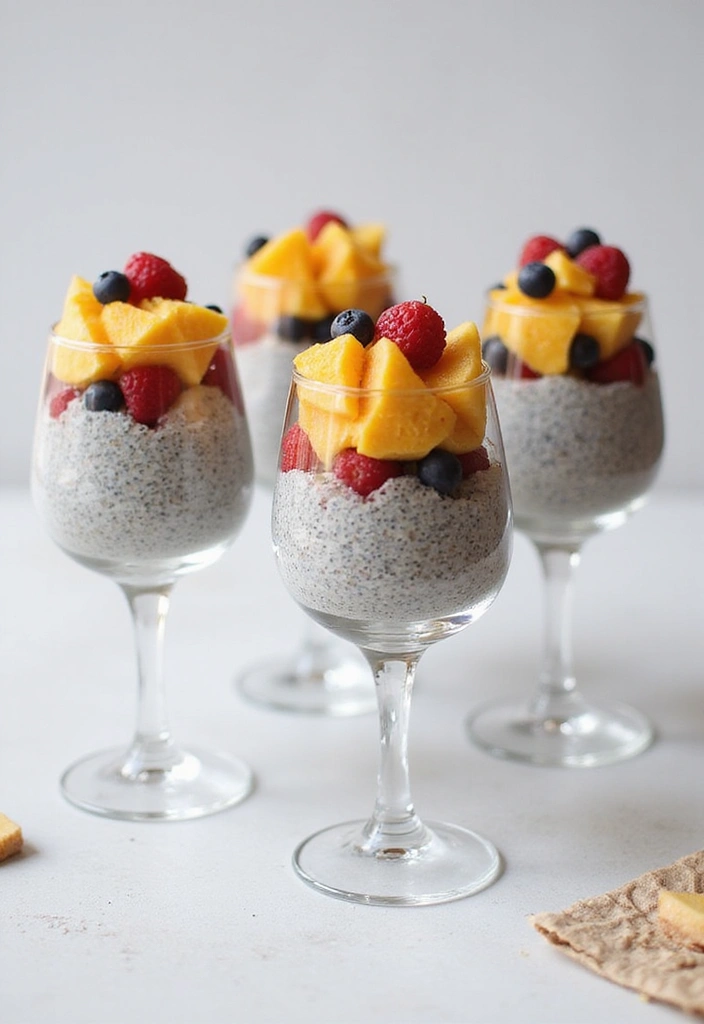
Chia Seed Fruit Parfaits are a delightful way to brighten your morning or satisfy your sweet tooth. Picture creamy layers of chia pudding, topped with vibrant, juicy fruits. These parfaits are not just a feast for the eyes; they’re packed with nutrients and can be customized to suit your taste. Whether you’re looking for a quick breakfast or a light dessert, these parfaits fit the bill perfectly!
Let’s break down the basics you need to get started:
Recipe Overview:
– Servings: 4
– Prep Time: 10 minutes
– Cook Time: 0 minutes
– Total Time: 10 minutes + chilling time
– Calories: 120 per serving
Nutrition Information:
– Calories: 120
– Fat: 7g
– Carbohydrates: 14g
– Protein: 3g
Ingredients:
– 1 cup almond milk
– 1/4 cup chia seeds
– 1 tablespoon maple syrup
– 1 teaspoon vanilla extract
– 2 cups mixed fruits (like berries, kiwi, and banana)
Instructions:
1. In a mixing bowl, whisk together the almond milk, chia seeds, maple syrup, and vanilla extract. This is where the magic begins!
2. Cover the bowl and refrigerate for at least 4 hours or overnight. This will transform your mixture into a thick, creamy pudding.
3. When ready to serve, grab your favorite glasses or bowls. Layer the chia pudding with your choice of mixed fruits.
4. Enjoy immediately or keep chilled until you’re ready to dig in!
Tips for the Best Parfaits:
– Choose a mix of colorful fruits for an eye-catching presentation.
– Prepare the chia pudding ahead of time for a quick and easy assembly.
Curious if you can switch things up? Yes! Feel free to swap almond milk for coconut milk for a tropical twist. These parfaits not only taste great but also make you feel good about what you’re eating. Enjoy them any time of the day!
Chia Seed Fruit Parfaits
Editor’s Choice

BetterBody Foods Organic Chia Seeds 2 lbs, 32 Oz, with Omega-3, Non-GMO,…
 Amazon$11.97
Silk Shelf-Stable Almond Milk, Unsweetened Vanilla, Dairy-Free, Vegan, N…
 Amazon$11.27
yarlung 9 Pack Small Glass Dessert Bowls, 8 Oz Custard Cup Clear Pudding…
 Amazon$21.99
21. Vegan Chocolate Tart
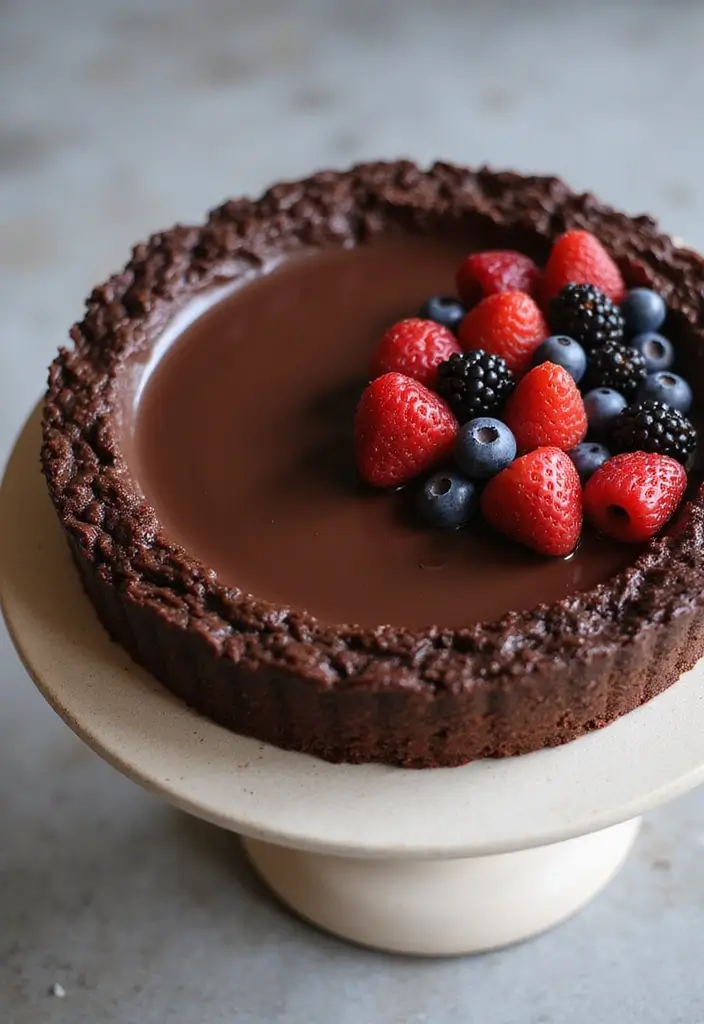
Indulge in the rich flavors of this Vegan Chocolate Tart, a dessert that will dazzle both your taste buds and your guests. Its luscious filling, made from creamy almond milk and dairy-free chocolate, pairs beautifully with a crunchy almond flour and cocoa crust. This tart is not just a treat; it’s a centerpiece for celebrations, perfect for impressing friends and family at your next gathering or holiday feast.
Recipe Overview:
– Servings: 8
– Prep Time: 15 minutes
– Cook Time: 25 minutes
– Total Time: 40 minutes
– Calories: 350 per slice
Nutrition Information:
– Calories: 350
– Fat: 22g
– Carbohydrates: 35g
– Protein: 5g
Ingredients List:
– 1 cup almond flour
– 1/4 cup cocoa powder
– 1/4 cup coconut oil, melted
– 2 cups almond milk
– 1 cup dairy-free chocolate chips
– 1/4 cup maple syrup
Step-by-Step Instructions:
1. Preheat your oven to 350°F (175°C) and grease a tart pan.
2. In a mixing bowl, combine almond flour and cocoa powder. Add the melted coconut oil and stir until the mixture is crumbly.
3. Press the crust mixture into the tart pan, ensuring an even layer, and bake for 10 minutes.
4. In a saucepan, warm the almond milk over medium heat. Stir in the dairy-free chocolate chips and maple syrup until completely melted and smooth.
5. Pour the chocolate filling into the baked crust and bake for an additional 15 minutes.
6. Allow the tart to cool completely before slicing and serving.
For the Best Tart:
– Top it off with a dollop of coconut whipped cream for an extra creamy touch.
– Store leftovers in the fridge, covered, for a delightful treat later.
Frequently Asked Questions:
– Can I use a different nut flour for the crust? Definitely! Hazelnut flour works wonderfully as a substitute.
This Vegan Chocolate Tart isn’t just a dessert; it’s a celebration of flavors that everyone will love. Enjoy every bite and share this joy with others!
Vegan Chocolate Tart
Editor’s Choice

Blue Diamond Almonds Almond Flour, Gluten Free, Blanched, Finely Sifted,…
 Amazon$9.91

Viva Naturals Organic Coconut Oil – Unrefined, Cold-Pressed Extra Virgin…
 Amazon$9.99
22. Vegan Chocolate Chip Muffins
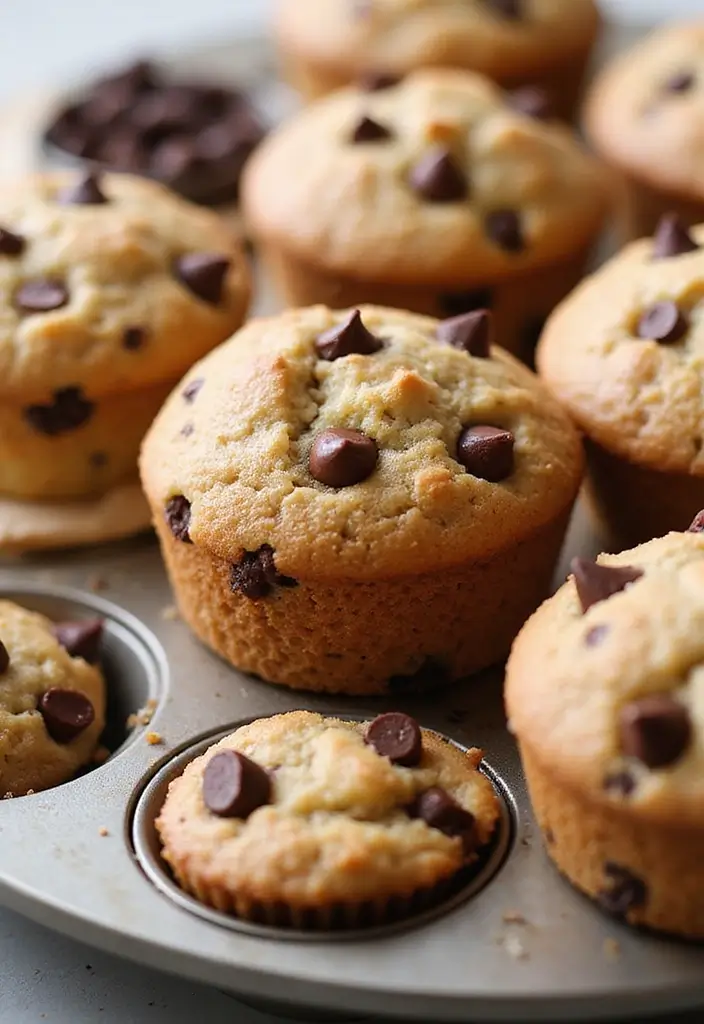
Start your morning on a sweet note with these scrumptious vegan chocolate chip muffins! They’re not just fluffy and moist; they burst with rich chocolatey goodness in every bite. These muffins are both gluten-free and dairy-free, so everyone can indulge without worry. Plus, you’ll love how quick and easy they are to make—just one bowl is all you need!
Recipe Overview:
– Servings: 12 muffins
– Prep Time: 15 minutes
– Cook Time: 20 minutes
– Total Time: 35 minutes
– Calories: 170 per muffin
Nutrition Information:
– Calories: 170
– Fat: 7g
– Carbohydrates: 24g
– Protein: 3g
Here’s what you’ll need:
– 1 1/2 cups gluten-free all-purpose flour
– 1/2 cup cocoa powder
– 1/3 cup coconut sugar
– 1/2 cup almond milk
– 1/4 cup melted coconut oil
– 1/2 cup dairy-free chocolate chips
Let’s make those muffins!
1. Preheat your oven to 350°F (175°C) and line your muffin tin with liners.
2. In a large mixing bowl, combine the gluten-free flour, cocoa powder, and coconut sugar.
3. Pour in the almond milk and melted coconut oil, mixing gently until just combined.
4. Carefully fold in the chocolate chips to keep them from breaking.
5. Fill each muffin cup about two-thirds full with the batter.
6. Bake for 20 minutes or until a toothpick comes out clean from the center.
7. Allow them to cool before diving in!
Tips for Muffin Perfection:
– Remember, don’t overmix the batter! This keeps your muffins light and fluffy.
– For an extra chocolatey treat, sprinkle a few more chocolate chips on top before baking.
Frequently Asked Questions:
– Can I use a different sweetener? You absolutely can! Maple syrup works great as a substitute.
These muffins are perfect for breakfast or a snack anytime. Enjoy them fresh out of the oven or save some for later—if they last that long!
Vegan Chocolate Chip Muffins
Editor’s Choice

King Arthur Measure for Measure Gluten-Free Flour: All-Purpose 1:1 Subst…
 Amazon$8.62
Enjoy Life Baking Dark Chocolate Morsels, Dairy Free, Soy Free, Nut Free…
 AmazonCheck Price
NOW Foods, Certified Organic Coconut Sugar, Alternative to Table Sugar, …
 AmazonCheck Price
23. Vegan Peanut Butter Cookies
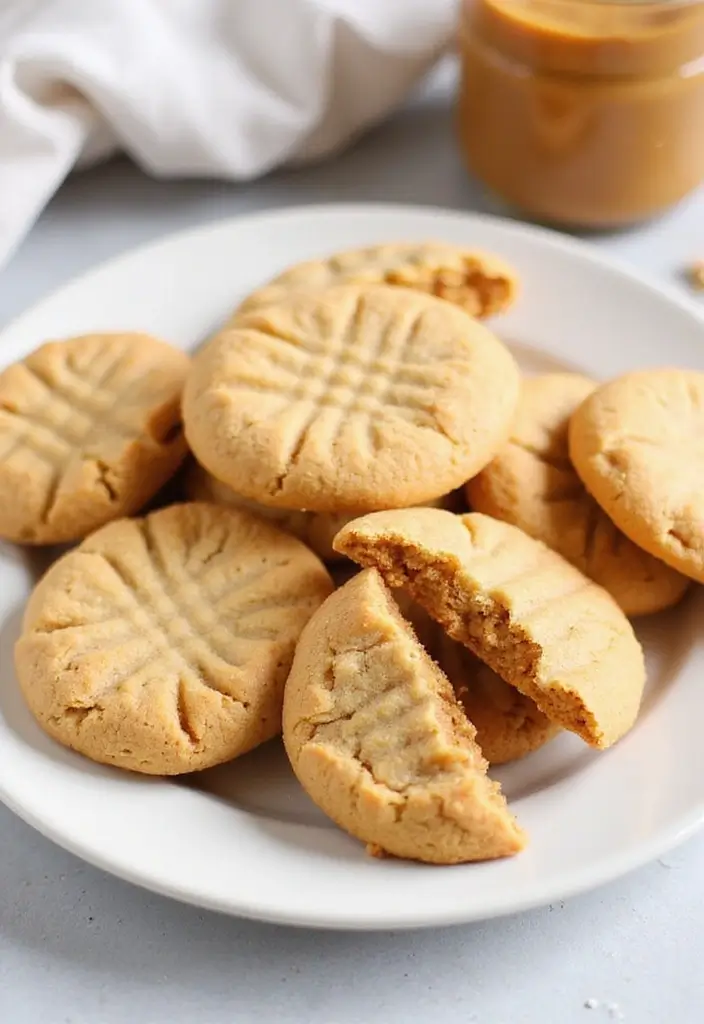
Craving something sweet and nutty? These vegan peanut butter cookies are your answer! They’re not just easy to whip up, but also require just a handful of ingredients. Imagine biting into a cookie that’s soft and chewy inside, with a delightful crunch on the outside. Perfect for any occasion, these treats will surely satisfy your peanut butter cravings!
Let’s get started on this simple recipe. You’ll need:
Ingredients:
– 1 cup peanut butter
– 1/2 cup coconut sugar
– 1/4 cup maple syrup
– 1/2 teaspoon baking soda
Instructions:
1. Preheat your oven to 350°F (175°C) and line a baking sheet with parchment paper.
2. In a large bowl, combine the peanut butter, coconut sugar, maple syrup, and baking soda. Mix until smooth and creamy.
3. Scoop tablespoon-sized balls of dough onto the baking sheet, leaving space between them.
4. Gently flatten each ball with a fork, creating that classic crisscross pattern.
5. Bake for about 10 minutes, or until the edges are lightly golden.
6. Let the cookies cool slightly before transferring them to a wire rack.
These cookies are not only delicious but also easy to store. Keep them in an airtight container for up to a week, so you can enjoy them whenever you want!
Tips for the Best Cookies:
– Use creamy peanut butter for a smoother bite.
– Experiment with almond butter for a twist in flavor.
– Add a pinch of salt to enhance the sweetness.
– Consider adding dark chocolate chips for extra indulgence.
Now you have a delightful recipe that’s simple and satisfying. Enjoy your baking and treat yourself to these irresistible vegan peanut butter cookies!
Vegan Peanut Butter Cookies
Editor’s Choice

MADHAVA Organic Coconut Sugar 3 Lb. Bag (Pack of 1), Natural Sweetener, …
 Amazon$12.22
Butternut Mountain Farm Pure Vermont Maple Syrup, Grade A, Dark Color, R…
 Amazon$17.97
24. Vegan Rice Pudding
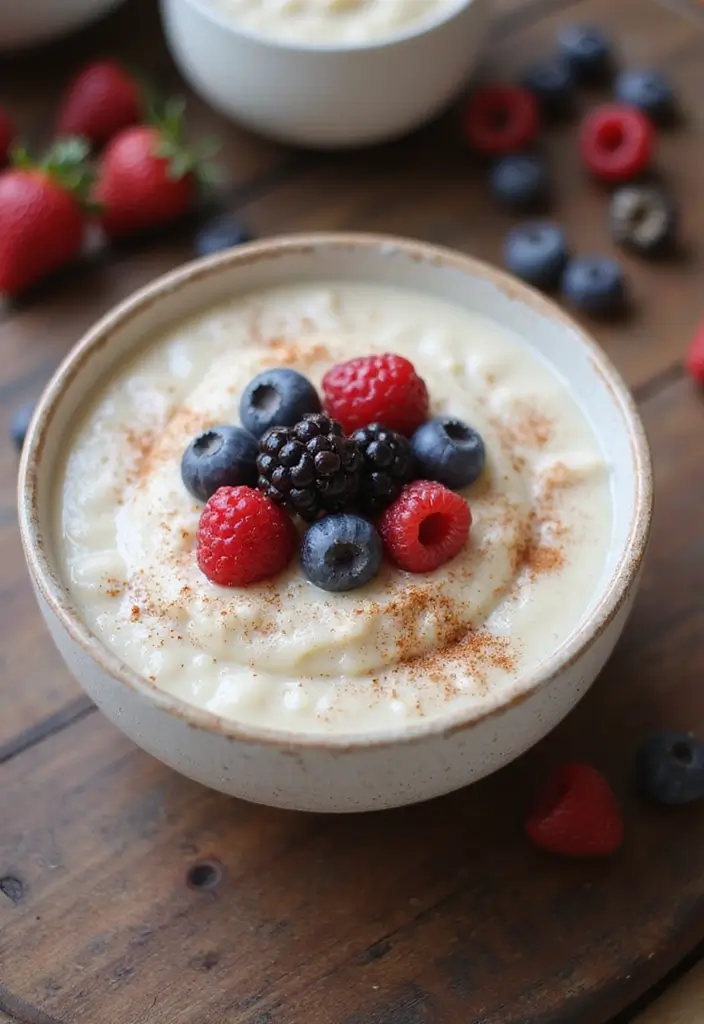
Indulge in a warm bowl of vegan rice pudding, a dessert that brings comfort any time of year. This creamy delight is made with simple ingredients, allowing you to customize it just the way you like. Whether you prefer it plain, spiced with cinnamon, or topped with fresh fruit, it’s sure to satisfy your sweet cravings!
Let’s get started with the recipe:
Recipe Overview:
– Servings: 4
– Prep Time: 10 minutes
– Cook Time: 30 minutes
– Total Time: 40 minutes
– Calories: 180 per serving
Nutrition Information:
– Calories: 180
– Fat: 6g
– Carbohydrates: 30g
– Protein: 4g
Ingredients:
– 1 cup short grain rice
– 4 cups almond milk
– 1/4 cup maple syrup
– 1 teaspoon vanilla extract
– 1/2 teaspoon cinnamon (optional)
Instructions:
1. In a medium saucepan, combine the rice and almond milk.
2. Bring the mixture to a boil, then reduce the heat to low. Let it simmer for 30-35 minutes, stirring occasionally until the rice is tender.
3. When the rice is cooked, stir in the maple syrup and vanilla extract.
4. Serve the pudding warm, and feel free to sprinkle cinnamon or add fresh fruit on top for extra flavor.
To make the best pudding possible:
– Reduce almond milk slightly for a thicker texture.
– Experiment with spices like nutmeg or cardamom for a unique twist!
Frequently Asked Questions:
– Can I make this ahead of time? Absolutely! Store it in the fridge for up to three days. Just reheat before serving.
This vegan rice pudding is not only easy to make, but it also allows you to enjoy a delicious dessert without dairy or gluten. Perfect for cozy nights or gatherings with friends, this dish will leave everyone asking for seconds!
Vegan Rice Pudding
Editor’s Choice

Asian Kitchen White Sona Masoori Aged Rice 4-Pound Bag, 4lbs (1.81kg) Sh…
 AmazonCheck Price
Califia Farms – Organic Unsweetened Almond Milk, 48 Oz, Dairy Free, Keto…
 AmazonCheck Price
Butternut Mountain Farm Pure Vermont Maple Syrup, Grade A, Dark Color, R…
 Amazon$17.97
25. Vegan Fruit Salad
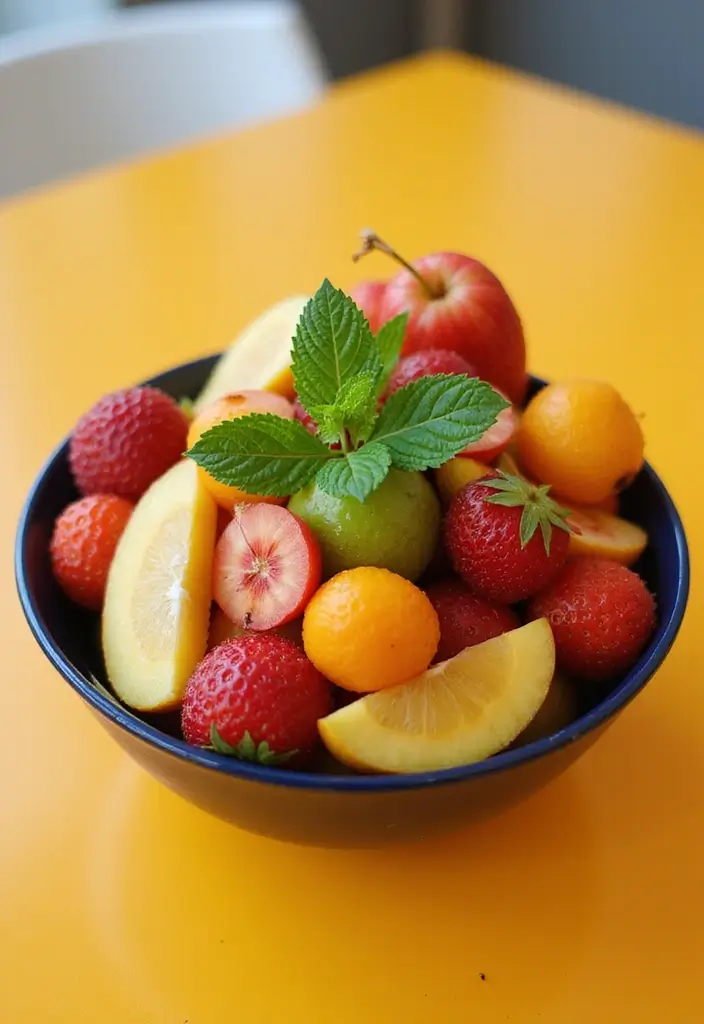
Imagine a bowl filled with colorful fruits, each bite bursting with natural sweetness. That’s exactly what you get with this delightful vegan fruit salad. It’s a wonderful choice for a light dessert or a refreshing side dish at any gathering. You can enhance its flavor with a splash of lime juice or a sprinkle of fresh mint. This salad not only looks beautiful but also delivers a healthy dose of vitamins.
Recipe Overview:
– Servings: 6
– Prep Time: 10 minutes
– Cook Time: 0 minutes
– Total Time: 10 minutes
– Calories: 80 per serving
Nutrition Information:
– Calories: 80
– Fat: 0g
– Carbohydrates: 20g
– Protein: 1g
Ingredients:
– 2 cups watermelon, cubed
– 2 cups strawberries, halved
– 2 cups blueberries
– 1 cup kiwi, sliced
– Juice of 1 lime
– Fresh mint for garnish
Instructions:
1. In a large bowl, combine all the cubed and sliced fruits.
2. Squeeze lime juice over the fruits and toss gently to coat.
3. Serve immediately, garnished with fresh mint for an extra pop of color and flavor.
Tips for the Best Fruit Salad:
– Choose a mix of your favorite seasonal fruits for a variety of flavors.
– Prep the salad just before serving to keep the fruits fresh and firm.
Frequently Asked Questions:
– Can I add other fruits? Absolutely! Feel free to mix in any fruits you love, like mangoes or oranges.
This vegan fruit salad is not just a dish; it’s a celebration of fresh flavors. Perfect for picnics, parties, or a simple family meal, it’s sure to impress everyone at the table. Enjoy the taste of summer all year round!
Vegan Fruit Salad
Editor’s Choice

Mixing Bowls with Lids Set, 7 PCS Stainless Steel Mixing Bowls with 3 Gr…
 Amazon$21.79
Elite Gourmet ETS740 BPA-Free Electric Citrus Juicer with 2 Cones, Compa…
 Amazon$22.31
Fresh Mint Plants for Indoors Outdoors, Mint Plant Pot, Live Mint Plant,…
 AmazonCheck Price
Conclusion
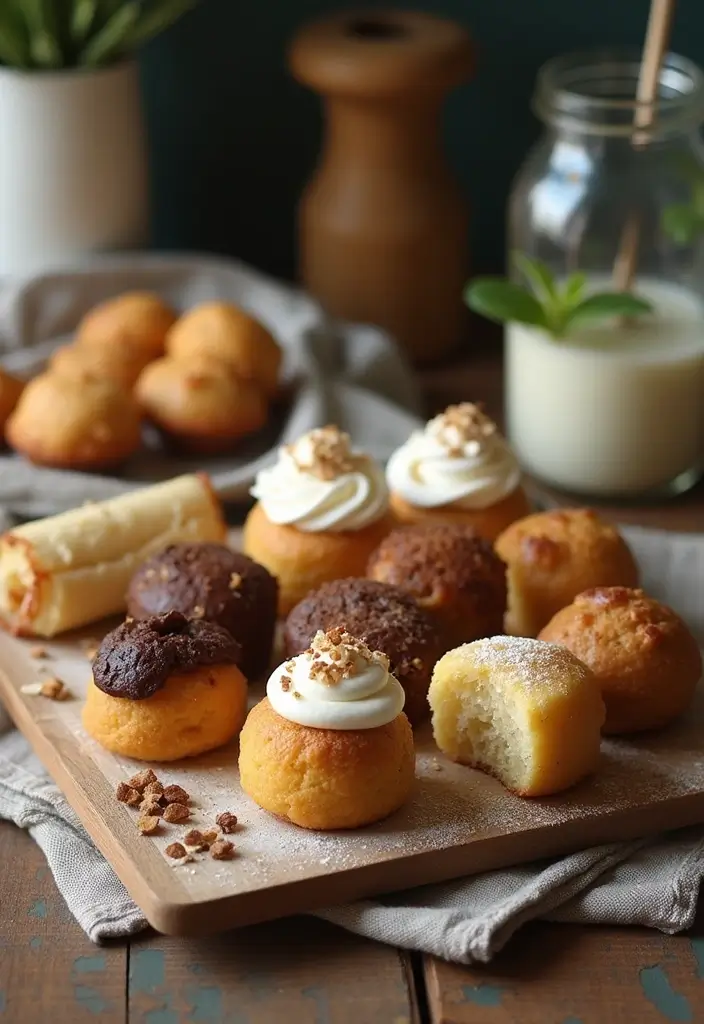
These 25 vegan, dairy-free, and gluten-free dessert recipes offer a delightful range of flavors and textures that everyone can enjoy. Whether you’re planning a special occasion or simply want to treat yourself, these delicious options will satisfy your cravings while adhering to dietary preferences. Embrace the joy of cooking and baking—after all, creating sweet treats can be just as fulfilling as indulging in them!
So, roll up your sleeves and try one or all of these recipes; they’re sure to become your new favorites!
Note: We aim to provide accurate product links, but some may occasionally expire or become unavailable. If this happens, please search directly on Amazon for the product or a suitable alternative.
This post contains Amazon affiliate links, meaning I may earn a small commission if you purchase through my links, at no extra cost to you.
Frequently Asked Questions
What Are Some Easy Vegan Dairy Free Gluten Free Dessert Recipes I Can Make?
If you’re looking for simple yet delicious vegan dairy free gluten free dessert recipes, you’re in luck! Consider trying chocolate avocado mousse or coconut milk ice cream. These recipes are not only easy to make but also packed with flavor! Plus, they cater to those craving healthy dessert options without compromising on taste. Don’t forget to check out our full list of plant-based recipes for more inspiration!
Can I Substitute Ingredients in Vegan Dairy Free Gluten Free Recipes?
Absolutely! One of the best things about cooking is experimenting with substitutions. For instance, if a recipe calls for almond milk, you can easily swap it for oat or soy milk. Similarly, if you’re out of gluten-free flour, try using almond flour or coconut flour instead. Just keep in mind that different ingredients may alter the texture and flavor slightly, so don’t hesitate to experiment and find what works for you!
Are Vegan Dairy Free Gluten Free Desserts Healthy?
Many vegan dairy free gluten free desserts can be quite healthy! They often use wholesome ingredients like natural sweeteners, fruits, and nuts that provide essential nutrients. However, it’s important to remember that some recipes may still be high in sugar or fats, so always check the ingredients. By focusing on whole foods and minimizing processed ingredients, you can enjoy delicious desserts that align with a healthy lifestyle.
What Are Some Popular Vegan Dairy Free Gluten Free Snacks?
Looking for tasty vegan dairy free gluten free snacks? Try energy balls made from oats and nut butter or chickpea hummus with veggie sticks. These snacks are not only satisfying but also packed with nutrients. You can find a variety of easy-to-make options in our article, which will keep your snacking healthy and delicious without the gluten or dairy!
How Can I Make Vegan Cooking Easier?
Vegan cooking can be a breeze with a few handy tips! First, meal prep by cooking large batches of your favorite vegan dairy free gluten free recipes and storing them. Secondly, stock your kitchen with essential ingredients like nut milks, gluten-free flours, and plant-based proteins. Lastly, don’t hesitate to use online resources and communities for inspiration and support in your vegan cooking journey. Happy cooking!
Related Topics
vegan recipes
dairy free
gluten free
healthy desserts
plant-based snacks
easy vegan cooking
quick gluten-free meals
dessert ideas
vegan baking
no-bake recipes
family-friendly
seasonal treats

