Are you tired of dessert options that leave you feeling heavy and sluggish? Maybe you’re craving something sweet but still want to stick to a vegan and gluten-free lifestyle. Well, I feel you! It’s tough to find treats that satisfy your sweet tooth without compromising your health goals. That’s why I created this post.
If you’re someone who loves baking or just enjoys whipping up delicious treats, you’re in the right place. This collection is perfect for anyone who wants to indulge without the guilt. Whether you’re vegan, gluten-free, or simply looking to try something new, these recipes are sure to please.
What will you get from this list? A delightful assortment of 27 vegan gluten-free dessert recipes that are not only easy to make but also bursting with flavor. From rich chocolate brownies to refreshing fruit sorbets, these treats will make you look forward to dessert time.
So, grab your apron and get ready to explore some tasty options that will satisfy your cravings while keeping your diet in check. Let’s dive into these sweet delights that you’ll absolutely love!
1. Raw Vegan Chocolate Cheesecake
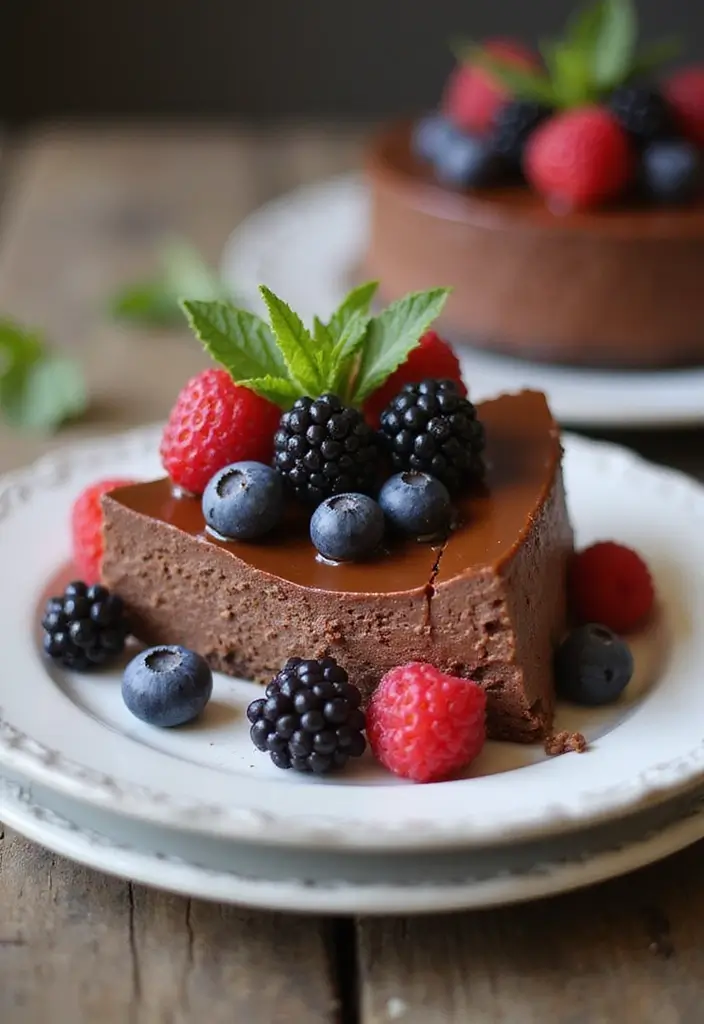
Indulge in the rich and creamy world of raw vegan chocolate cheesecake, where decadence meets health. This dessert is not just a treat; it’s a conversation starter at any occasion. Imagine a crunchy base made from crushed nuts and dates, perfectly complementing a luscious chocolate filling. Sweetened with pure maple syrup, this cheesecake avoids refined sugars, making it a guilt-free delight. Not only does it look impressive, but it also brings a nutritious spin to your dessert table.
Let’s dive into the recipe!
Recipe Overview:
– Servings: 8
– Prep Time: 20 minutes
– Total Time: 20 minutes
– Calories: 270 per slice
Nutrition Information:
– Protein: 4g
– Fat: 20g
– Carbohydrates: 20g
Ingredients:
– 1 cup raw almonds or walnuts
– 1 cup pitted dates
– 2 cups raw cashews (soaked for 4 hours)
– ½ cup cocoa powder
– ½ cup maple syrup
– 1 tsp vanilla extract
Instructions:
1. In a food processor, blend the nuts and dates until they form a sticky mixture.
2. Press this mixture into the bottom of a springform pan to create a crust.
3. Drain and rinse the soaked cashews. Blend them with cocoa powder, maple syrup, and vanilla until smooth.
4. Pour the chocolate filling over the crust and smooth it out.
5. Freeze for at least 4 hours until it’s firm. Slice and serve!
For an extra touch, add a pinch of sea salt to the filling. You can also top it with fresh berries or a drizzle of coconut cream for a stunning finish.
FAQs:
– Can I use different nuts for the crust? Absolutely! Use any nuts you enjoy.
– How long will the cheesecake last? Store it in the freezer for up to 2 months.
This raw vegan chocolate cheesecake is perfect for impressing guests or enjoying a cozy night in. Make it and savor every bite!
Raw Vegan Chocolate Cheesecake
Editor’s Choice

Hamilton Beach Food Processor & Vegetable Chopper for Slicing, Shredding…
 Amazon$46.98

Yupik Organic Raw Cashews, 2.2 lb (35.2 oz), Kosher, Gluten-Free, Non-GM…
 Amazon$22.99
2. Coconut Macaroons with Dark Chocolate Drizzle

Indulge your sweet cravings with these Coconut Macaroons with Dark Chocolate Drizzle. Imagine biting into a chewy macaron, perfectly balanced with sweet coconut and a rich dark chocolate finish. These treats are not only delicious but also incredibly simple to whip up. With just a few wholesome ingredients, you can create a dessert that’s both vegan and gluten-free. This makes them a delightful option for everyone, whether you’re entertaining guests or enjoying a quiet evening at home.
Ready to make your own? Here’s a quick overview of the recipe:
Recipe Overview:
– Servings: 12
– Prep Time: 10 minutes
– Cook Time: 15 minutes
– Total Time: 25 minutes
– Calories: 150 per macaroon
Nutritional Info:
– Protein: 2g
– Fat: 7g
– Carbohydrates: 21g
Ingredients:
– 3 cups unsweetened shredded coconut
– 1/2 cup almond flour
– 1/2 cup maple syrup
– 1 tsp vanilla extract
– 1/2 cup dark chocolate chips (dairy-free)
Instructions:
1. Preheat your oven to 325°F (160°C) and line a baking sheet with parchment paper.
2. In a large bowl, mix shredded coconut, almond flour, maple syrup, and vanilla extract until combined.
3. Use a tablespoon to scoop and form small mounds on the baking sheet.
4. Bake for 15 minutes or until they turn golden brown. Let them cool.
5. Melt the dark chocolate chips and drizzle them over your cooled macaroons before serving.
Want to boost the flavor? Add a pinch of sea salt to make the chocolate taste even richer. If you’re feeling adventurous, mix in a drop of almond or orange extract for a unique twist!
FAQs:
– Can I store these macaroons? Yes, they can last up to a week in an airtight container.
– Can I freeze them? Absolutely! Just layer them with parchment paper if you stack them.
These macaroons are perfect for any occasion. Enjoy them as a guilt-free snack, or serve them at your next gathering. With their delightful texture and rich flavor, they’re sure to be a hit!
Coconut Macaroons with Dark Chocolate Drizzle
Editor’s Choice

Silicone Baking Mat, 3 Pack Reusable Baking Mat, Non-Stick, Food Safe Si…
 Amazon$9.99
GHIRARDELLI Non-Dairy Dark Chocolate Chips for Baking, Premium Baking Ch…
 Amazon$8.49
TILUCK Stainless Steel Measuring Cups & Spoons Set, Cups and Spoons,Kitc…
 Amazon$15.99
3. Raw Vegan Lemon Bars
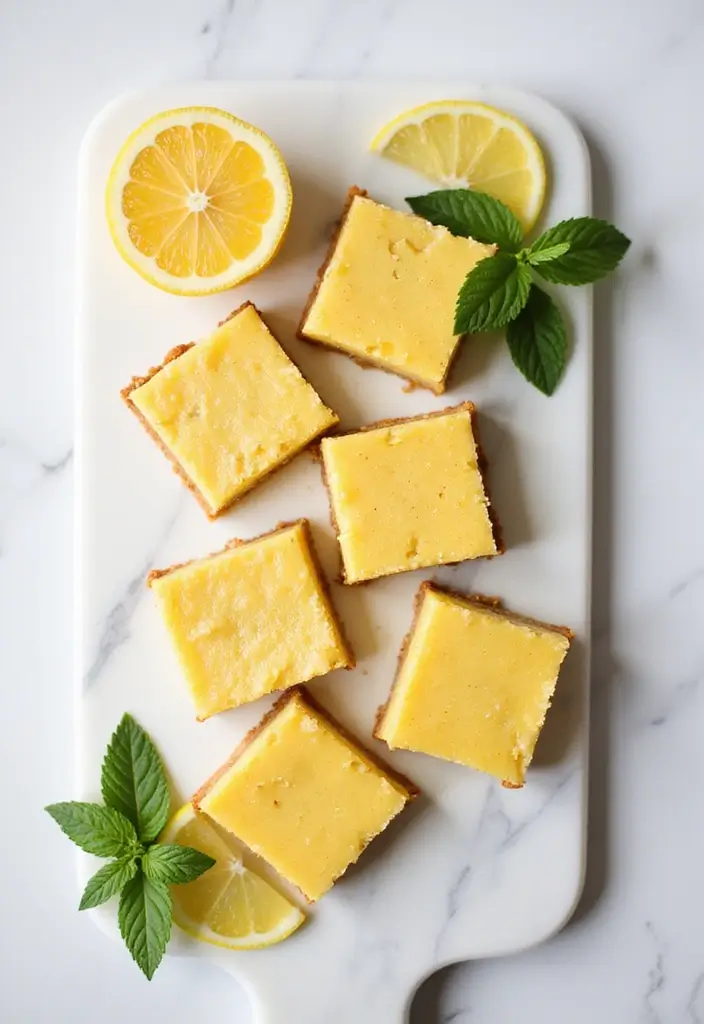
Brighten your day with these raw vegan lemon bars. They strike the perfect balance between tangy and sweet, making them a refreshing dessert choice. Imagine biting into a creamy lemon filling that bursts with citrus flavors, all resting on a crunchy nut-based crust. These bars are not only delicious but also healthy and gluten-free, making them a great addition to any gathering.
Let’s dive into the recipe so you can whip up a batch in no time!
Recipe Overview:
– Servings: 16
– Prep Time: 15 minutes
– Total Time: 15 minutes
– Calories: 180 per bar
Nutrition Information:
– Protein: 3g
– Fat: 14g
– Carbohydrates: 15g
Ingredients:
– 1 cup cashews (soaked)
– 1 cup almonds
– ½ cup pitted dates
– ½ cup fresh lemon juice
– ½ cup coconut oil (melted)
– Zest from 1 lemon
Instructions:
1. In a food processor, combine the almonds and dates. Blend until the mixture is crumbly.
2. Press this crumbly mix into the bottom of a lined square dish to form the crust.
3. Blend the soaked cashews, fresh lemon juice, melted coconut oil, and lemon zest until smooth and creamy.
4. Pour the lemon filling over the crust, spreading it evenly.
5. Refrigerate for at least 2 hours until set. Then, slice into bars and enjoy!
For an extra touch of sweetness, you can add a tablespoon of maple syrup to the filling. And don’t forget to garnish with lemon zest or edible flowers for a beautiful presentation.
FAQs:
– How long do these bars last? They can last up to a week in the fridge, but they are best enjoyed fresh.
– Can I use bottled lemon juice? While you can, fresh lemon juice gives the best flavor.
Now you’re ready to make these delightful treats! Enjoy sharing them with friends or keeping them all to yourself.
Raw Vegan Lemon Bars
Editor’s Choice

Hamilton Beach Food Processor & Vegetable Chopper for Slicing, Shredding…
 Amazon$46.98
Viva Naturals Organic Coconut Oil – Unrefined, Cold-Pressed Extra Virgin…
 Amazon$9.99
4. Chocolate Avocado Mousse
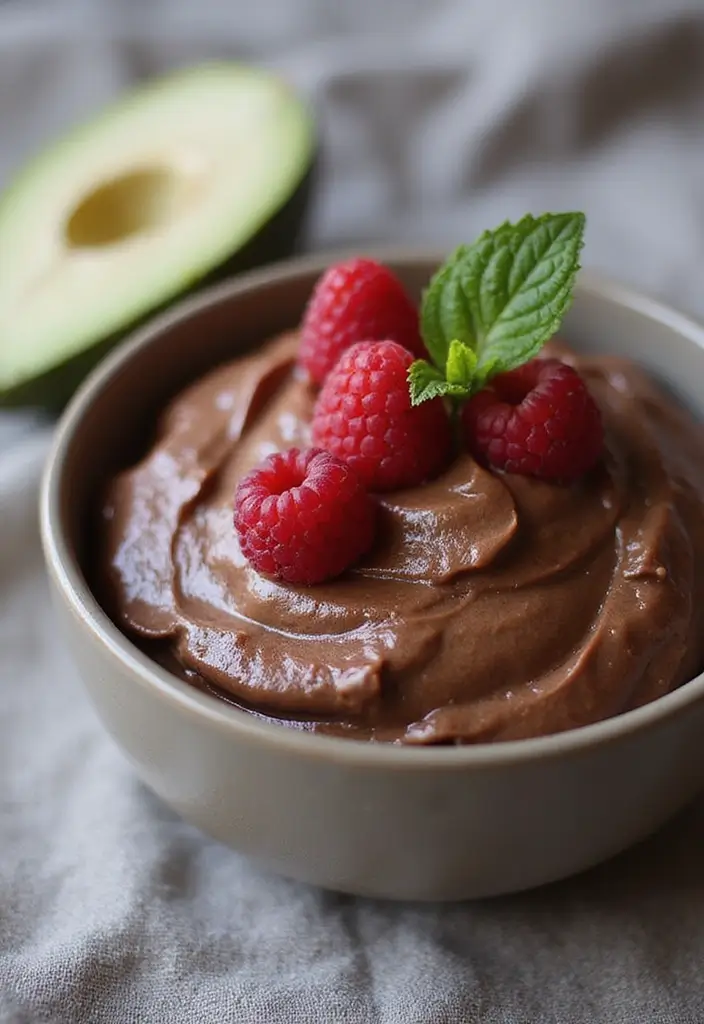
Discover a delightful twist on dessert with this Chocolate Avocado Mousse. Creamy and rich, this treat is not only indulgent but also surprisingly good for you. By using ripe avocados as the main ingredient, you get a dessert loaded with healthy fats that satisfy your sweet cravings without the guilt. The blend of cocoa powder and your choice of sweetener creates a luscious texture and flavor that will leave you wanting more.
Let’s dive into the easy recipe!
Recipe Overview:
– Servings: 4
– Prep Time: 10 minutes
– Total Time: 10 minutes
– Calories: 200 per serving
Nutrition Information:
– Protein: 3g
– Fat: 14g
– Carbohydrates: 18g
Ingredients:
– 2 ripe avocados
– ½ cup cocoa powder
– ¼ cup maple syrup or agave
– 1 tsp vanilla extract
– A pinch of sea salt
Instructions:
1. Cut the avocados in half and scoop the flesh into a blender.
2. Add the cocoa powder, maple syrup, vanilla, and sea salt to the blender.
3. Blend everything until it’s smooth and creamy, stopping to scrape down the sides if needed.
4. Taste the mousse and add more sweetener if you prefer it sweeter.
5. Spoon the mixture into serving dishes and chill in the fridge for about 30 minutes.
6. Serve topped with fresh berries or a dollop of coconut whipped cream for an extra treat!
Make sure to choose perfectly ripe avocados for the best flavor and texture. If you’re feeling fancy, sprinkle on some crushed nuts or coconut flakes for a delightful crunch.
FAQs:
– Can I use different sweeteners? Yes! Honey or agave syrup works well too.
– How long can I keep the mousse? It’s best enjoyed within two days, but you can store it in the fridge.
Enjoy this guilt-free dessert that feels like a treat! You’ll love how simple and satisfying it is.
Chocolate Avocado Mousse
Editor’s Choice

365 by Whole Foods Market, Organic Cocoa Powder, Unsweetened, 8 Ounce
 AmazonCheck Price
Butternut Mountain Farm Pure Vermont Maple Syrup, Grade A, Dark Color, R…
 Amazon$17.97
So Delicious Dairy Free CocoWhip Original, Vegan, Non-GMO Project Verifi…
 Amazon$6.79
5. Raw Berry Crumble
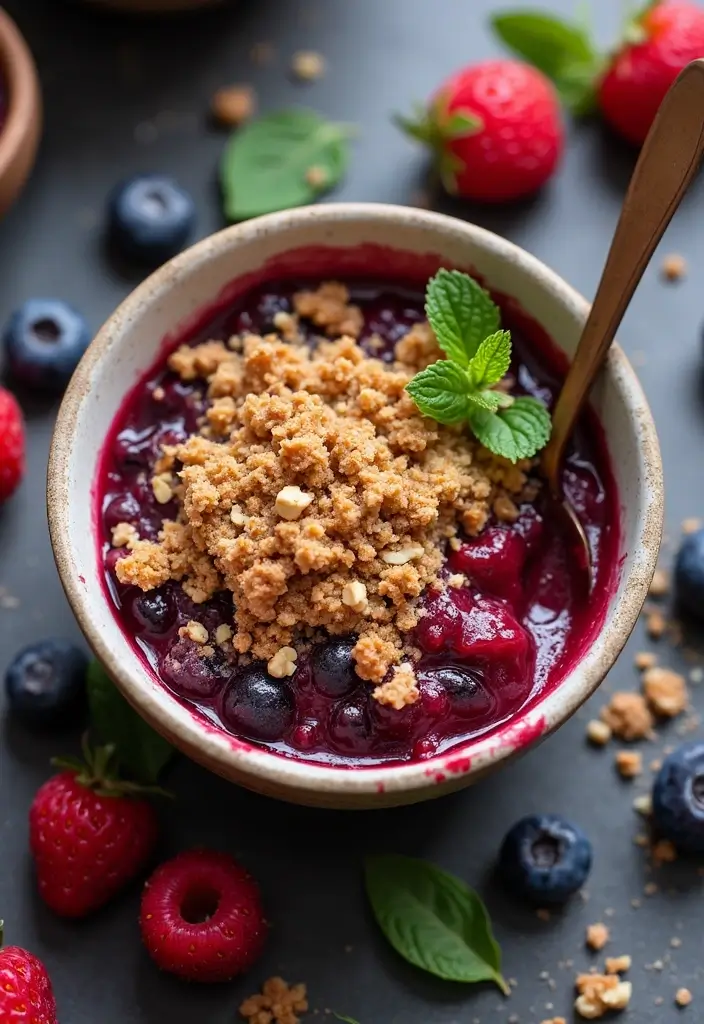
Treat yourself to a delightful Raw Berry Crumble that is not only delicious but also visually stunning. Imagine a vibrant mix of fresh berries sitting under a crunchy nut and date topping. This dessert is light and satisfying, perfect for those warm days when you want something sweet without the heaviness. Plus, it’s packed with nutrients and antioxidants, making it a guilt-free indulgence!
Here’s what you need to get started:
Recipe Overview:
– Servings: 6
– Prep Time: 15 minutes
– Total Time: 15 minutes
– Calories: 180 per serving
Nutritional Information:
– Protein: 2g
– Fat: 8g
– Carbohydrates: 24g
Ingredients:
– 2 cups mixed berries (think strawberries, blueberries, raspberries)
– 1 cup raw almonds
– 1 cup pitted dates
– 1 tsp cinnamon
Instructions:
1. Start by pulsing the almonds in a food processor until they’re crumbly. Add the pitted dates and cinnamon, mixing until combined but still chunky.
2. Layer your fresh berries at the bottom of a serving dish.
3. Generously sprinkle the nut crumble over the berries.
4. Chill the dessert for 10 minutes before serving to let the flavors meld together.
Feel free to switch up the fruits based on what’s in season. If you have a sweet tooth, drizzle a bit of maple syrup on top for added sweetness!
FAQs:
– Can I use frozen berries? Yes, just be sure to thaw them out before layering.
– How long does it last? This crumble is best enjoyed fresh but can be kept in the fridge for a day.
This Raw Berry Crumble is not just easy to make; it’s a perfect way to impress your guests too! Enjoy every bite of this healthy treat.
Raw Berry Crumble
Editor’s Choice

Electric Salt and Pepper Grinder Set Automatic Battery Pepper Mill Shake…
 Amazon$20.69
Blue Diamond Almonds Whole Natural Raw Snack Nuts, 40 Oz Resealable Bag …
 Amazon$14.98
6. Chocolate Chip Cookies

Indulge in the nostalgia of childhood with these delightful vegan gluten-free chocolate chip cookies! Imagine soft, chewy bites filled with rich chocolate that melt in your mouth. These cookies are perfect for sharing with friends or enjoying during a quiet moment at home. Made primarily with almond flour and sweetened with coconut sugar, they offer a healthier twist without sacrificing that comforting cookie flavor you love.
Here’s how to make them:
Recipe Overview:
– Servings: 12
– Prep Time: 15 minutes
– Cook Time: 10 minutes
– Total Time: 25 minutes
– Calories: 130 per cookie
Nutrition Information:
– Protein: 2g
– Fat: 6g
– Carbohydrates: 18g
Ingredients:
– 2 cups almond flour
– 1/2 cup coconut sugar
– 1/4 cup melted coconut oil
– 1/4 cup almond milk
– 1 tsp vanilla extract
– 1 tsp baking soda
– 1/2 cup vegan chocolate chips
Instructions:
1. Preheat your oven to 350°F (175°C) and line a baking sheet with parchment paper.
2. In a large bowl, combine almond flour, coconut sugar, baking soda, and a pinch of salt.
3. Add the melted coconut oil, almond milk, and vanilla extract. Stir until everything is well mixed.
4. Gently fold in the vegan chocolate chips until evenly distributed.
5. Drop spoonfuls of dough onto the prepared baking sheet, spacing them apart.
6. Bake for 10-12 minutes or until the edges are golden. Let them cool before enjoying!
Tips for Perfect Cookies:
– For a chewier texture, be careful not to overbake.
– Feel free to experiment! Add nuts or dried fruits for extra flavor.
FAQs:
– Can I use a different flour? Almond flour gives the best texture, but oat flour works too.
– How should I store these cookies? Keep them in an airtight container for up to a week.
With these easy steps, you’re on your way to creating delicious vegan gluten-free chocolate chip cookies that will impress anyone. Enjoy the warmth of home baking, and share your creations with loved ones or savor them all by yourself!
Chocolate Chip Cookies
Editor’s Choice

Blue Diamond Almonds Almond Flour, Gluten Free, Blanched, Finely Sifted,…
 Amazon$9.91
Enjoy Life Baking Dark Chocolate Morsels, Dairy Free , Soy Free, Nut Fre…
 Amazon$5.84
7. Vegan Peanut Butter Cups
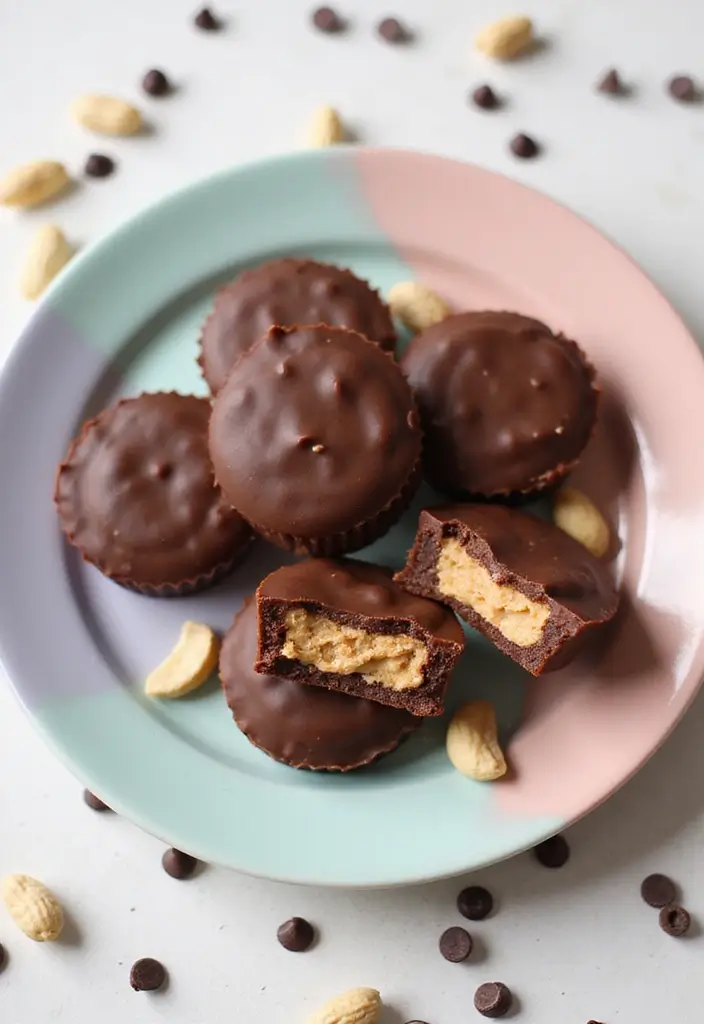
Craving something sweet that satisfies both your taste buds and your dietary needs? Look no further than these delightful vegan peanut butter cups! Combining creamy peanut butter with rich dark chocolate, these treats are simple to whip up. With just a handful of ingredients, you’ll have a delicious snack ready in no time. Perfect for a midday pick-me-up or a late-night indulgence!
Here’s how to make them:
Recipe Overview:
– Servings: 6
– Prep Time: 10 minutes
– Cook Time: 20 minutes
– Total Time: 30 minutes
– Calories: 210 per cup
Nutrition Information:
– Protein: 6g
– Fat: 18g
– Carbohydrates: 9g
Ingredients:
– 1 cup dark chocolate chips (dairy-free)
– 1/2 cup crunchy peanut butter
– 1 tablespoon maple syrup
– 1/2 teaspoon vanilla extract
Instructions:
1. Melt the dark chocolate using a double boiler or microwave, stirring until smooth.
2. Line a muffin tin with cupcake liners. Pour a thin layer of melted chocolate into the bottom of each liner and freeze for 10 minutes to set.
3. In a bowl, combine the peanut butter, maple syrup, and vanilla. Stir until smooth.
4. Spoon the peanut butter mixture over the set chocolate. Then, cover with more melted chocolate.
5. Freeze again for about 20 minutes until firm.
Tips for success:
– Use natural peanut butter to keep out added sugars and oils.
– Try almond butter or sun butter for a tasty twist!
FAQs:
– Can I make these ahead of time? Yes! They store well in the freezer for a quick treat.
– What if I don’t like peanut butter? No problem! Substitute with your favorite nut or seed butter.
These vegan peanut butter cups are not just delicious; they’re also easy to customize. Enjoy making them your own!
Vegan Peanut Butter Cups
Editor’s Choice

Enjoy Life Baking Dark Chocolate Morsels, Dairy Free, Soy Free, Nut Free…
 AmazonCheck Price
365 by Whole Foods Market, Organic Creamy Peanut Butter, Unsweetened & U…
 Amazon$4.49
24 Pack Silicone Baking Cups Reusable Muffin Liners Non-Stick Cup Cake M…
 Amazon$7.74
8. Raw Chocolate Truffles

Indulge your sweet tooth with these irresistible raw chocolate truffles! They’re not just a quick fix for your chocolate cravings; they’re also packed with wholesome ingredients that make them a guilt-free delight. With just a handful of natural components, you can create these decadent treats. Feel free to jazz them up with your favorite toppings—think crushed nuts or coconut flakes—for a personal touch!
Recipe Overview:
– Servings: 12
– Prep Time: 15 minutes
– Total Time: 15 minutes
– Calories: 100 per truffle
Nutrition Information:
– Protein: 2g
– Fat: 7g
– Carbohydrates: 10g
Ingredients:
– 1 cup raw almonds
– 1/2 cup pitted dates
– 1/4 cup cocoa powder
– 1/4 cup almond butter
– 1 tsp vanilla extract
Instructions:
1. Start by adding the raw almonds to a food processor. Blend them until they reach a fine flour-like consistency.
2. Next, toss in the pitted dates, cocoa powder, almond butter, and vanilla extract. Process everything until you have a sticky dough.
3. Roll the mixture into small balls. Then, coat them with your choice of toppings, like chopped nuts or shredded coconut.
4. Arrange the truffles on a baking sheet and refrigerate for at least one hour to firm up.
Want to elevate the flavor? Add spices like cinnamon for warmth or a hint of chili powder for a kick. Or sprinkle in some espresso powder for a delightful mocha twist.
FAQs:
– How long do these truffles last? Store them in the fridge for up to two weeks.
– Can I freeze them? Yes! They freeze beautifully, making them perfect for future cravings.
These raw chocolate truffles are not only a delicious treat but also a fun way to experiment with flavors. Enjoy making them, and let your creativity shine!
Raw Chocolate Truffles
Editor’s Choice

365 by Whole Foods Market, Organic Creamy Almond Butter, 16 Ounce
 Amazon$13.99
9. Banana Oatmeal Cookies
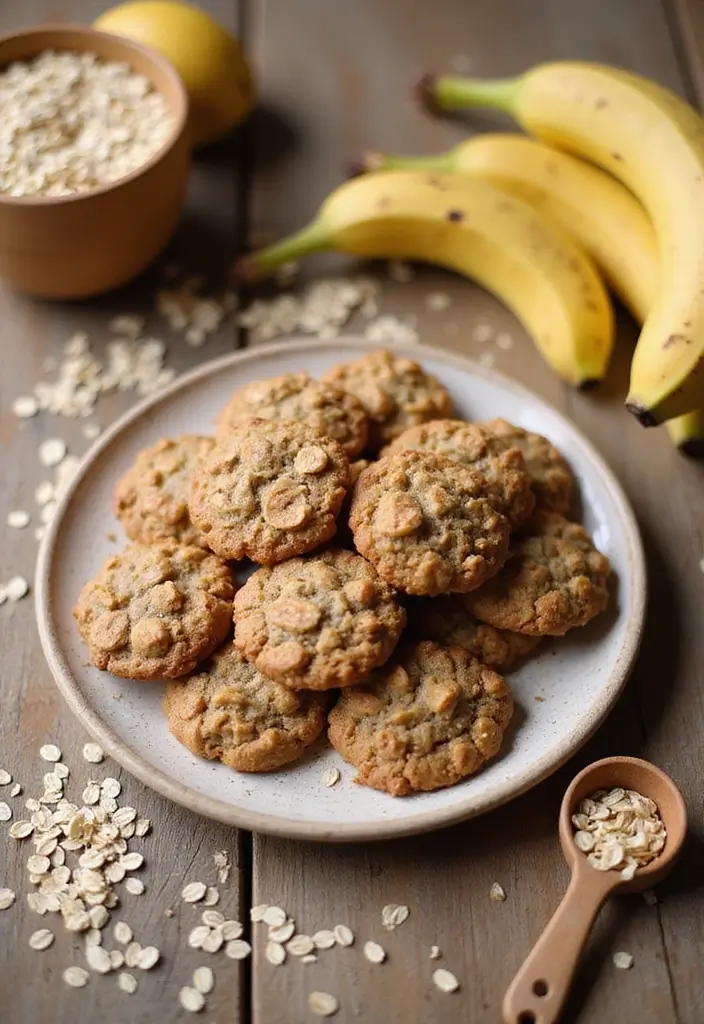
Are you looking for a delicious way to use those overripe bananas sitting on your counter? Look no further! These Banana Oatmeal Cookies are your answer. They are soft, chewy, and packed with sweet banana flavor. Even better, they are both vegan and gluten-free, making them a treat everyone can enjoy. Plus, they require just a handful of simple ingredients.
Let’s get baking! Here’s what you need to whip up a batch of these delightful cookies:
Ingredients:
– 2 ripe bananas, mashed
– 1 ½ cups gluten-free oats
– 1/4 cup almond butter
– 1/4 cup maple syrup
– 1 tsp vanilla extract
Instructions:
1. Preheat your oven to 350°F (175°C) and line a baking sheet with parchment paper.
2. In a mixing bowl, combine the mashed bananas, oats, almond butter, maple syrup, and vanilla. Mix until everything is well blended.
3. Scoop spoonfuls of the dough onto your prepared baking sheet, spacing them out.
4. Bake for 15 minutes or until they turn golden brown.
5. Once baked, let them cool before you dive in!
These cookies are customizable too! Add nuts or dried fruits for a fun twist. Store any leftovers in an airtight container for up to a week to keep them fresh.
FAQs:
– Can I use a different nut butter? Absolutely! Peanut butter or any nut butter you love will work.
– Are they gluten-free? Yes, just make sure to use certified gluten-free oats.
Enjoy these easy-to-make cookies as a snack or a sweet treat after dinner. With their wholesome ingredients, you can feel good about indulging!
Banana Oatmeal Cookies
Editor’s Choice

Bob’s Red Mill Gluten Free Old Fashioned Rolled Oats, 32oz (Pack of 4) -…
 Amazon$23.92
Butternut Mountain Farm Pure Vermont Maple Syrup, Grade A, Dark Color, R…
 Amazon$17.97
10. Raw Pumpkin Pie Bites
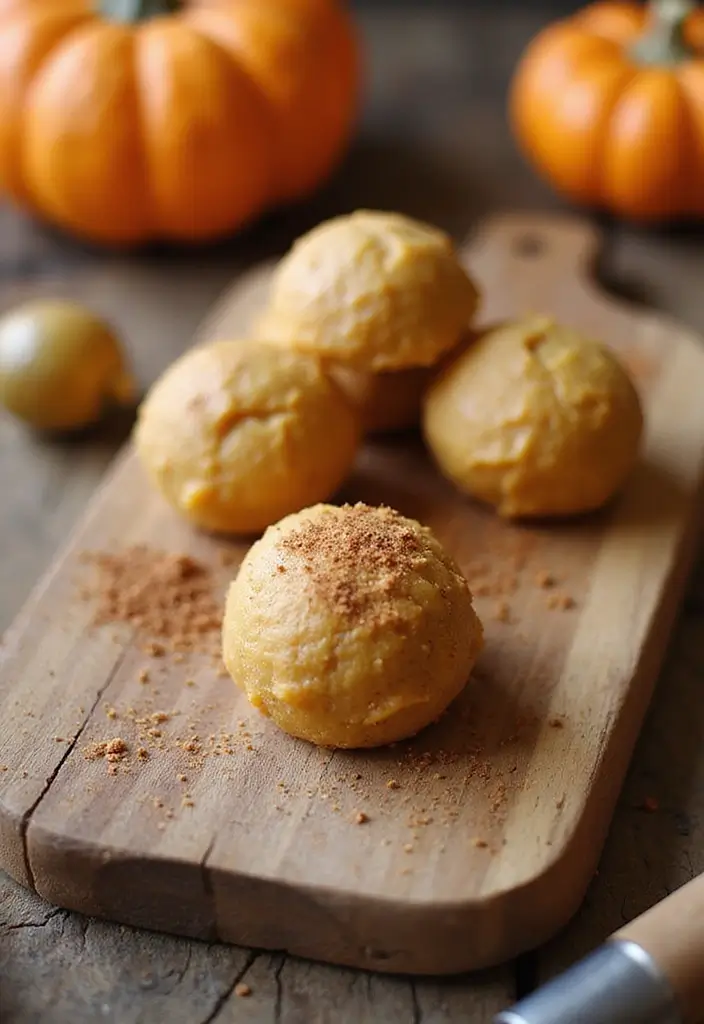
Indulge in the deliciousness of fall with these delightful Raw Pumpkin Pie Bites. They capture the classic flavors of pumpkin pie in a bite-sized treat that’s perfect for any sweet craving. Rich and creamy, these bites are packed with wholesome ingredients, making them a guilt-free dessert option for gatherings or a cozy night in.
These little treats are not only gluten-free but also vegan, ensuring everyone can enjoy them. Imagine the warm spices of pumpkin pie filling your kitchen as you whip these up in just 20 minutes. Each bite is a creamy explosion of flavor, and with only 90 calories, they fit perfectly into a healthy snack routine.
Here’s what you need to make these tasty bites:
Ingredients:
– 1 cup raw cashews (soaked for 2-4 hours)
– 1 cup pitted dates
– 1 cup pumpkin puree
– 1 tsp pumpkin spice
– 1 tbsp maple syrup
Instructions:
1. In a food processor, blend the soaked cashews and pitted dates until smooth and creamy.
2. Add the pumpkin puree, pumpkin spice, and maple syrup. Blend again until everything combines perfectly.
3. Scoop the mixture and roll it into small balls, about the size of a tablespoon.
4. Chill the bites in the refrigerator for at least an hour before serving.
For an extra crunch, roll the bites in crushed pecans or walnuts. You can also drizzle some coconut cream on top for an added treat.
FAQs:
– How long do they last? Store them in the fridge for up to a week.
– Can I freeze them? Yes! They freeze well for up to a month, perfect for meal prep or unexpected guests.
Try these Raw Pumpkin Pie Bites for a healthy dessert that brings joy and flavor to your day. They’re simple to make and a delightful way to enjoy the essence of pumpkin pie without all the fuss!
Raw Pumpkin Pie Bites
Editor’s Choice

Hamilton Beach Food Processor & Vegetable Chopper for Slicing, Shredding…
 AmazonEUR 40.61
Raw Organic JUMBO Cashew 1lb, 100% Natural, Fairtrade, Non-GMO
 AmazonCheck Price
11. Matcha Coconut Energy Balls
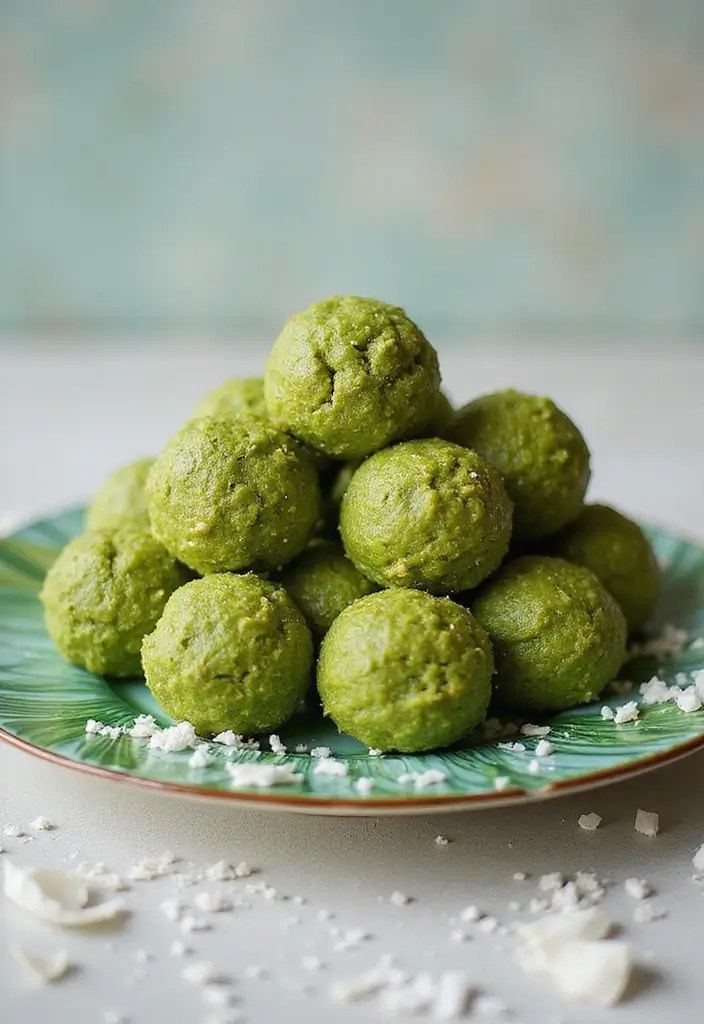
Feeling low on energy? Try these Matcha Coconut Energy Balls for a delicious boost! They combine the creamy goodness of coconut with the earthy flavor of matcha. This snack is perfect for busy days or a quick pre-workout treat. Plus, the bright green hue of matcha is not just pretty; it packs a punch of antioxidants, keeping you healthy while satisfying your sweet tooth.
Recipe Overview:
– Servings: 12
– Prep Time: 15 minutes
– Total Time: 15 minutes
– Calories: 80 per ball
Nutritional Information:
– Protein: 2g
– Fat: 5g
– Carbohydrates: 9g
Ingredients:
– 1 cup medjool dates, pitted
– 1 cup almond meal
– 1/4 cup shredded coconut
– 2 tablespoons matcha powder
Instructions:
1. Begin by placing the pitted medjool dates, almond meal, shredded coconut, and matcha powder in a food processor. Blend until the mixture becomes a sticky dough.
2. Next, roll the mixture into small balls. For an extra touch, dust them with a bit of shredded coconut.
3. Finally, refrigerate your energy balls for about 30 minutes to help them firm up. Enjoy them chilled!
If you want to switch things up, feel free to substitute almond meal with your favorite nuts or seeds.
Storage Tips:
– Keep these energy balls in the fridge for a quick, healthy snack. They will last up to two weeks in an airtight container.
Frequently Asked Questions:
– Can I use a different sweetener? Absolutely! Maple syrup or honey works well as alternatives.
– How long can I store them? They stay fresh for up to two weeks when stored properly.
These energy balls are not just easy to make; they’re also a tasty way to keep your energy up throughout the day. Try them out and feel the difference!
Matcha Coconut Energy Balls
Editor’s Choice

Hamilton Beach Food Processor & Vegetable Chopper for Slicing, Shredding…
 Amazon$46.98

Amazon Basics Tritan Plastic Food Storage Containers – Tritan Plastic Lo…
 Amazon$31.46
12. Raw Chewy Granola Bars
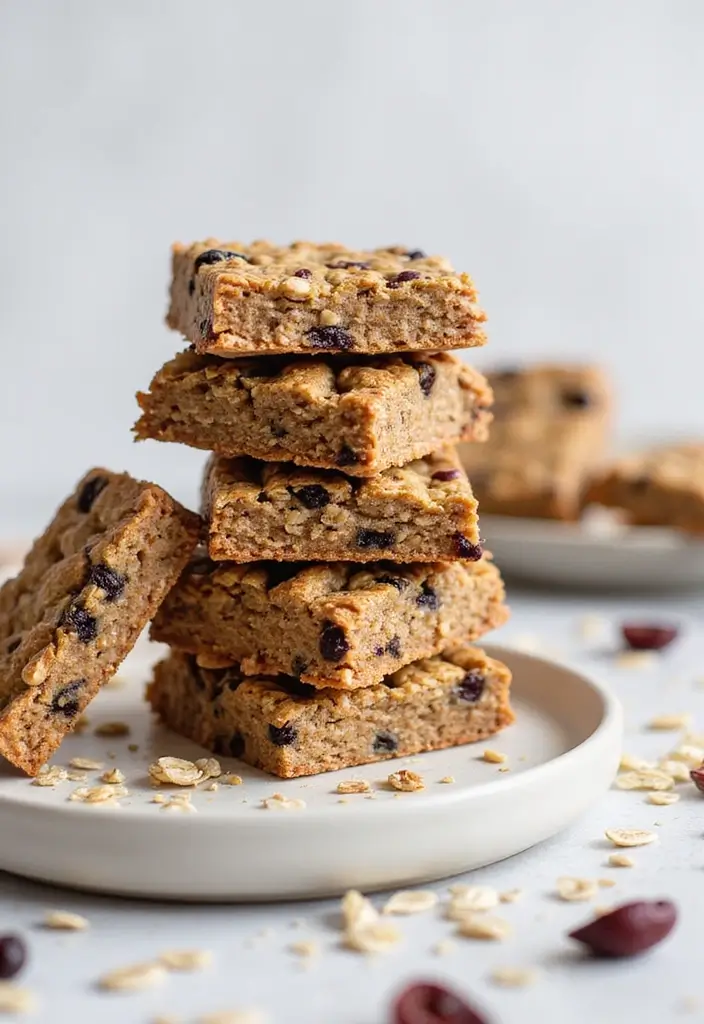
Enjoy the perfect pick-me-up with these delicious raw chewy granola bars. They’re not just a treat; they’re a powerhouse of energy, making them ideal for breakfast or as a snack during your busy day. With a delightful combination of oats, nuts, and dried fruits, every bite bursts with flavor. Plus, they’re gluten-free and dairy-free, so they fit perfectly into a variety of diets!
Here’s what you need to know to whip up a batch in no time! You can make 10 bars with just 15 minutes of prep. Not only are these bars easy to prepare, but they also provide a substantial 200 calories each. This means you can fuel your day without any fuss.
Ingredients:
– 1 cup rolled oats
– 1/2 cup almond butter
– 1/2 cup pitted dates
– 1/2 cup dried fruit (like raisins or cranberries)
Instructions:
1. Start by placing the pitted dates in a food processor. Blend until they form a smooth paste.
2. Next, add the almond butter and rolled oats. Blend again until everything is well combined.
3. Pour in your choice of dried fruit and stir with a spatula until mixed.
4. Firmly press this mixture into a lined baking dish.
5. Chill in the refrigerator for 2 hours, then cut into bars.
Feel free to customize these bars! Add seeds like chia or flax for extra nutrition, or mix in different nuts for variety. They’re easy to wrap up for a quick grab-and-go snack, making them perfect for busy mornings or afternoon cravings.
FAQs:
– Can I use other nut butters? Yes, any nut or seed butter you love will work great!
– How do I store them? Keep them in an airtight container in the fridge for up to a week.
With these simple steps, you can enjoy a healthy, homemade treat that satisfies your sweet tooth and keeps you energized all day long!
Raw Chewy Granola Bars
Editor’s Choice

Electric Salt and Pepper Grinder Set Automatic Battery Pepper Mill Shake…
 Amazon$20.69
50 Pack (100-Piece) 32 oz Meal Prep Containers Reusable with Lids 3-Comp…
 Amazon$21.99
13. Fruity Chia Seed Pudding
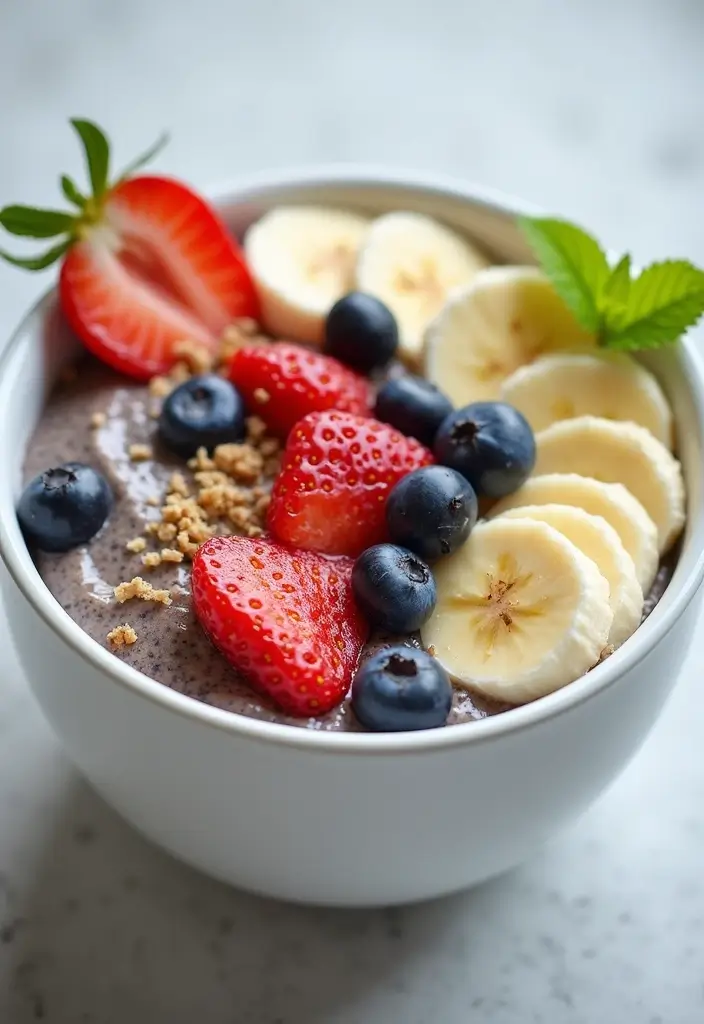
Treat yourself to a delightful bowl of fruity chia seed pudding! This easy dessert is not only creamy but also packed with nutrients. Chia seeds work their magic by soaking up liquid, creating a wonderful texture that’s both satisfying and refreshing. You can customize it with your favorite fruits, making it a perfect treat any time of the day.
To whip up this delicious dessert, you’ll need just a few ingredients and minimal prep time. In about 10 minutes, you can have a satisfying pudding ready to chill. Let’s dive into the recipe details so you can enjoy this wholesome dessert.
Recipe Overview:
– Servings: 4
– Prep Time: 10 minutes
– Total Time: 10 minutes
– Calories: 150 per serving
Nutritional Information:
– Protein: 4g
– Fat: 8g
– Carbohydrates: 20g
Ingredients:
– 1/2 cup chia seeds
– 2 cups almond milk (or any plant-based milk)
– 2 tbsp maple syrup (adjust to taste)
– 1 tsp vanilla extract
– Fresh fruit for topping (try berries, bananas, or mango)
Instructions:
1. In a medium bowl, combine chia seeds, almond milk, maple syrup, and vanilla extract.
2. Stir the mixture well, then let it sit for 5 minutes. Stir again to prevent clumping.
3. Cover the bowl and refrigerate for at least 2 hours, or overnight for the best texture.
4. When ready to serve, spoon the pudding into bowls and top with your choice of fresh fruits.
Feel free to adjust the sweetness by adding more or less maple syrup. For an extra creamy treat, switch to coconut milk instead of almond milk.
FAQs:
– How long does it last? Enjoy this pudding within 3 days if stored in the fridge.
– Can I use other milks? Absolutely! Any plant-based milk, like oat or soy milk, will work well.
This fruity chia seed pudding is not just a dessert; it’s a versatile dish you can enjoy for breakfast or as a snack. Plus, it’s a great way to sneak in some healthy ingredients while satisfying your sweet tooth!
Fruity Chia Seed Pudding
Editor’s Choice

BetterBody Foods Organic Chia Seeds 2 lbs, 32 Oz, with Omega-3, Non-GMO,…
 Amazon$11.97
Silk Shelf-Stable Almond Milk, Unsweetened Vanilla, Dairy-Free, Vegan, N…
 Amazon$11.27
Butternut Mountain Farm Pure Vermont Maple Syrup, Grade A, Dark Color, R…
 Amazon$17.97
14. Raw Chocolate Chip Cookie Dough
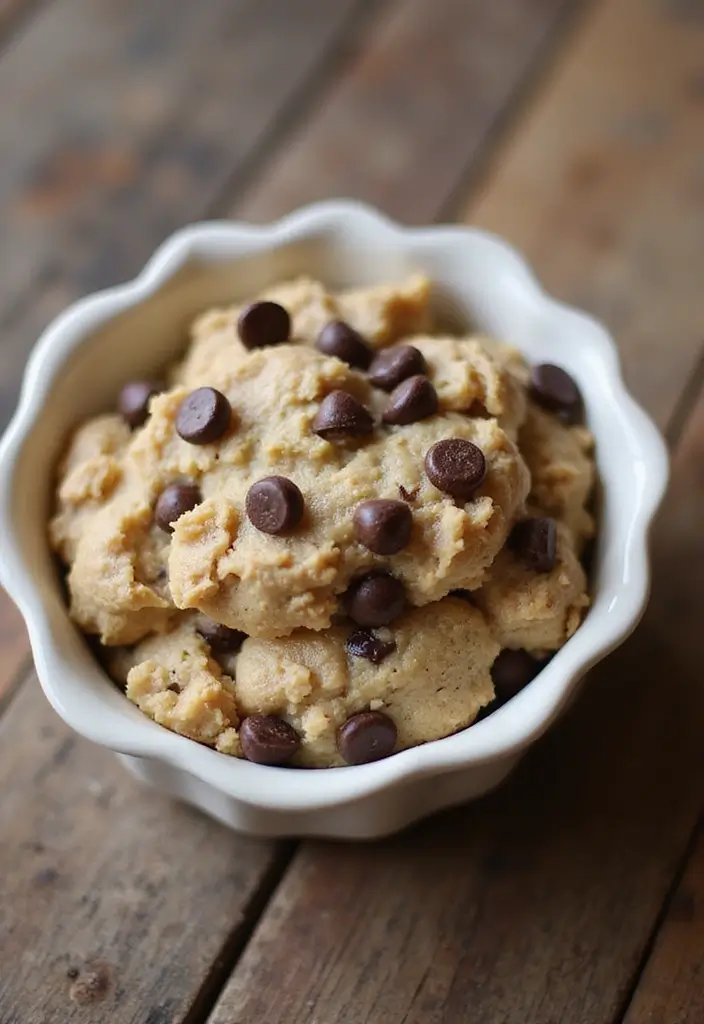
Satisfy your sweet tooth without the worry with this delightful raw chocolate chip cookie dough! Made from wholesome ingredients, this indulgence is safe to eat raw, offering a delicious treat for your late-night cravings. You’ll love how easy it is to whip up, and it’s a healthier option that still hits the spot!
Recipe Overview:
– Servings: 8
– Prep Time: 10 minutes
– Total Time: 10 minutes
– Calories: 150 per serving
Nutrition Information:
– Protein: 3g
– Fat: 8g
– Carbohydrates: 18g
Ingredients:
– 1 cup almond flour
– 1/2 cup maple syrup
– 1/4 cup coconut oil (melted)
– 1/2 cup dairy-free chocolate chips
– 1 tsp vanilla extract
Instructions:
1. In a medium bowl, mix together the almond flour, maple syrup, melted coconut oil, and vanilla extract until it’s well combined.
2. Gently fold in the dairy-free chocolate chips.
3. You can enjoy this yummy dough immediately, or chill it in the fridge for a firmer texture.
Feel free to get creative! You can add nuts for crunch or dried fruit for extra sweetness. If you have leftovers, just store them in the fridge, and they’ll be ready for your next craving!
FAQs:
– Can I bake this? Yes, but keep in mind it will change the texture and flavor!
– How long does it last? You can store it in the fridge for up to a week.
This raw chocolate chip cookie dough is not just a treat; it’s a quick, guilt-free dessert that fits into your vegan and gluten-free lifestyle. Enjoy it as is or use it as a topping for your favorite dessert. There are endless ways to savor this delicious dough!
Raw Chocolate Chip Cookie Dough
Editor’s Choice

Blue Diamond Almonds Almond Flour, Gluten Free, Blanched, Finely Sifted,…
 AmazonCheck Price
Enjoy Life Baking Dark Chocolate Morsels, Dairy Free , Soy Free, Nut Fre…
 Amazon$5.84
Viva Naturals Organic Coconut Oil – Unrefined, Cold-Pressed Extra Virgin…
 Amazon$9.99
15. Date and Nut Energy Bars
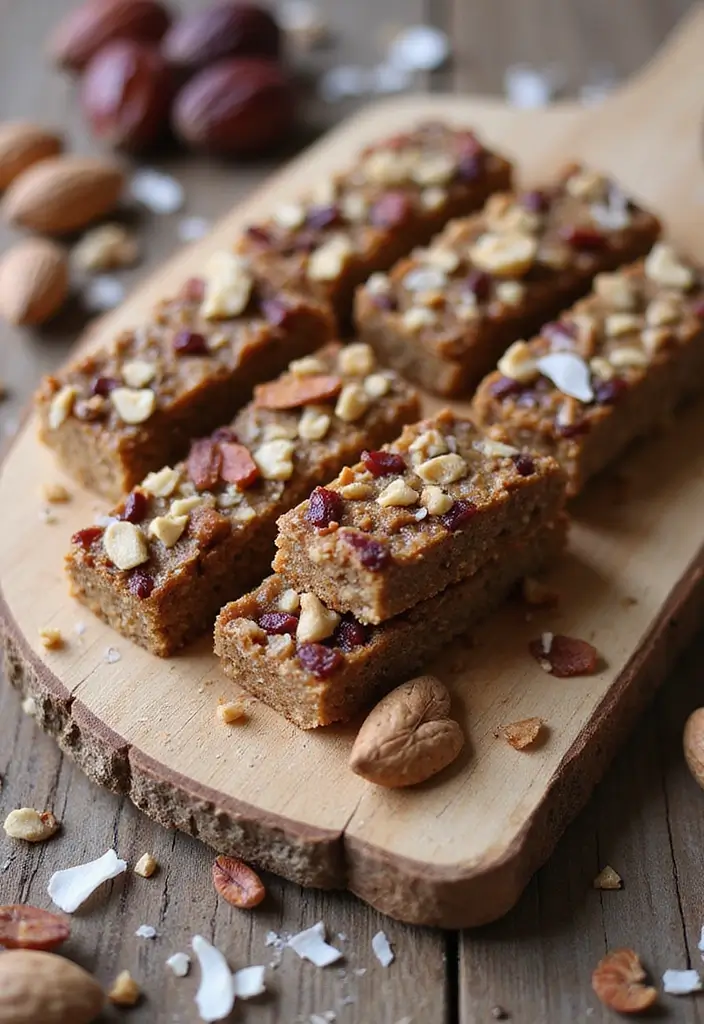
Fuel your day with these Date and Nut Energy Bars. They pack a punch of energy, making them perfect for a quick snack or a revitalizing post-workout treat. With just a few wholesome ingredients, you can whip them up in no time. Just blend, press, and chill—it’s that easy!
Recipe Overview:
– Servings: 10
– Prep Time: 10 minutes
– Total Time: 10 minutes
– Calories: 150 per bar
Nutrition Information:
– Protein: 3g
– Fat: 6g
– Carbohydrates: 23g
Ingredients:
– 1 cup pitted dates
– 1 cup mixed nuts (like almonds, walnuts, and cashews)
– 1/4 cup coconut flakes
– 1 tbsp chia seeds
Instructions:
1. Start by placing the dates and nuts in a food processor. Blend until finely chopped.
2. Next, add the coconut flakes and chia seeds. Pulse until everything is well combined.
3. Press the mixture firmly into a lined baking dish.
4. Chill in the fridge for one hour. Once set, cut into bars.
For a flavor boost, sprinkle in a dash of cinnamon or a splash of vanilla extract. These bars store well in an airtight container in the fridge, ready for you to grab anytime!
FAQs:
– Can I use different nuts? Absolutely! Feel free to swap in your favorites.
– How long do they last? They can stay fresh for up to two weeks in the fridge.
Enjoy these energy bars knowing they are not only delicious but also a healthy option to keep you going throughout your day!
Date and Nut Energy Bars
Editor’s Choice

Hamilton Beach Food Processor & Vegetable Chopper for Slicing, Shredding…
 Amazon$46.98
Airtight Food Storage Containers with Lids, Vtopmart 24 pcs Plastic Kitc…
 Amazon$35.99
BetterBody Foods Organic Chia Seeds 2 lbs, 32 Oz, with Omega-3, Non-GMO,…
 Amazon$11.97
16. Mango Coconut Sorbet

Beat the heat with a bowl of refreshing mango coconut sorbet! This delightful dessert combines the natural sweetness of ripe mangoes with the creamy richness of coconut milk. Perfect for summer gatherings or a quiet evening at home, this vegan and gluten-free treat is sure to impress.
Imagine scooping into this vibrant sorbet, with its tropical flavors dancing on your taste buds. Each spoonful is a mini-vacation, bringing the sun and warmth of the tropics right to your kitchen. Plus, it’s easy to make!
Here’s how to whip it up:
Recipe Overview:
– Servings: 4
– Prep Time: 15 minutes
– Total Time: 4 hours (including freezing)
– Calories: 100 per serving
Nutrition Information:
– Protein: 1g
– Fat: 5g
– Carbohydrates: 15g
Ingredients:
– 2 ripe mangoes, peeled and diced
– 1 cup coconut milk
– 2 tbsp maple syrup
– A squeeze of lime juice
Instructions:
1. In a high-speed blender, combine the mangoes, coconut milk, maple syrup, and lime juice. Blend until smooth and creamy.
2. Pour the mixture into a shallow container and freeze for 4 hours.
3. Every hour, give it a gentle stir to break up any ice crystals. This will keep your sorbet creamy and smooth.
4. When you’re ready to serve, scoop it into bowls and enjoy!
Feel free to add fresh mint leaves as a garnish for an extra pop of color. You can keep this sorbet in the freezer for up to a week, but it’s so delicious, it might not last that long!
FAQs:
– Can I use frozen mangoes? Yes! Just let them thaw for a bit before blending.
– How can I make it sweeter? Simply add more maple syrup to taste.
Now you have a delicious recipe that’s not only easy to make but also a great way to cool off and treat yourself. Enjoy your mango coconut sorbet and the tropical vibes it brings!
Mango Coconut Sorbet
Editor’s Choice

Ninja BL660 Professional Compact Smoothie & Food Processing Blender, 110…
 Amazon$99.99
Food Storage Containers 11.02×8.85×1.81″ Vegetable Organizer 98-oz with …
 Amazon$15.99
Butternut Mountain Farm Pure Maple Syrup From Vermont, Grade A (Prev. Gr…
 AmazonCheck Price
17. Vegan Caramel Sauce
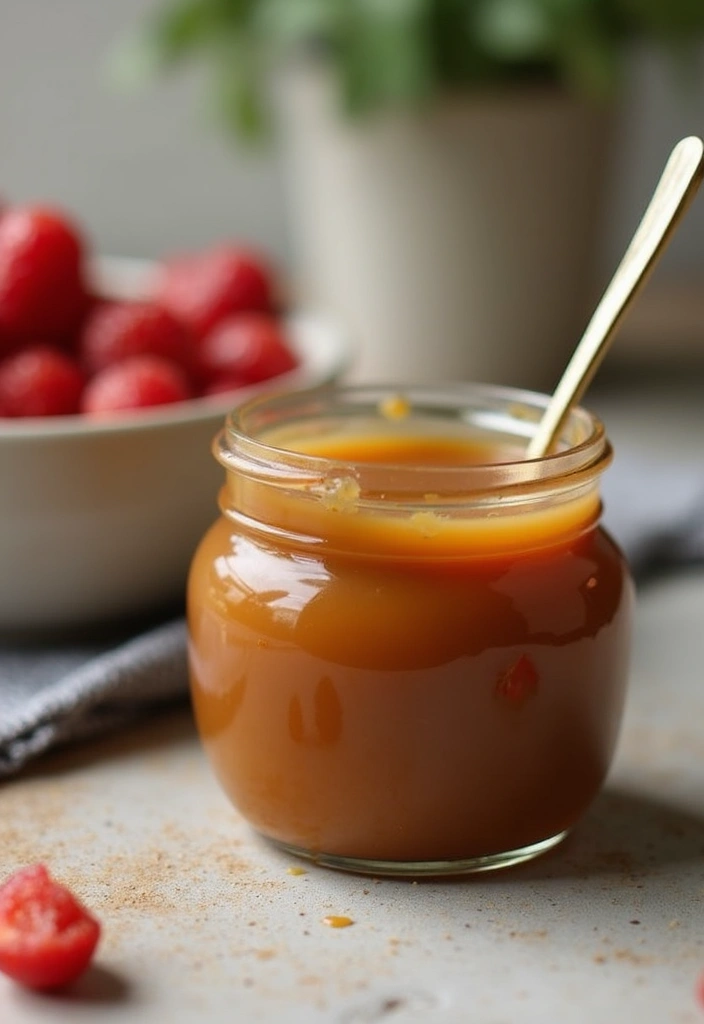
Indulge your sweet tooth with this delightful vegan caramel sauce! It’s creamy, rich, and perfect for adding a touch of joy to your favorite desserts. Imagine drizzling it over a scoop of dairy-free ice cream or pouring it on fluffy pancakes. You’ll love how this simple sauce elevates your treats, making every bite a little more special. Plus, it’s made from wholesome ingredients that you probably already have in your kitchen!
Ready to make it? Here’s what you need:
Recipe Overview:
– Servings: 8
– Prep Time: 10 minutes
– Cook Time: 5 minutes
– Total Time: 15 minutes
– Calories: 70 per tablespoon
Nutrition Information:
– Protein: 0g
– Fat: 4g
– Carbohydrates: 8g
Ingredients:
– 1 cup coconut cream
– 1/2 cup maple syrup
– 1 tsp vanilla extract
– A pinch of sea salt
Instructions:
1. In a saucepan, mix the coconut cream, maple syrup, and sea salt.
2. Heat over medium, stirring for about 5 minutes until the sauce thickens.
3. Remove from heat and stir in the vanilla extract.
4. Let cool, then transfer to a jar. Store in the fridge for up to a week.
To make your sauce thicker, simply simmer it for a bit longer. This caramel is not just for desserts; you can also use it as a topping for oatmeal or in your morning smoothies.
FAQs:
– Can I use other sweeteners? Absolutely! Agave or date syrup can work well too.
– How long will it last? It keeps fresh in the fridge for about a week.
Now you have a delicious vegan caramel sauce that’s quick and easy to make. Enjoy it while it lasts!
Vegan Caramel Sauce
Editor’s Choice

Coco Reàl, Cream of Coconut, 16.9 FL OZ Squeezable Bottle, Individually …
 Amazon$3.58
Butternut Mountain Farm Pure Vermont Maple Syrup, Grade A, Dark Color, R…
 Amazon$17.97
Watkins All Natural Original Gourmet Baking Vanilla, with Pure Vanilla E…
 Amazon$12.35
18. Cinnamon Roll Energy Bites
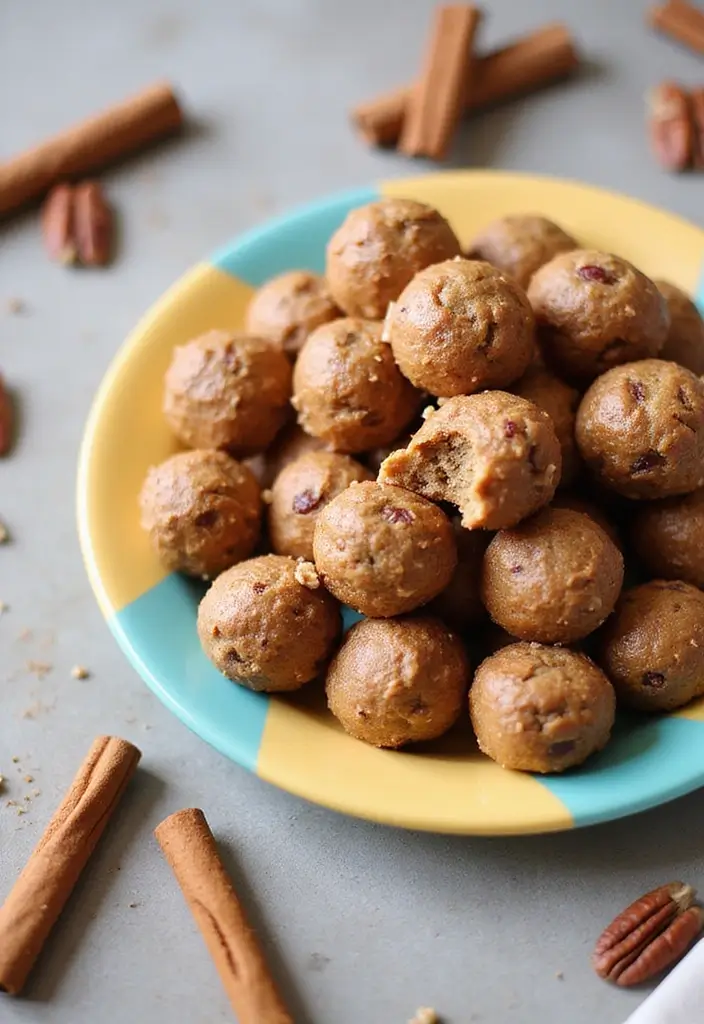
Craving the warm, gooey goodness of cinnamon rolls but want a healthier option? Look no further! These Cinnamon Roll Energy Bites deliver all the sweet, spicy flavors you love in a portable, guilt-free snack. With wholesome ingredients like oats, almond butter, and just the right kick of cinnamon, you can indulge your cravings without derailing your healthy eating goals. Plus, they take only minutes to whip up!
Imagine biting into a soft, chewy ball that tastes like your favorite bakery treat. The blend of textures and flavors will make your taste buds dance. These bites are perfect for a quick snack, an energy boost before a workout, or a satisfying dessert after dinner.
Here’s how to make them:
Recipe Overview:
– Servings: 12
– Prep Time: 10 minutes
– Total Time: 10 minutes
– Calories: 120 per bite
Nutrition Information:
– Protein: 3g
– Fat: 5g
– Carbohydrates: 18g
Ingredients:
– 1 cup rolled oats
– 1/2 cup almond butter
– 1/4 cup maple syrup
– 1 tsp cinnamon
– 1/4 cup chopped pecans
Instructions:
1. In a mixing bowl, combine all the ingredients until well blended. Get your hands in there for a good mix!
2. Roll the mixture into small balls, about the size of a tablespoon, and place them on a baking sheet.
3. Refrigerate them for about 30 minutes to help them firm up.
4. Enjoy right away, or store in an airtight container in the fridge for up to a week.
For an extra touch of sweetness, drizzle a bit of maple syrup over the bites before serving.
FAQs:
– Can I use peanut butter instead? Yes, any nut butter you prefer will work beautifully!
– How long do they last? They’ll stay fresh in the fridge for about a week. Perfect for meal prep!
These easy-to-make energy bites are not just delicious; they also fit perfectly into your vegan and gluten-free lifestyle. Enjoy them anytime you need a pick-me-up!
Did you know? Cinnamon Roll Energy Bites come together in just 5 minutes, and each bite packs bakery flavor with oats, almond butter, and a dash of cinnamon. A vegan gluten free dessert you can grab on the go without guilt.
Cinnamon Roll Energy Bites
Editor’s Choice


365 by Whole Foods Market, Organic Creamy Almond Butter, 16 Ounce
 Amazon$13.99
Butternut Mountain Farm Pure Vermont Maple Syrup, Grade A, Dark Color, R…
 Amazon$17.97
19. Vegan Ice Cream Sandwiches

Beat the heat with scrumptious vegan ice cream sandwiches! These treats are not just fun to make, but they’re also incredibly versatile. You can mix and match your favorite cookies and ice cream flavors, creating a delightful dessert for any occasion. Plus, they are both gluten-free and vegan, making them a guilt-free indulgence for sweet lovers everywhere.
Let’s get started with the recipe! You’ll need just a few simple ingredients to whip up these tasty sandwiches.
Recipe Overview:
– Servings: 6
– Prep Time: 20 minutes
– Cook Time: 10 minutes
– Total Time: 30 minutes
– Calories: 250 per sandwich
Nutrition Information:
– Protein: 3g
– Fat: 12g
– Carbohydrates: 30g
Ingredients:
– 1 batch of gluten-free chocolate chip cookies (check section 6 for the recipe)
– 1 pint of dairy-free ice cream (your favorite flavor will work!)
Instructions:
1. First, bake your batch of gluten-free chocolate chip cookies. Let them cool completely on a wire rack.
2. Next, scoop a generous amount of dairy-free ice cream and place it between two cookies.
3. Gently press down so the ice cream spreads just a bit.
4. If you’re feeling fancy, roll the edges in colorful sprinkles or chopped nuts for extra flair.
5. Finally, pop them in the freezer for 1-2 hours before serving. This step helps them hold their shape.
Feel free to get creative! Try different combinations of cookies and ice cream. Want a classic taste? Use vanilla ice cream with chocolate cookies. Want something fun? Go for mint chocolate chip ice cream with peanut butter cookies.
FAQs:
– Can I use store-bought cookies? Yes! Store-bought gluten-free cookies can save you time and taste great.
– How long do they last? Enjoy them within a week if kept in the freezer.
These vegan ice cream sandwiches are perfect for summer parties or just a sweet treat after dinner. Enjoy every bite!
Vegan Ice Cream Sandwiches
Editor’s Choice

Miss Jones Baking Gluten-Free Chocolate Chip Cookie Mix – More Chocolate…
 Amazon$5.99
Ben & Jerry’s Non-Dairy Chocolate Chip Cookie Dough Frozen Dessert Certi…
 AmazonCheck Price
365 by Whole Foods Market, Rainbow Sprinkles, Vegan, 2.75 Ounce
 Amazon$3.49
20. Strawberry Rhubarb Crumble
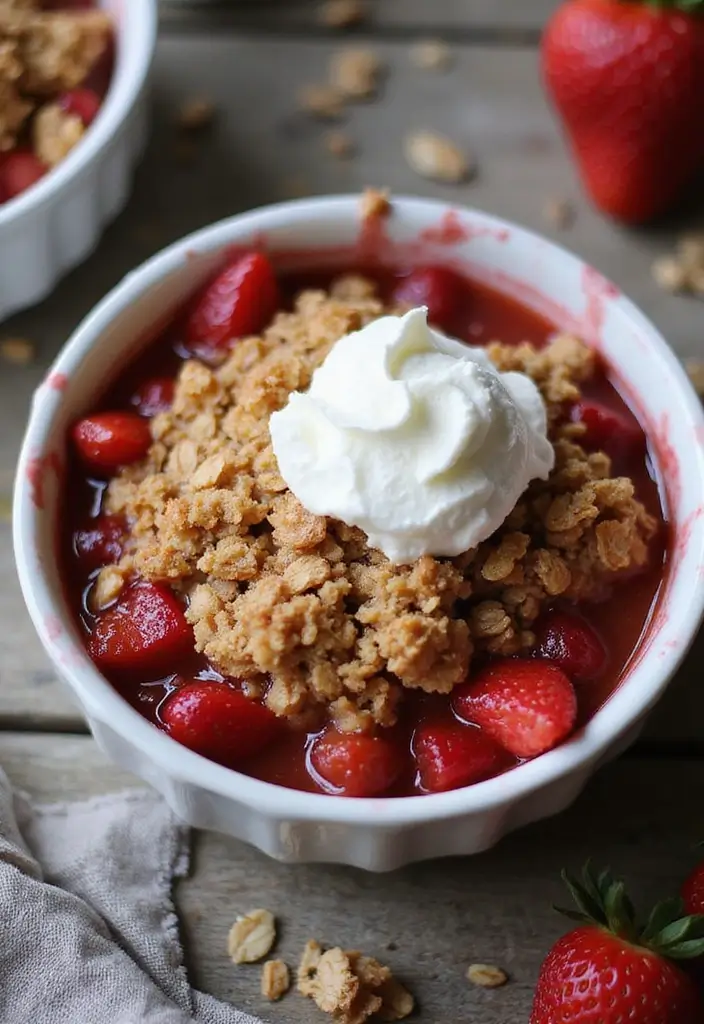
Indulge in the delightful balance of sweet and tart with this Strawberry Rhubarb Crumble. This classic dessert combines juicy strawberries and tangy rhubarb, all covered with a crunchy oat and nut topping. It’s a gluten-free and vegan treat that’s perfect for any occasion. Imagine serving this warm, with the aroma of baked fruit filling your kitchen, tempting everyone to dig in!
Ready to bring this tasty dish to life? Here’s a simple recipe that serves eight and can be whipped up in just 45 minutes. The combination of flavors and textures makes it a favorite, and it’s easy to customize. Love apples or berries? Swap them in for a fun twist!
Recipe Overview:
– Servings: 8
– Prep Time: 15 minutes
– Cook Time: 30 minutes
– Total Time: 45 minutes
– Calories: 180 per serving
Nutrition Information:
– Protein: 3g
– Fat: 8g
– Carbohydrates: 26g
Ingredients:
– 2 cups strawberries (hulled and sliced)
– 2 cups rhubarb (chopped)
– 1/3 cup maple syrup
– 1 cup rolled oats
– 1/2 cup almond flour
– 1/4 cup coconut oil (melted)
Instructions:
1. Preheat your oven to 350°F (175°C).
2. In a large bowl, mix together the strawberries, rhubarb, and maple syrup. Spread this fruity mixture into a baking dish.
3. In another bowl, combine the rolled oats, almond flour, and melted coconut oil until you have a crumbly mixture.
4. Sprinkle the crumble over the fruit layer evenly.
5. Bake for about 30 minutes or until the top is golden brown and the fruit is bubbling.
Serve this crumble warm, and for a special touch, add a dollop of coconut whipped cream on top. You can even prepare it ahead of time and reheat it later, making it a convenient dessert option for busy days!
FAQs:
– Can I use different fruits? Absolutely! Try swapping in apples or your favorite berries for variety.
– How long can I store it? Keep it in the fridge for up to three days, though it’s best enjoyed fresh!
Did you know this vegan gluten-free Strawberry Rhubarb Crumble can be ready in under 40 minutes with a simple oat and nut topping? It’s a crowd-pleasing dessert for any occasion.
Strawberry Rhubarb Crumble
Editor’s Choice

So Delicious Dairy Free CocoWhip Original, Vegan, Non-GMO Project Verifi…
 Amazon$6.79
Blue Diamond Almonds Almond Flour, Gluten Free, Blanched, Finely Sifted,…
 Amazon$9.91
Butternut Mountain Farm Pure Vermont Maple Syrup, Grade A, Dark Color, R…
 Amazon$17.97
21. Chocolate Dipped Fruit

Treat yourself to a delightful snack with chocolate-dipped fruit! This easy-to-make dessert combines the sweetness of fresh fruit with the richness of melted chocolate. Perfect for sharing at parties or enjoying on your own, it’s a treat that everyone will love. Plus, you can use any fruit you like, making it a versatile option for any occasion!
Let’s get into the details. Here’s a quick overview of what you need to know:
Recipe Overview:
– Servings: 6
– Prep Time: 15 minutes
– Total Time: 15 minutes
– Calories: 100 per serving
Nutritional Information:
– Protein: 1g
– Fat: 7g
– Carbohydrates: 11g
Ingredients:
– 1 cup dark chocolate chips (dairy-free)
– 2 cups assorted fruits (strawberries, banana slices, apple slices)
Instructions:
1. Melt the dark chocolate in a double boiler or microwave. Stir until smooth.
2. Dip each piece of fruit into the melted chocolate, covering it halfway or fully.
3. Place the dipped fruit on a sheet of parchment paper to set.
4. Chill in the refrigerator for about 15 minutes or until the chocolate hardens.
Want to make it even better? Here are a few tips:
Enhance your chocolate-dipped fruit:
– Add toppings: Sprinkle chopped nuts or colorful sprinkles on the chocolate before it sets.
– Mix up the fruits: Try using kiwi, pineapple, or oranges for a vibrant display.
FAQs:
– How long do they last? Enjoy them the same day for the best taste, but they can be stored in the fridge for up to a day.
– Can I use milk chocolate? Yes, just ensure it’s dairy-free to keep it vegan.
Dive into this sweet treat and enjoy a burst of flavor with every bite. It’s simple, fun, and a hit for any gathering!
Chocolate Dipped Fruit
Editor’s Choice

GHIRARDELLI Non-Dairy Dark Chocolate Chips for Baking, Premium Baking Ch…
 Amazon$8.49
Reynolds Kitchens Unbleached Parchment Paper Roll, Non Stick Parchment P…
 Amazon$3.39
Fruit Slicer Cup – Strawberry, Banana, Grape Cutter, Egg Slicer for Hard…
 Amazon$6.99
22. Raspberry Almond Thumbprint Cookies

Indulge in the sweet and nutty goodness of Raspberry Almond Thumbprint Cookies. These delightful treats combine a buttery almond base with a tangy raspberry jam, creating a dessert that’s as pleasing to the eyes as it is to the palate. Perfect for any gathering, these gluten-free cookies will impress your friends and family while satisfying your sweet cravings.
Imagine biting into a cookie that’s soft on the inside with a slight crunch on the outside. The rich almond flavor mingles beautifully with the vibrant raspberry jam, making every bite a burst of flavor. These cookies are not just delicious; they are a stunning addition to any dessert table, making them an instant favorite at parties and gatherings.
Ready to bake? Let’s get into the details.
Recipe Overview:
– Servings: 12
– Prep Time: 20 minutes
– Cook Time: 15 minutes
– Total Time: 35 minutes
– Calories: 130 per cookie
Nutrition Information:
– Protein: 3g
– Fat: 6g
– Carbohydrates: 18g
Ingredients:
– 1 cup almond flour
– 1/4 cup coconut oil (melted)
– 1/4 cup maple syrup
– 1/2 cup raspberry jam (make sure it’s vegan)
Instructions:
1. Preheat your oven to 350°F (175°C) and line a baking sheet with parchment paper.
2. In a mixing bowl, stir together the almond flour, melted coconut oil, and maple syrup until well combined.
3. Shape the dough into small balls and place them on the prepared baking sheet.
4. Use your thumb or a small spoon to create an indentation in the center of each ball. Fill this space with raspberry jam.
5. Bake for about 15 minutes, or until the cookies are golden and set. Allow them to cool completely on a wire rack before serving.
Feel free to get creative! Experiment with different jams to find your favorite flavor combination. Keep your cookies fresh by storing them in an airtight container for up to a week.
FAQs:
– Can I use another nut flour? Yes, but almond flour gives the best texture and flavor.
– How long do they last? Enjoy them within a week for the best taste.
These cookies are not just a treat; they’re a fantastic way to enjoy a gluten-free dessert that everyone will love. Get ready to impress with these Raspberry Almond Thumbprint Cookies!
Raspberry Almond Thumbprint Cookies
Editor’s Choice

Blue Diamond Almonds Almond Flour, Gluten Free, Blanched, Finely Sifted,…
 Amazon$9.91
Viva Naturals Organic Coconut Oil – Unrefined, Cold-Pressed Extra Virgin…
 Amazon$9.99
Crofters Fruit Spread – Organic – Premium – Raspberry – 16.5 Oz
 Amazon$4.96
23. Lemon Coconut Energy Bites

Brighten your day with these delightful Lemon Coconut Energy Bites! They’re a refreshing treat that combines zesty lemon and sweet coconut, making them perfect for any time you need a boost. Packed with wholesome ingredients, these bites not only satisfy your sweet tooth but also offer a nutritious snack option that you can feel good about.
Creating these energy bites is quick and easy. In just 15 minutes, you can whip up a batch that makes about 10 servings. With only 90 calories per bite, they’re a guilt-free indulgence. Plus, they’re vegan and gluten-free, making them suitable for various dietary needs.
Here’s how to make your own Lemon Coconut Energy Bites:
Ingredients:
– 1 cup pitted dates
– 1 cup shredded coconut
– 1/4 cup lemon juice
– 1 tsp lemon zest
Instructions:
1. In a food processor, blend together the dates, shredded coconut, lemon juice, and lemon zest.
2. Process until a sticky dough forms.
3. Roll the mixture into small balls, about the size of a tablespoon.
4. Chill the bites in the refrigerator for 30 minutes before enjoying.
To add a special touch, roll the bites in extra shredded coconut for a fun finish. These energy bites can be stored in the fridge for up to a week, making them a great grab-and-go snack!
You might wonder if you can use lemon extract instead of fresh lemon zest. While you can, using fresh zest truly brings out the best flavor. And if you’re curious about their shelf life, they’ll last about a week in the fridge, so you can always have a healthy snack at hand.
These Lemon Coconut Energy Bites are not just tasty; they’re also a wonderful way to energize your day. Enjoy them as a mid-morning snack, a post-workout treat, or even a sweet addition to your lunchbox!
Here’s why you’ll love them:
– Use fresh ingredients for the best flavor
– Choose organic coconut for a healthier option
– Add chia seeds for an extra nutritional boost
– Pack them in lunchboxes for a quick healthy snack
Lemon Coconut Energy Bites
Editor’s Choice

Hamilton Beach Food Processor & Vegetable Chopper for Slicing, Shredding…
 Amazon$46.98
Anthony’s Organic Shredded Coconut, 2 lb, Unsweetened, Gluten Free, Non …
 Amazon$18.29
BetterBody Foods Organic Chia Seeds 2 lbs, 32 Oz, with Omega-3, Non-GMO,…
 Amazon$11.97
24. Vegan Chocolate Cake
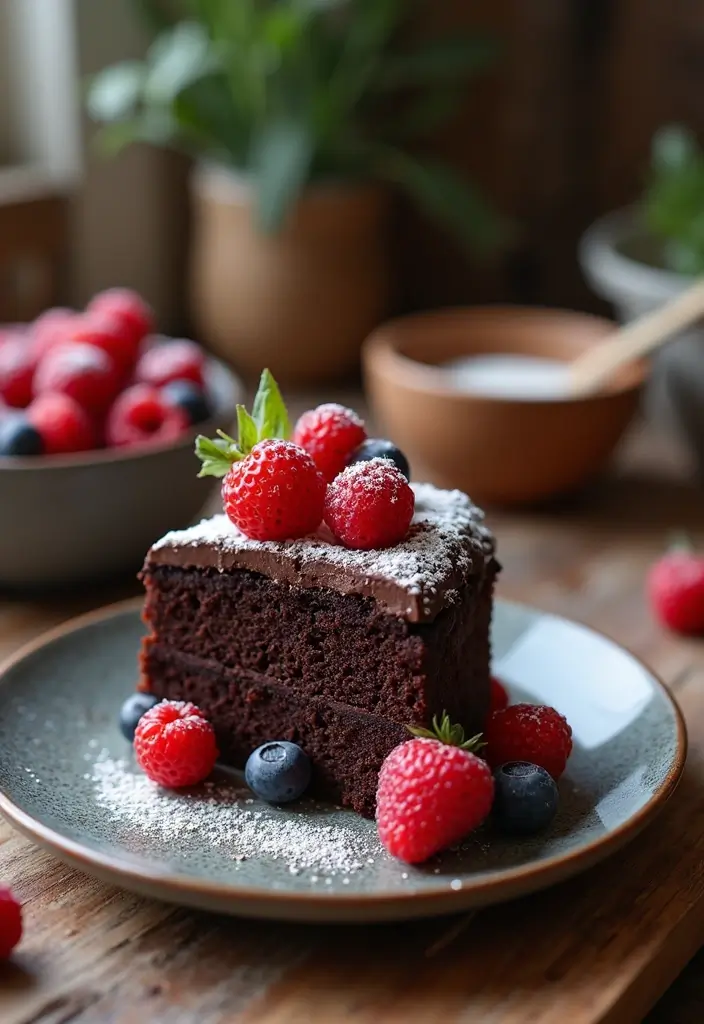
If you’re searching for a dessert that delights without compromising your dietary needs, this vegan chocolate cake is your answer. It’s rich, moist, and incredibly simple to whip up. Perfect for birthdays, holidays, or just a cozy night in, this cake caters to everyone, being both vegan and gluten-free. You can choose to dress it up with a luscious frosting or keep it elegant with a sprinkle of powdered sugar. Either way, your taste buds will thank you!
Let’s dive into the recipe.
Recipe Overview:
– Servings: 8
– Prep Time: 15 minutes
– Cook Time: 30 minutes
– Total Time: 45 minutes
– Calories: 250 per slice
Nutrition Information:
– Protein: 4g
– Fat: 10g
– Carbohydrates: 36g
Ingredients:
– 1 ½ cups almond flour
– 1 cup cocoa powder
– 1 cup maple syrup
– 1/2 cup almond milk
– 1/4 cup coconut oil (melted)
– 1 tsp baking soda
– 1 tsp vanilla extract
Instructions:
1. Preheat your oven to 350°F (175°C). Grease your cake pan.
2. In a large bowl, mix together the almond flour, cocoa powder, and baking soda.
3. In another bowl, combine the maple syrup, almond milk, melted coconut oil, and vanilla extract.
4. Pour the wet ingredients into the dry ingredients and stir until just combined.
5. Transfer the batter to your prepared cake pan. Bake for 30 minutes, or until a toothpick inserted in the center comes out clean.
For an extra treat, serve it with a dollop of coconut whipped cream. Your family and friends will be impressed!
Store any leftovers in an airtight container for up to three days.
FAQs:
– Can I use a different flour? Yes, other gluten-free flour blends work too!
– How do I make it sweeter? Adjust the maple syrup to your liking.
This cake is not just a dessert; it’s a celebration of flavors that everyone can enjoy!
Fun fact: Gluten-free desserts can be surprisingly rich—this vegan chocolate cake nails it with 3 simple ingredients and a 1-bowl cleanup. You’ll wow birthdays and holidays without dairy or gluten, proving flavor, not sacrifice, is the real dessert standard.
Vegan Chocolate Cake
Editor’s Choice

Blue Diamond Almonds Almond Flour, Gluten Free, Blanched, Finely Sifted,…
 Amazon$9.91
Amazon Fresh, Unsweetened Cocoa Powder, 8 Oz (Pack of 3)
 AmazonCheck Price
Butternut Mountain Farm Pure Vermont Maple Syrup, Grade A, Dark Color, R…
 Amazon$17.97
25. Raspberry Chia Jam
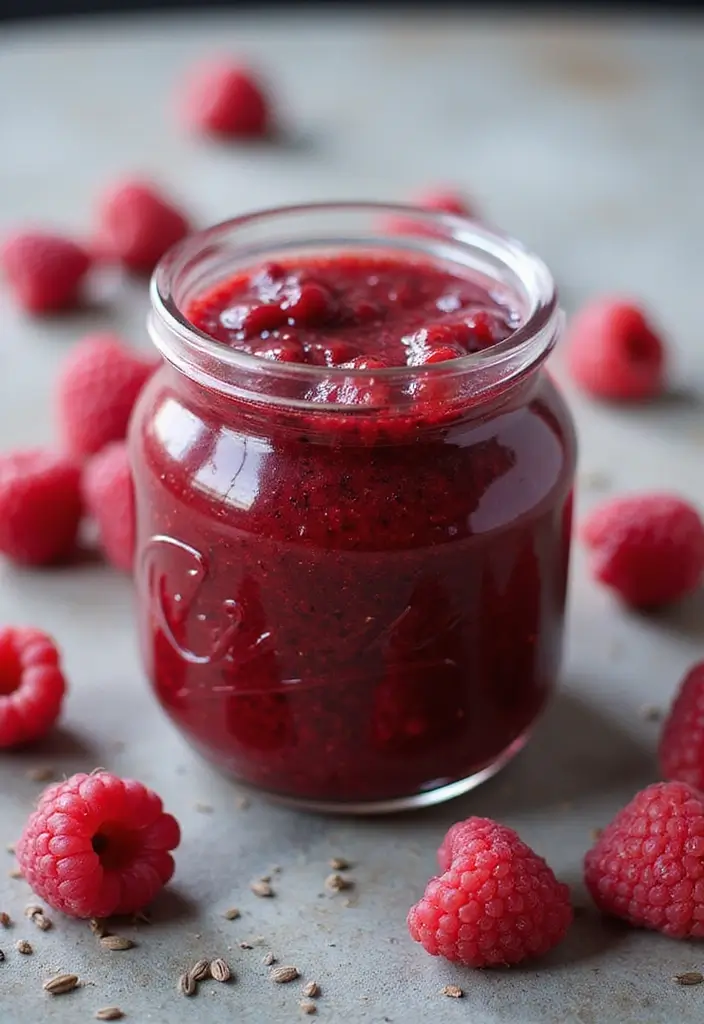
Looking for a sweet treat that captures the essence of summer? This Raspberry Chia Jam is your answer! With just three simple ingredients, you can whip up a delightful spread that’s perfect for toast, desserts, or even as a topping for your favorite snacks. Best of all, it’s vegan and gluten-free, so everyone can enjoy it!
Imagine spreading this vibrant, tangy jam on warm, crusty bread or dolloping it over pancakes. The natural sweetness of raspberries pairs beautifully with the slight crunch of chia seeds. Plus, this jam is packed with nutrients, making it a healthy alternative to store-bought options.
Ready to make your own? Here’s how:
Recipe Overview:
– Servings: 10
– Prep Time: 5 minutes
– Cook Time: 10 minutes
– Total Time: 15 minutes
– Calories: 50 per tablespoon
Nutrition Information:
– Protein: 1g
– Fat: 3g
– Carbohydrates: 6g
Ingredients:
– 2 cups raspberries (fresh or frozen)
– 2 tbsp maple syrup
– 2 tbsp chia seeds
Instructions:
1. In a medium saucepan over medium heat, combine the raspberries and maple syrup.
2. Cook for about 5-7 minutes, stirring occasionally, until the raspberries start to break down.
3. Stir in the chia seeds and continue cooking for another few minutes until the mixture thickens.
4. Remove from heat and let it cool before transferring to a jar.
Store your homemade jam in the fridge for up to two weeks. You can also experiment with other berries like strawberries or blueberries for different flavors!
FAQs:
– Can I use other sweeteners? Yes, try agave or honey if you prefer.
– Is cooking necessary? Yes, cooking helps blend the flavors and thicken the jam.
This jam is not just a recipe; it’s a way to brighten your breakfast table or add a special touch to your desserts. So go ahead, make some today and savor the taste of summer whenever you want!
Raspberry Chia Jam
Editor’s Choice

BetterBody Foods Organic Chia Seeds 2 lbs, 32 Oz, with Omega-3, Non-GMO,…
 Amazon$11.97
Butternut Mountain Farm Pure Maple Syrup From Vermont, Grade A (Prev. Gr…
 AmazonCheck Price
Anchor Hocking Heritage Hill 1 Gallon Glass Jar with Lid, Set of 2
 Amazon$29.99
26. Almond Joy Energy Balls
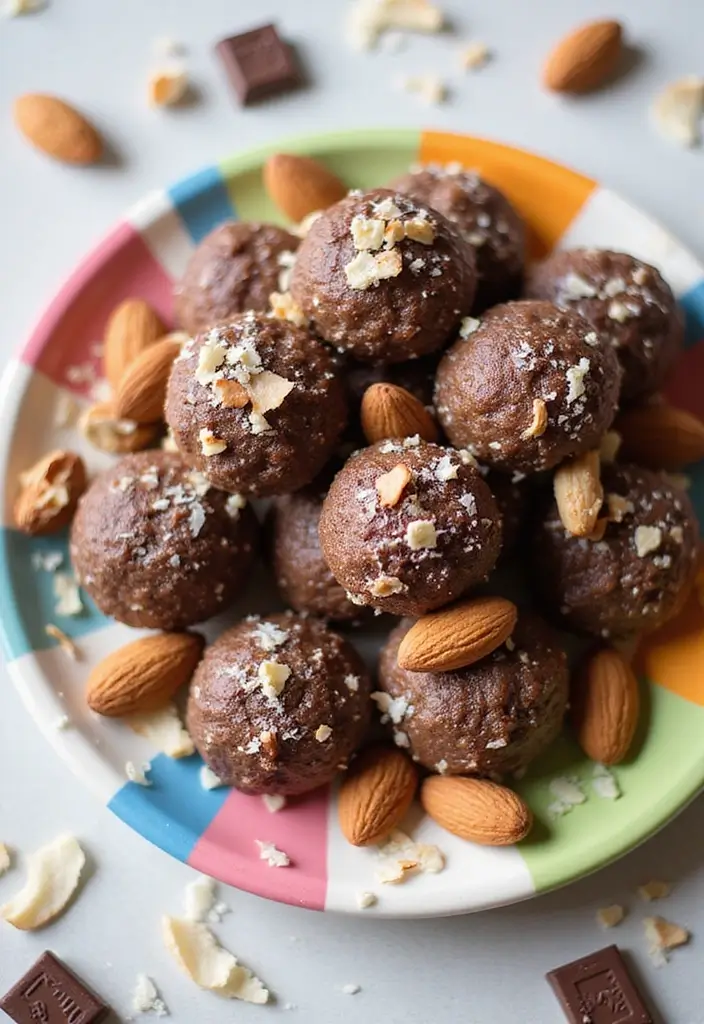
Craving a sweet and healthy treat? Look no further than these Almond Joy Energy Balls. They pack the delightful flavors of chocolate, almond, and coconut into easy-to-make bites. Perfect for a boost during your afternoon slump or as a tasty post-workout snack, these energy balls are both satisfying and nutritious.
Recipe Overview:
– Servings: 12
– Prep Time: 10 minutes
– Total Time: 10 minutes
– Calories: 140 per ball
Nutritional Information:
– Protein: 4g
– Fat: 9g
– Carbohydrates: 15g
Ingredients:
– 1 cup pitted dates
– 1 cup unsweetened shredded coconut
– 1/4 cup almond butter
– 1/4 cup cocoa powder
– 1/2 cup chopped almonds
Instructions:
1. Start by placing the pitted dates, shredded coconut, almond butter, and cocoa powder into a food processor. Blend until the mix turns sticky and smooth.
2. Gently fold in the chopped almonds for that extra crunch.
3. Roll the mixture into small balls, about the size of a tablespoon. Place them on a baking sheet.
4. Refrigerate for 30 minutes to help them set.
You can store these delicious bites in an airtight container for up to a week. For a fun twist, roll them in cocoa powder before serving to give them an extra chocolatey touch.
FAQs:
– How long do they last? For the best taste, enjoy them within a week when kept in the fridge.
– Can I use other nut butters? Absolutely! Feel free to swap in your favorite nut butter for a new flavor.
Not only are these almond joy energy balls a breeze to make, but they also satisfy your sweet tooth without the guilt. Enjoy them anytime you need a tasty pick-me-up!
Almond Joy Energy Balls
Editor’s Choice

Hamilton Beach Food Processor & Vegetable Chopper for Slicing, Shredding…
 Amazon$46.98
365 by Whole Foods Market, Organic Creamy Almond Butter, 16 Ounce
 Amazon$13.99
27. Vegan Tiramisu
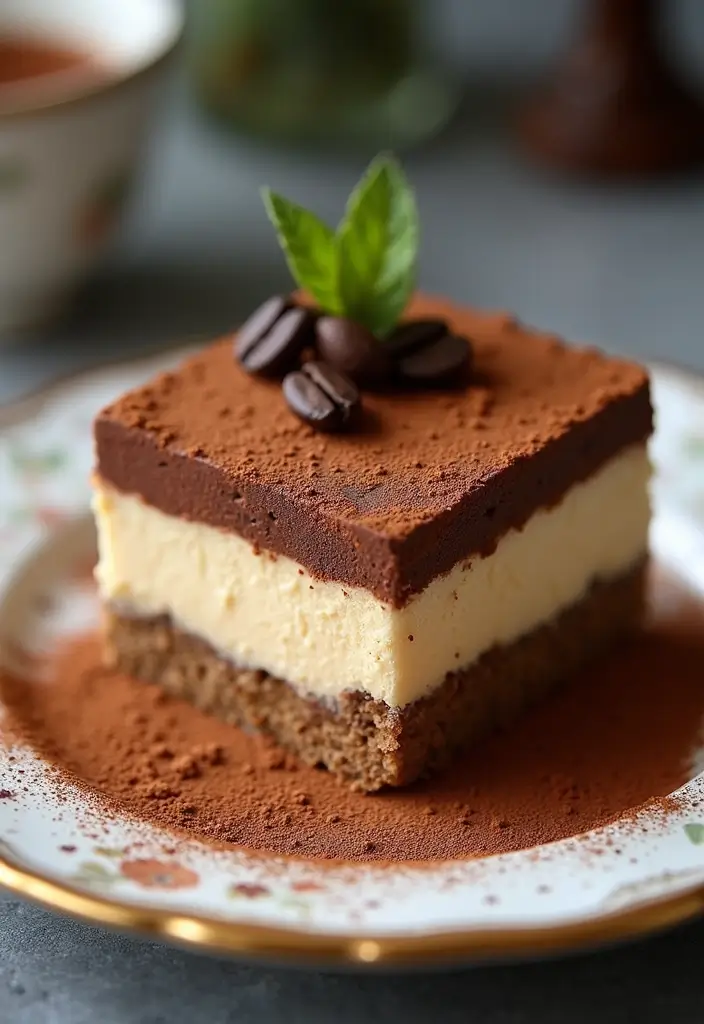
Treat yourself to a delightful twist on the classic Italian tiramisu! This vegan version swaps traditional ingredients for a gluten-free and dairy-free treat that everyone can enjoy. Imagine layers of coffee-soaked ladyfingers, creamy cashew filling, and a sprinkle of cocoa powder. It’s not just a dessert; it’s a showstopper that will leave your guests in awe!
Prepare this scrumptious vegan tiramisu in just a few simple steps. You’ll need 30 minutes of prep time and a little patience as it chills for a few hours. With only 300 calories per slice, it’s a guilt-free indulgence you can feel good about sharing.
Recipe Overview:
– Servings: 8
– Prep Time: 30 minutes
– Chill Time: 4 hours
– Calories: 300 per slice
Nutrition Information:
– Protein: 6g
– Fat: 15g
– Carbohydrates: 36g
Ingredients:
– 2 cups raw cashews (soaked)
– 1 cup brewed coffee (cooled)
– 1/2 cup maple syrup
– 1/4 cup cocoa powder
– 1 tsp vanilla extract
– Vegan ladyfingers (store-bought or homemade)
Instructions:
1. Start by blending the soaked cashews with maple syrup, vanilla, and a splash of cooled coffee in a food processor. Aim for a smooth and creamy texture.
2. Dip the ladyfingers in the remaining coffee. Layer them in a dish, creating a base for your tiramisu.
3. Spread a generous layer of the cashew cream over the ladyfingers. Repeat the layering until you reach the top.
4. Finish with a light dusting of cocoa powder. Let it chill in the fridge for at least 4 hours before serving.
To elevate your dessert even more, consider adding a splash of coffee liqueur for an adult twist. You can also sprinkle some dark chocolate shavings on top for a touch of elegance.
FAQs:
– Can I make this ahead of time? Yes, it’s perfect for preparing a day in advance!
– How long does it last? Enjoy it best within 3 days when stored in the fridge.
With this simple recipe, you can impress your friends and family while sticking to your dietary choices. Enjoy every bite of your homemade vegan tiramisu!
Conclusion
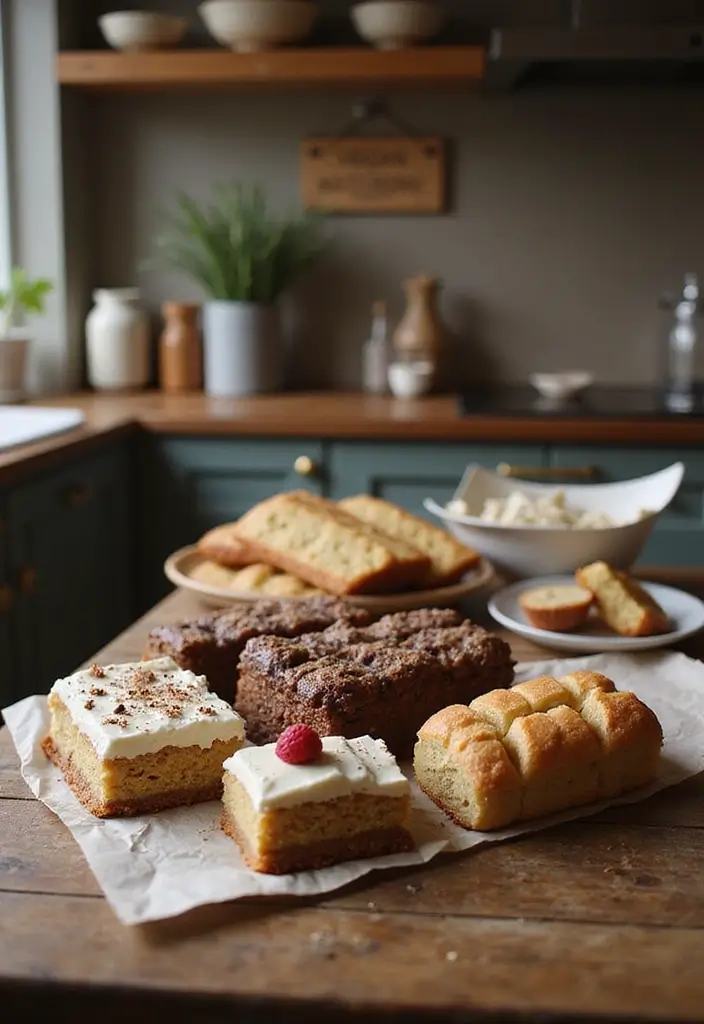
Finding delicious vegan gluten-free dessert recipes doesn’t have to be a challenge. With these 27 recipes, you can indulge your sweet tooth while sticking to your dietary preferences. Each treat offers a unique flavor profile and is made with wholesome ingredients that nourish your body.
Try experimenting with these delightful recipes, and don’t hesitate to get creative with flavors and ingredients. Happy baking and enjoy every guilt-free bite!
Note: We aim to provide accurate product links, but some may occasionally expire or become unavailable. If this happens, please search directly on Amazon for the product or a suitable alternative.
This post contains Amazon affiliate links, meaning I may earn a small commission if you purchase through my links, at no extra cost to you.
Frequently Asked Questions
What Are Some Easy Vegan Gluten Free Dessert Recipes to Start With?
If you’re new to vegan gluten free desserts, starting with simple recipes can be a breeze! Try no-bake chocolate avocado mousse or almond flour cookies. These treats require minimal ingredients and are packed with flavor. Plus, they’re perfect for satisfying your sweet tooth without any gluten or dairy. Explore the world of plant-based sweets and get creative!
Can I Substitute Ingredients in Vegan Gluten Free Dessert Recipes?
Absolutely! One of the joys of baking is experimenting with ingredient substitutions. For instance, if a recipe calls for almond flour, you can often swap it with coconut flour or oat flour. Similarly, if you’re out of maple syrup, agave nectar works as a great alternative. Just remember to adjust the liquid ratio accordingly. This way, you can tailor your vegan baking recipes to your pantry and preferences!
Are Vegan Gluten Free Desserts Healthier Than Traditional Desserts?
While vegan gluten free desserts can be healthier alternatives, it depends on the ingredients used. Many recipes incorporate wholesome ingredients like nuts, fruits, and natural sweeteners, making them a great choice for those looking to indulge guilt-free. However, be mindful of added sugars and fats. Always check the labels and aim for a balance to enjoy your dairy-free desserts without compromise!
How Can I Ensure My Vegan Gluten Free Desserts Turn Out Perfectly?
To achieve dessert perfection, follow a few simple tips: measure ingredients accurately, use room temperature components when specified, and don’t skip the chilling times if required. Additionally, consider investing in quality gluten-free flour blends for better texture. Most importantly, have fun with the process! Baking should be enjoyable, and experimenting with healthy dessert alternatives can lead to delicious discoveries.
Where Can I Find Unique Vegan Gluten Free Dessert Recipes?
Looking for unique recipes? Social media platforms like Instagram and Pinterest are treasure troves for vegan gluten free recipes dessert. You can follow food bloggers who specialize in raw vegan gluten free desserts and explore their creative takes. Cookbooks dedicated to gluten-free or vegan baking are also fantastic resources, providing you with a plethora of innovative ideas to try in your kitchen!
Related Topics
vegan gluten free recipes
dairy-free desserts
plant-based sweets
raw vegan desserts
healthy dessert alternatives
gluten-free treats
easy vegan baking
no-bake desserts
quick vegan recipes
healthy indulgence
vegan dessert ideas
guilt-free sweets


